Help / Getting Started / How do I use this?
What is Agile Documents?
Stated simply, Agile Documents builds documents. It can build Microsoft Word, Excel, PowerPoint, Adobe Acrobat (PDF), and Adobe InDesign documents to name a few.
More specificially, Agile Documents builds a document from a recipe. That recipe (aka project file) is also referred to as an Agile "Virtual" Document. The Agile Document can take various pieces of data (ingredients) on your SharePoint site and on the internet to assemble a document into whatever form you need. Just like a recipe, these ingredients are only retrieved while you are cooking. One of the benefits of this approach is that you can change one of the underlying ingredients without having to rewrite your recipes. That is why we used the term virtual to describe an Agile Document. Content doesn't reside within the Agile Document. Instead, content is linked from the Agile Document. This allows for a user to update a logo on a SharePoint site, without having to update in all the documents that use it. Since many Agile Documents link to this logo, they will pull in the most recent logo on subsequent builds. This allows you to envision documents as a collection of independently managed content where a single change propagates to all appropriate documents. Content from Excel spreadsheets, Word Processing documents, databases and a myriad of other sources can be linked into your agile document. Through SharePoint integration, this content and the documents built from this content can independently maintain audit tracking, versioning, information management policies and unique security permissions.
How do I start using this?
In order to start using Agile Documents, you will need to create an Agile Document, configure it and then generate an output from it. There are a lot of different options to do this depending on your needs. In what follows, we'll explain how to interact with Agile Documents and walk you through a simple example.
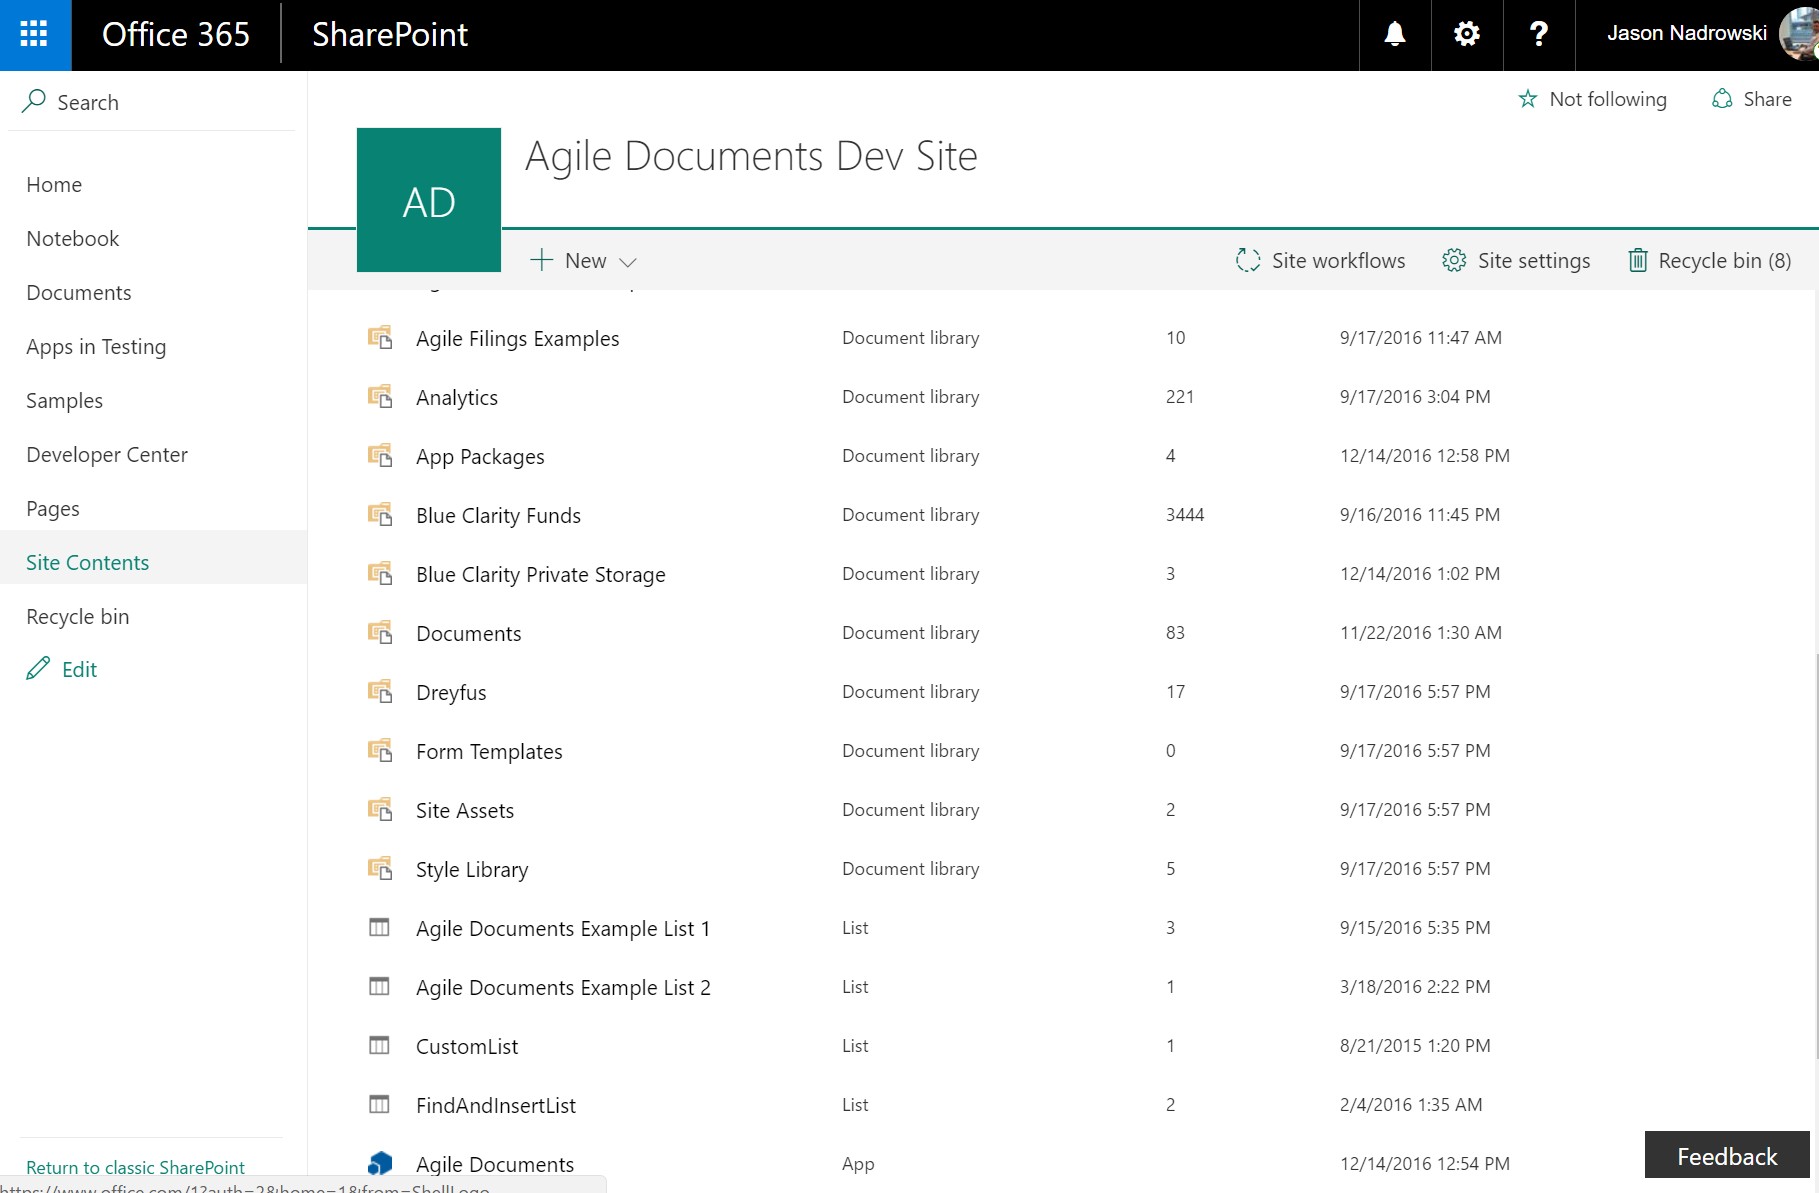
After you have installed Agile Documents, it will appear under the site contents (Figure 1) as an App. In the list of choices, look for Agile Documents in the list and click on it. It might take a couple seconds to get there as SharePoint establishes a secure connection between itself and Agile Documents.
NOTE: You can navigate to the Site Contents page by clicking on the icon in the upper right of virtually every SharePoint page. Then, select Site contents from the drop down menu. You can see that icon in Figure 1 below. Please keep in mind that Apps [Agile Documents included] are installed on a site by site basis, so if you can't find Agile Documents in the site contents its probably because it was never installed on that site.
Once SharePoint and Agile Documents are securely connected, you will be taken to Agile Document's SharePoint Explorer (Figure 2). SharePoint Explorer is the starting point for working with Agile Documents.
At the top, you will see and Back to SharePoint. alternately collapses and expands the left navigation. Back to SharePoint takes you back to the SharePoint site you lauched Agile Documents from.
On the left side of the screen, you will see the navigation bar. The navigation bar allows access to site wide functionality.
In the center, you will see a hierarchical view of your site collection (top-most site and its descendant sites). Through a right-click menu, you can interact with the various content/data on your SharePoint sites. You will be able to interact with all the data/content you have access to on your SharePoint site collection. To be clear, you will be restricted from data/content you don't have access to. Agile Documents is able to interact with all your content on your SharePoint site collection. Even though Agile Documents may not be installed on other sites within a site collection, it can interact with it assuming the current user has access. However, Agile Documents can only access data from the site collection it was launched from. It cannot reach into another site collection that it wasn't launched from--even if that site collection has Agile Documents installed within it.
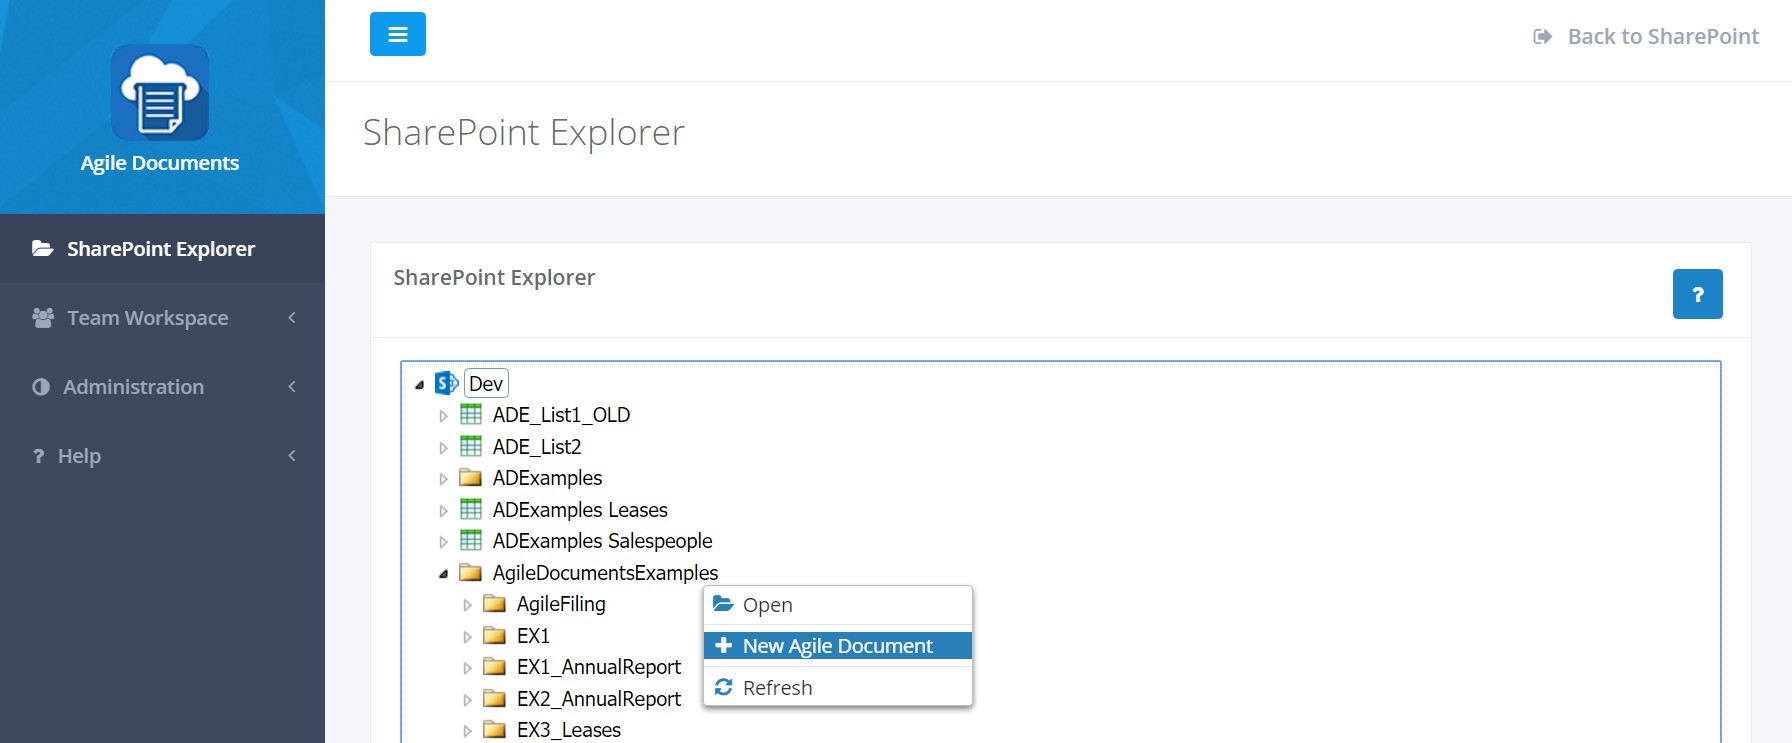
As you might expect, you can expand and collapse the various web, folders and lists in this hierarchical view. You can perform various operations on the items in the hierarchy depending on their type. For now, right click on a SharePoint document library where you store files and select New Agile Document (Figure 2). If you are unsure which document library to use, consider the Documents document library that is generally added to every SharePoint site.
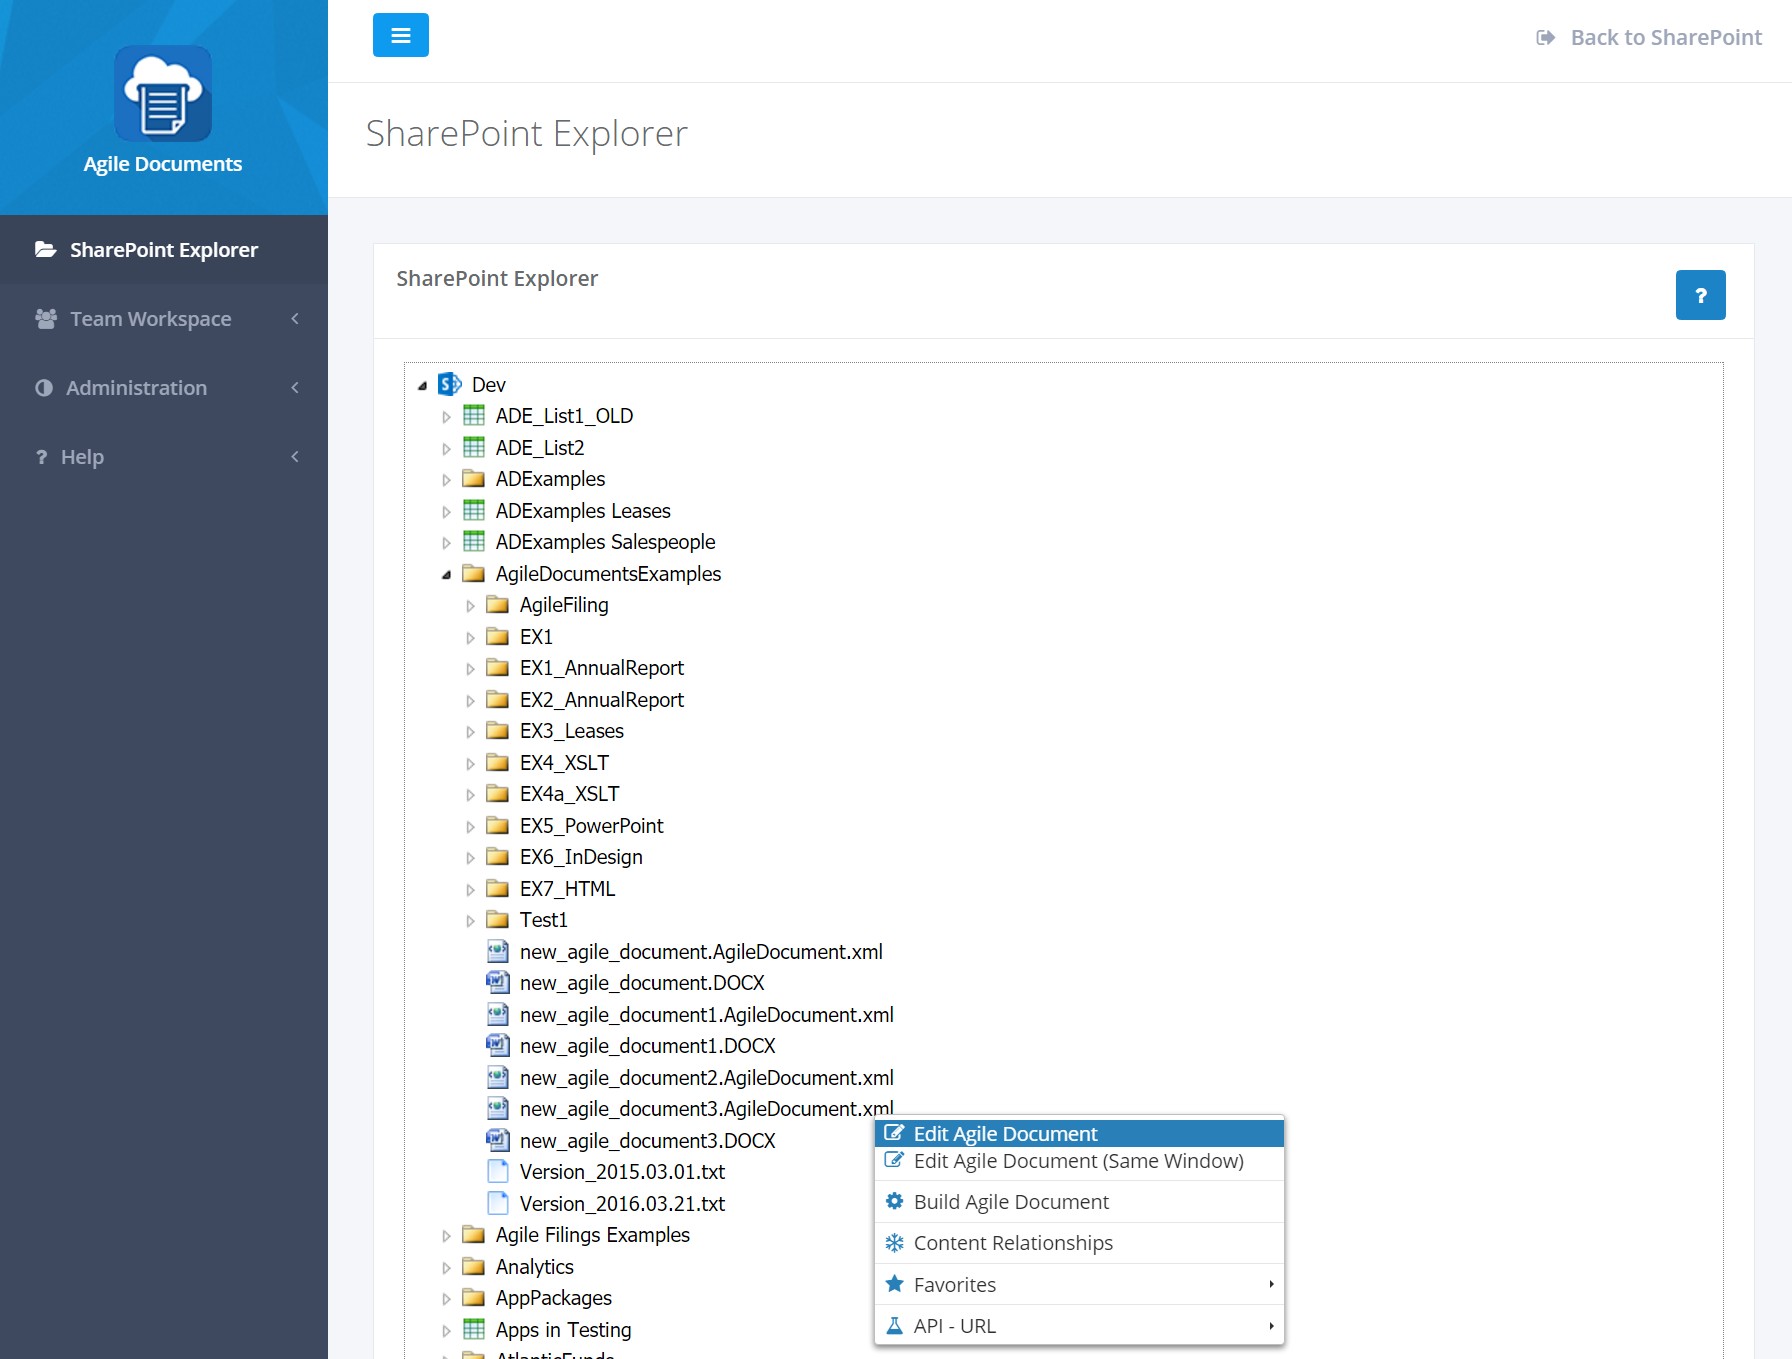
Once you've created your Agile Document, right click on it in SharePoint Explorer and select Edit Agile Document (Figure 3). This will open the Edit Agile Document page (Figure 4). You may notice that I clicked on the button to collapse the menu and provide more space to the other screen components.
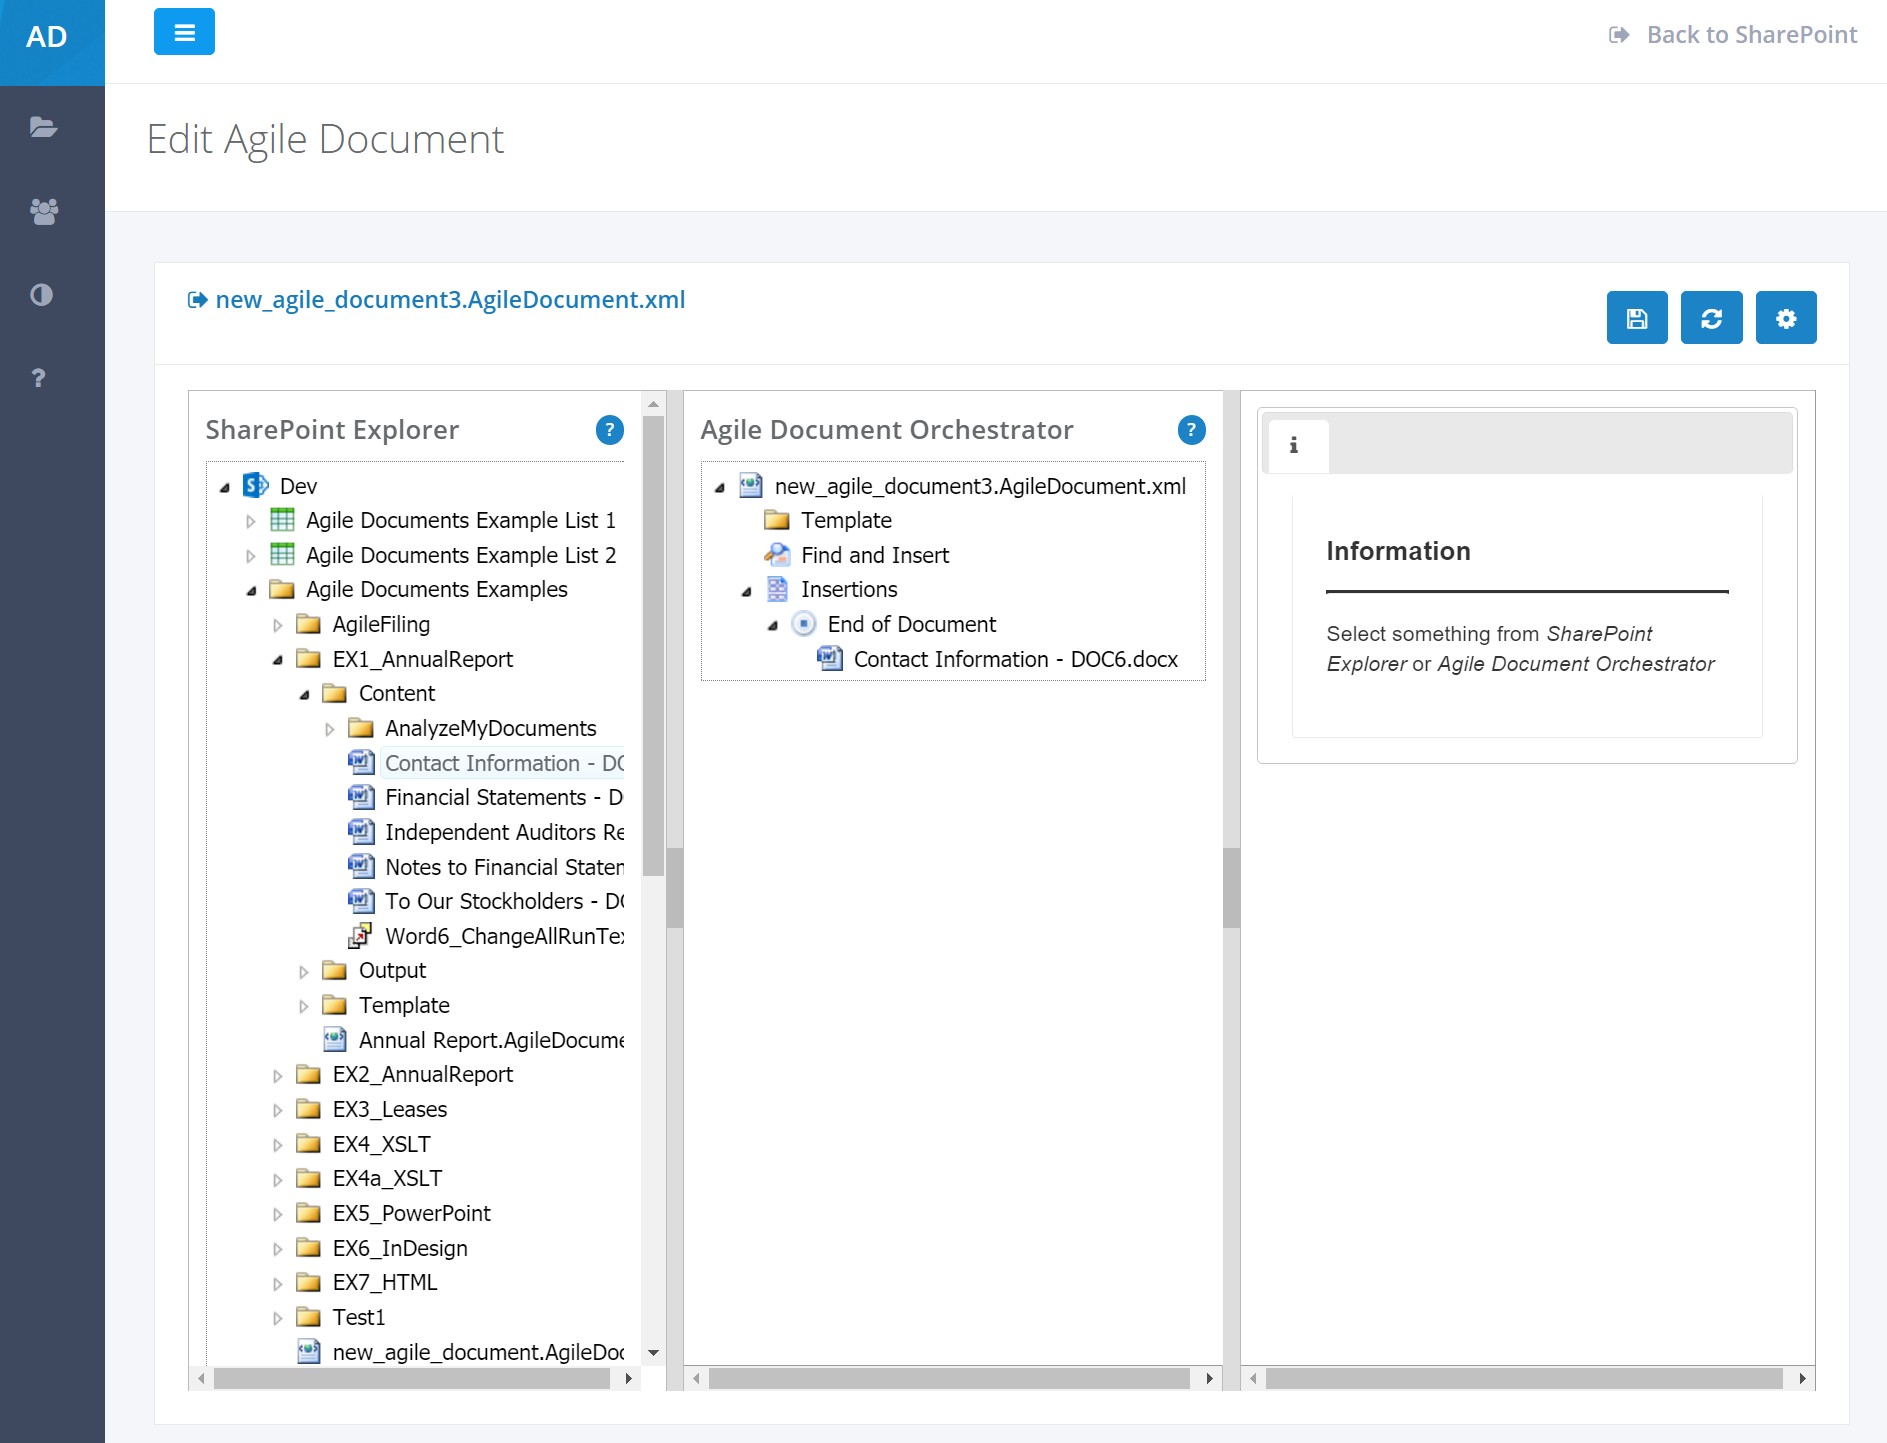
The Edit Agile Document page is composed of three primary panes: (1) SharePoint Explorer (left pane), (2) Agile Document Orchestrator (center pane) and (3) details pane (right pane). The SharePoint Explorer pane functions very similarly to the SharePoint Explorer page described in Figure 2. The Agile Document Orchestrator details how the Agile Document should be constructured. It defines your document's recipe. Finally, the details pane provides contextual information and choices based on your selection of items in SharePoint Explorer or Agile Document Orchestrator.
So, let's create our first Agile Document!
Browse SharePoint Explorer for any Microsoft Word file you have on your site. We are going to use this in your Agile Document. Drag that Word file from SharePoint Explorer to the End of Document in the Agile Document Orchestrator. In Figure 4, you may have noticed that was previously dragged Contact Information - DOC6.docx to End of Document. At this point, we have created a very simply Agile Document that links to the content of a Word file. In this basic example, we are creating a copy of that file.
Now, select the top most item in Agile Document Orchestrator--the Agile Document (Figure 4). Then select the output tab in the details pane and check the DOCX output file type in that pane. Finally, click on build toolbar button to build the Agile Document. This will build your current Agile Document by opening up a new browser window as shown in Figure 5.
You may have noticed the save toolbar button. Since you haven't clicked on the save toolbar button, you've probably realized the Agile Document you just built hasn't been saved. The build button, on the Edit Agile Document page, will build the currently loaded [and potentially manipulated] Agile Document which may or may not be saved. This is in contrast to building from SharePoint Explorer where it builds the currently saved Agile Document.
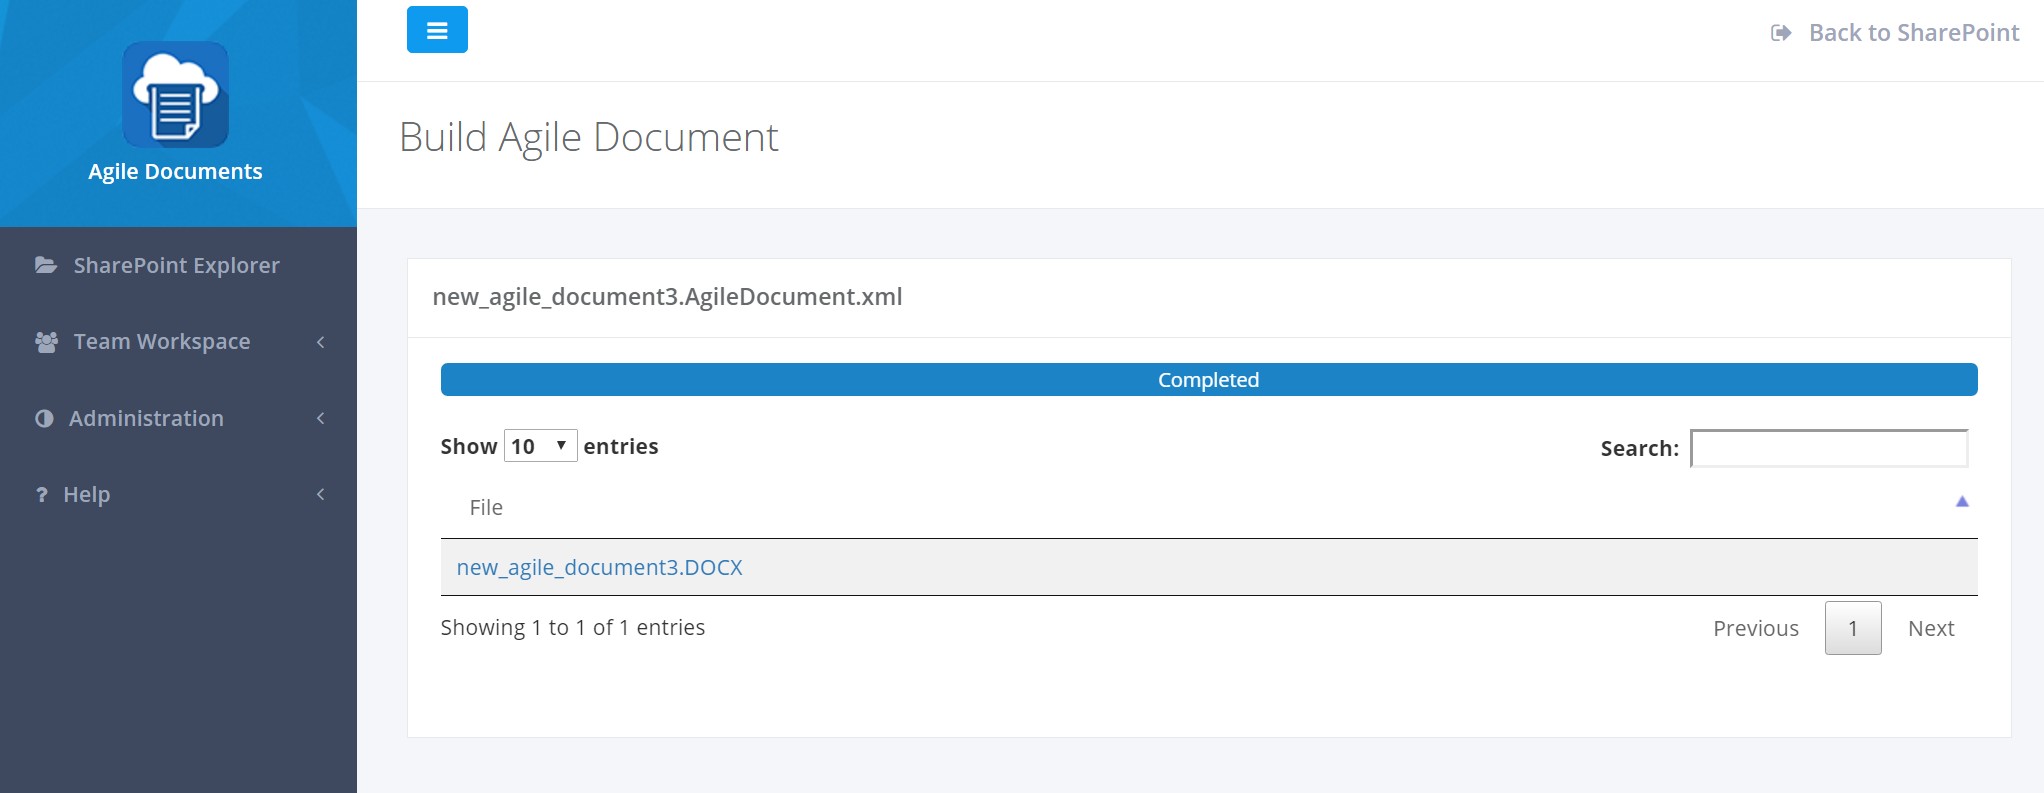
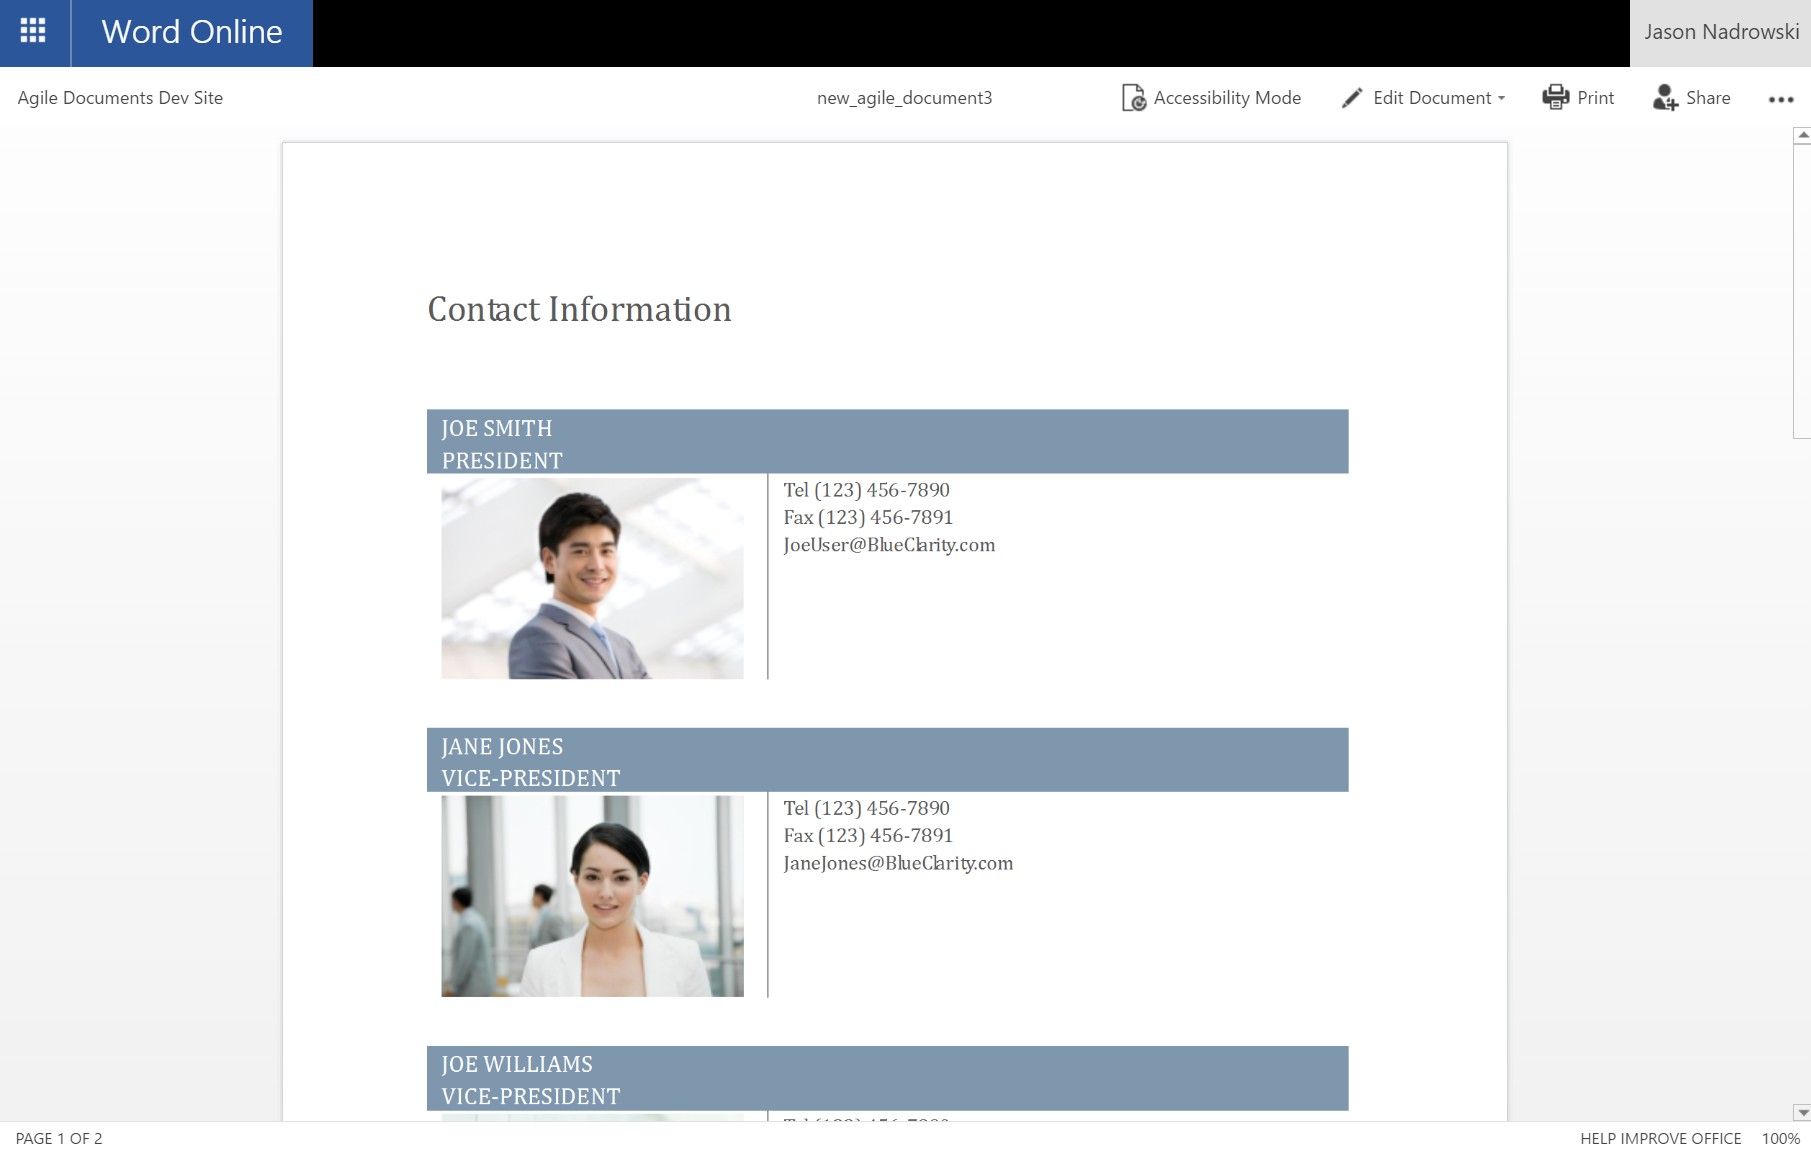
Congratulations! You've built your first Agile Document. The output file is listed in the table immediately below the status bar. If you click on it, it will open the file in Word Online in a new browser window (Figure 6).