Help / Examples / Basics (Word) / Templates
Summary
In this article we go through two of examples leveraging templates. This series continues where Word Basics - Start Here left off. To that point, this we start with Example 5 to emphasize its a continuation. If you are completely new to Agile Documents, you should start with Example 1. After that, you can generally skip around as needed.
The Start Here article included more detail on the basics of the Agile Document and SharePoint interfaces. In contrast, this article assumes you are already familar with the basics and skips over those details. It should be noted that this article offers a bit more commentary into best practices than the first. The first was designed to get you up and running as quick as possible. As such it was more focused on the how to. This article speaks more to the pros and cons of different approaches--especially as they relate to templates.
Please note that the examples described here are easily installed onto your SharePoint site. That installation procedure is described in Installing Examples.
Example 5: A Simple Template
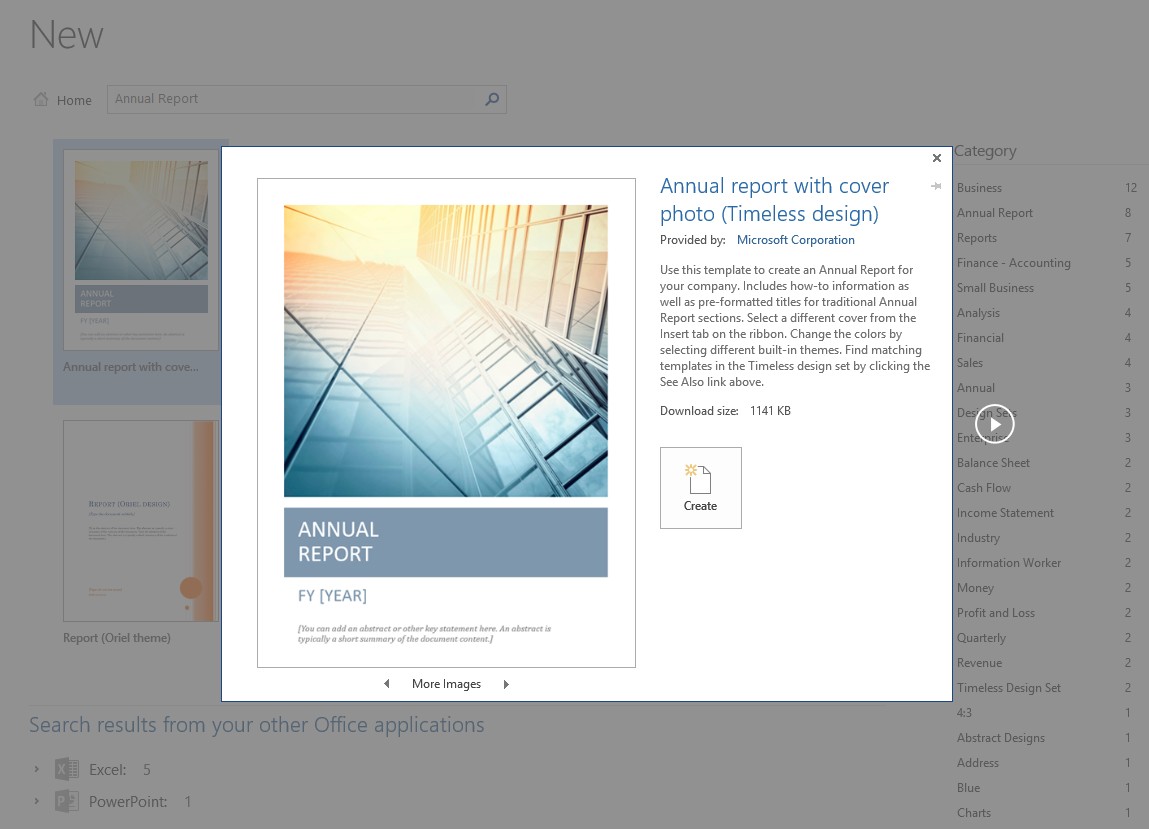
We are going to be converting the Microsoft Word template Annual report with cover photo (Timeless Design) to an Agile Document. It is a multi-page document that is a downloadable template. A screenshot of the template in Word is shown in Figure 1.
There are many ways you could leverage an Agile Document to represent your document, just as there are many ways you could travel from Miami to Boston. For the Annual Report, we break each section into its own document and then have Agile Documents put it back together. This design has a number of advantages over just editing a single document.
First, you can ensure that only the appropriate contributors are modifying the appropriate section(s). A common problem with document collaboration is that people make changes they shouldn’t have made. This can happen both accidentally and on purpose. When you are dealing with sensitive documents that must follow particular procedures, these unauthorized changes can have substantial consequences. For instance, the Independent Auditors report should come from the auditors and not re-interpreted by a marketing associate. When the Independent Auditors report exists as its own file, SharePoint permissions can be assigned to ensure that only auditors can edit it. This is not possible when the document exists as one Word file where all the editors–regardless of section–have equal rights to the entire file.
Secondly, the version history is more granular. With the sections split out as separate documents, the SharePoint version history [and audit trails] on the collection of files is more insightful. Each section is versioned independently and more naturally. When people are working on different sections within a single document its hard to revert their changes as that might also revert others changes since everyone’s edits are interleaved with one another. However, if people are working on their own section as a separate document, those changes can be reverted more easily. Section changes (versions) could also be compared more easily for the same reasons. Additionally, or emphasized differently, its easier to see who made the changes on a per section basis. This is essentially lost when you are trying to analyze changes on a single file that didn’t split out its sections in separate files.
We will split up this Annual Report into 6 documents that mirror the various sections of the document and put them in our EX5 folder. The 6 sections are listed below. For simplicity, we have put all the files in this example in the same folder EX5. However, as your own Agile Document portfolio grows you might want to think separating template, content and output files.
- Cover Page
- To Our Stockholders
- Financial Statements
- Notes to Financial
- Independent Auditors
- Contact Information
As you have probably noticed, the document has a header starting on the second page that displays the text of the first H1 style on the page. Some might consider that a bit redundant, but I’m not here to argue. With that said and as we just explained, this document has a certain pattern to it. Agile Documents makes use of templates just like Microsoft Word does. So, we are going to use the Cover Page document as our Agile Document template. We will delete from page 3 on, but keep the header and footer on that page. Note the header includes Word field codes.
The other documents are created through a copy and paste process. It is not necessary to copy the headers and footers for these new documents since they will inherit the one defined in the template.
Although it doesn’t matter in this instance, its important to point out that Agile Documents emphasizes pagination. What that means, is that images, and content items in general, shouldn’t be anchored to a page. If content is anchored in a particular place, it doesn’t get pushed down as more content is inserted ahead of it. Its better to place the object with the document as an in-line object that flows with the text.
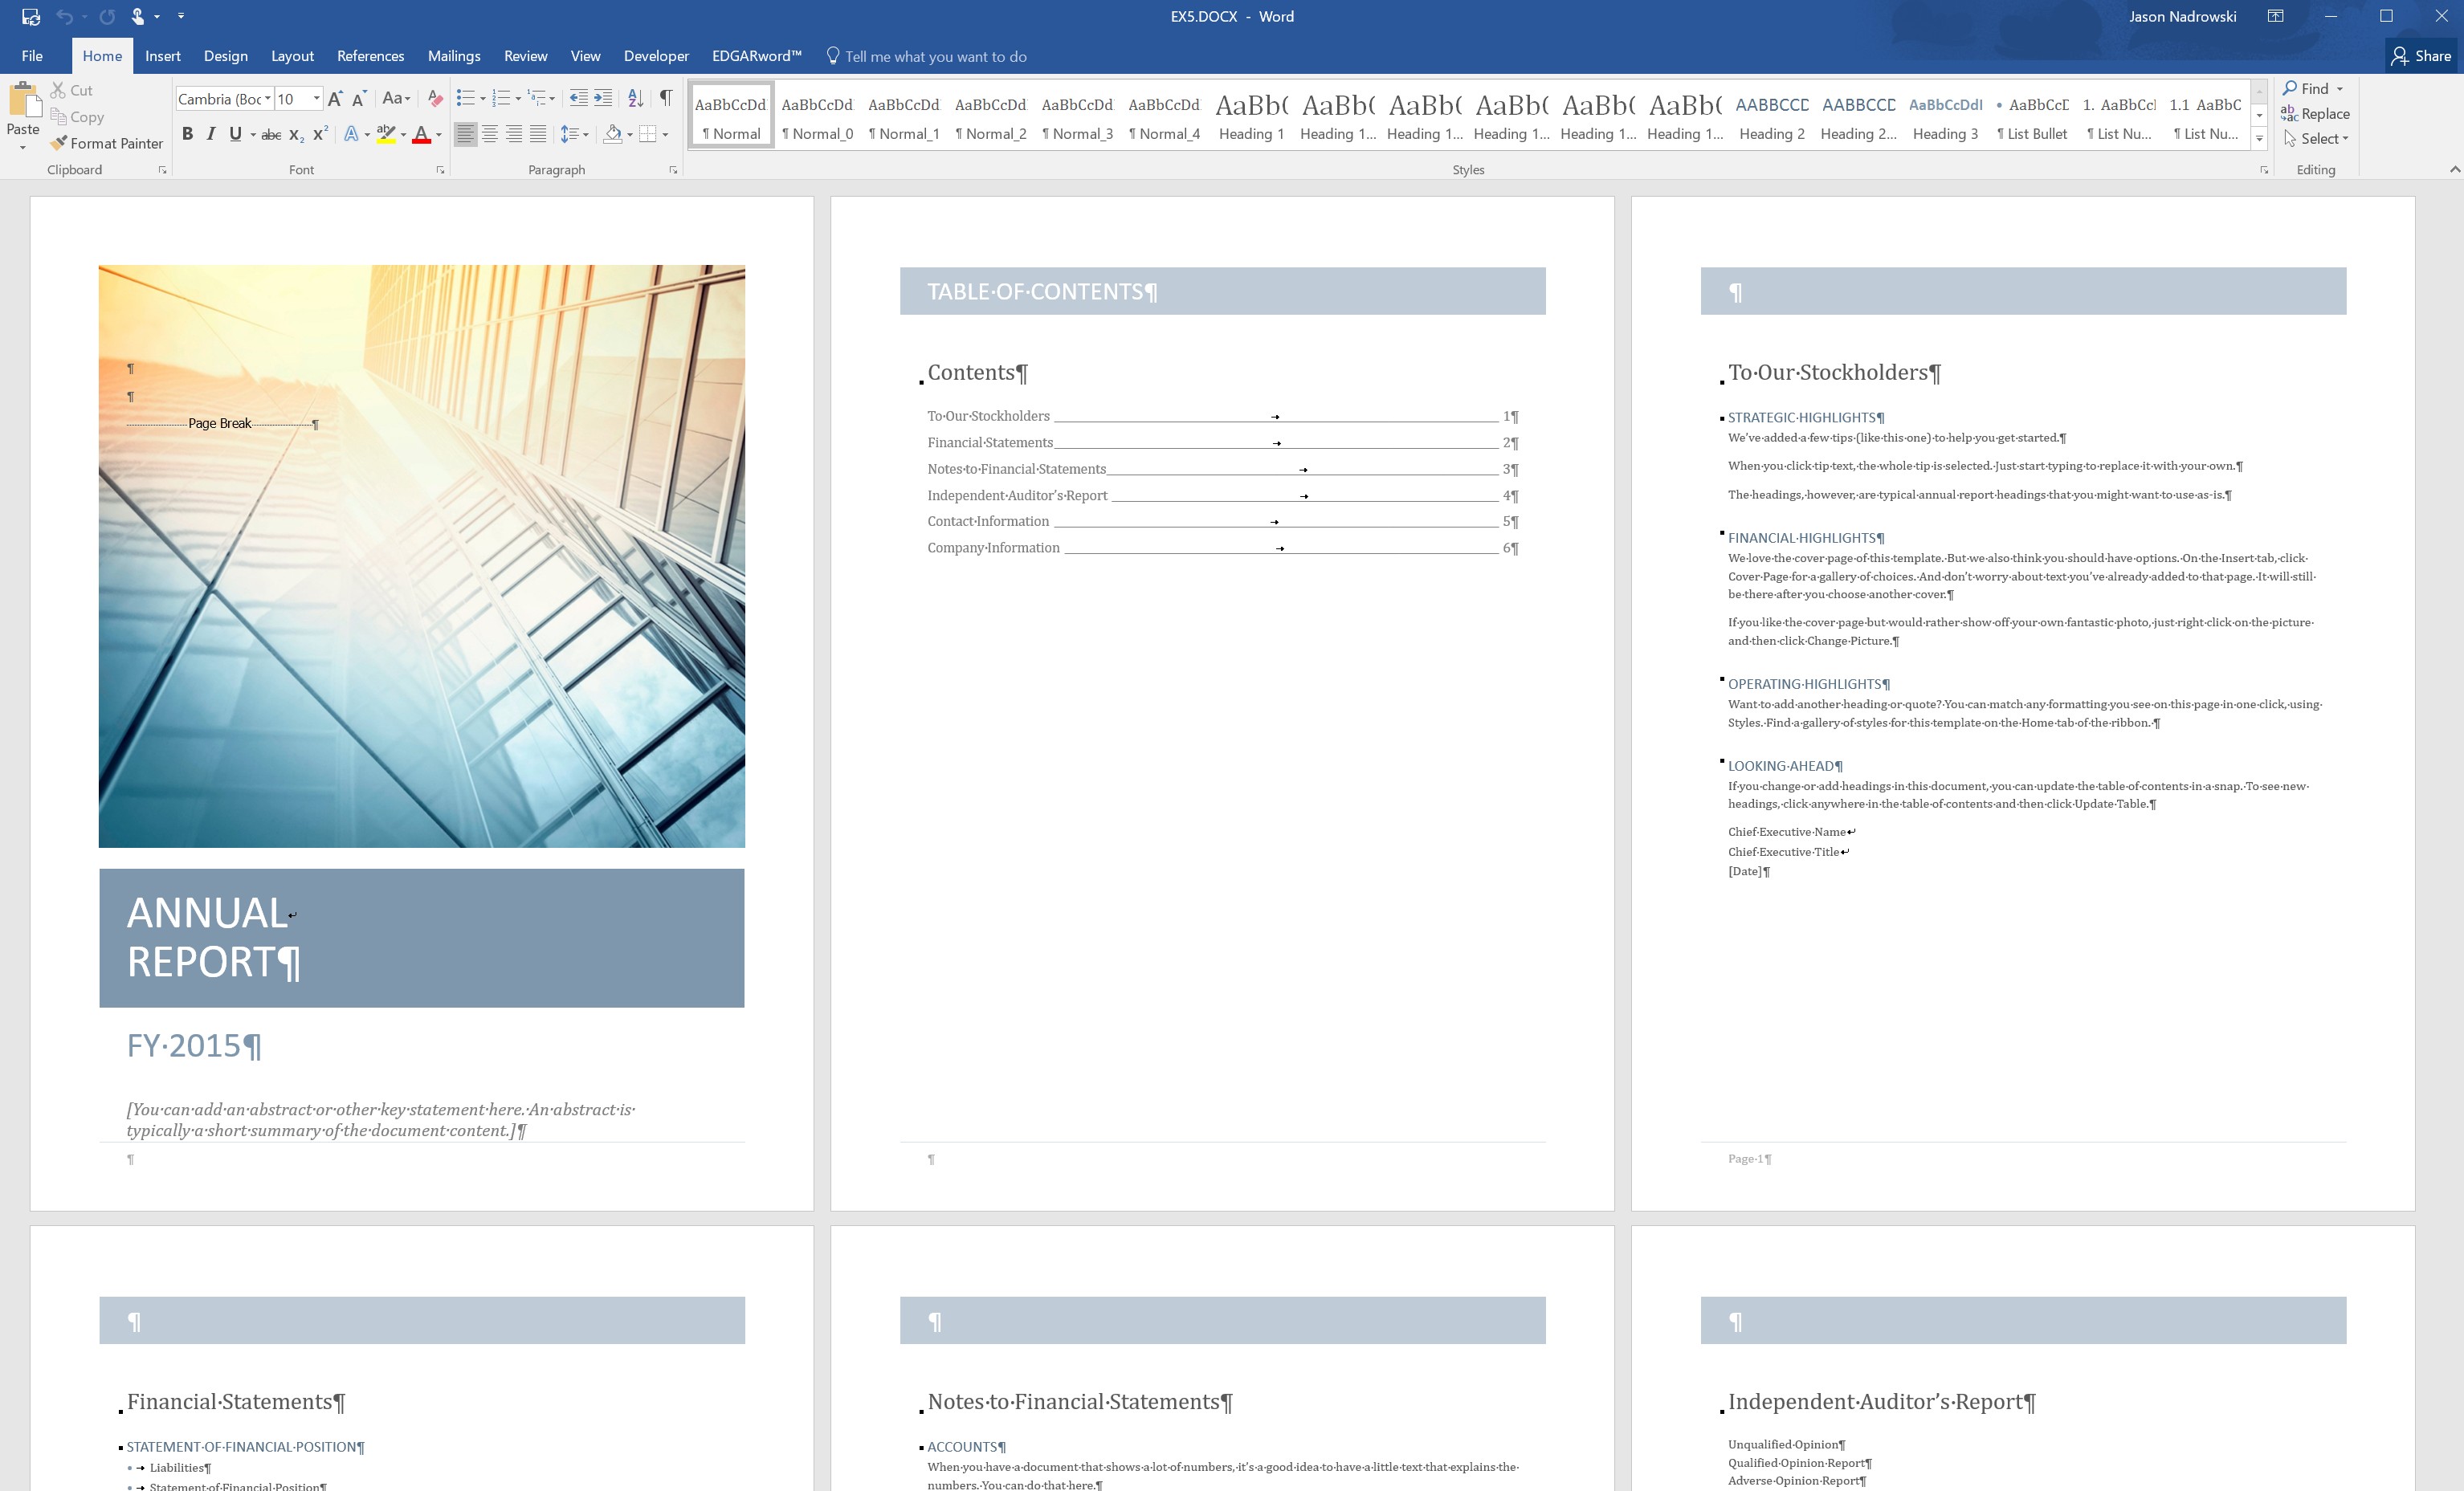
Similar to previous examples, ensure that the folder Word/EX5 exists within your document library. Then create a new Agile Document through SharePoint Explorer. Go back into SharePoint and rename it EX5.AgileDocument.xml. Also, deconstruct the template into six Word files as described above. Now, edit the Agile Document as shown in Figure 2. In addition, make sure you set the Agile Document output type to DOCX. Save, build and then review Figure 3.
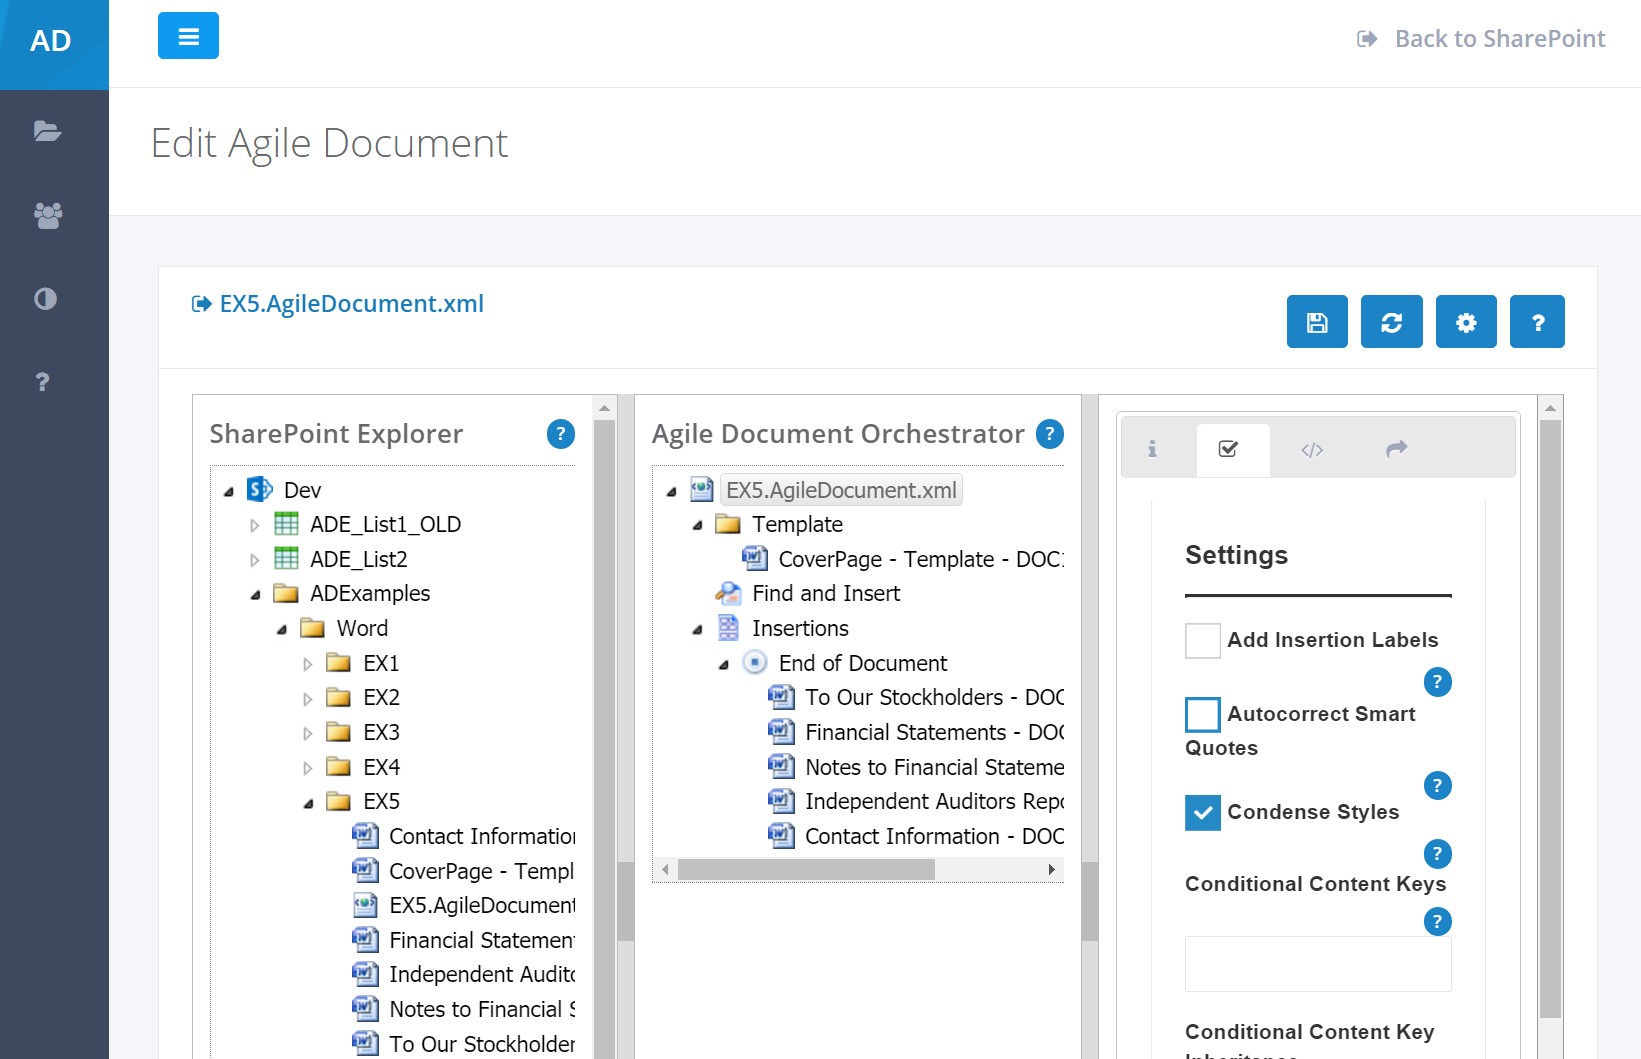
So, how is this different than just concatenating the files at the End of Document? If you recall in Example 4, when we concatenated the files we lost the first section header. What happened there was that Agile Documents started with an empty Word template--since none was specified--and then merged the first section of the first file into that empty template.
In this example, we specify a template and that is what Agile Documents starts with. In addition to being able to specify the first section headers, page orientation and such, we also provide a framework that the rest of the document will use. The Word styles defined in the template establish the styles for the Agile Document. Agile Documents gives you the ability to Condense Styles (Figure 2). This means that if an imported document has content that uses a style defined in the template, that template style will take precedence. In other words, you can control look of your document from the template and not have to worry if your users chose a non-professional font for Heading 1....because you can override it.
In addition to a style framework, the template can provide a structural framework. Insertion Points (Word Mail Merge Fields) can be leveraged as places to graft content onto. We will talk about that more in the next example.
Example 6: Templates Structure and Style
This example showcases insertion points. As mentioned above, insertion points (Word Mail Merge Fields) are leveraged to graft content into your Agile Document. Sometimes its just not appropriate to concatenate files to generate your desired document. This concept of grafting content into an existing structure closely mirrors templates in Microsoft Word. For instance, the Word resume template provides a style and structure that the users plugs in their name, address, jobs and other appropriate information.
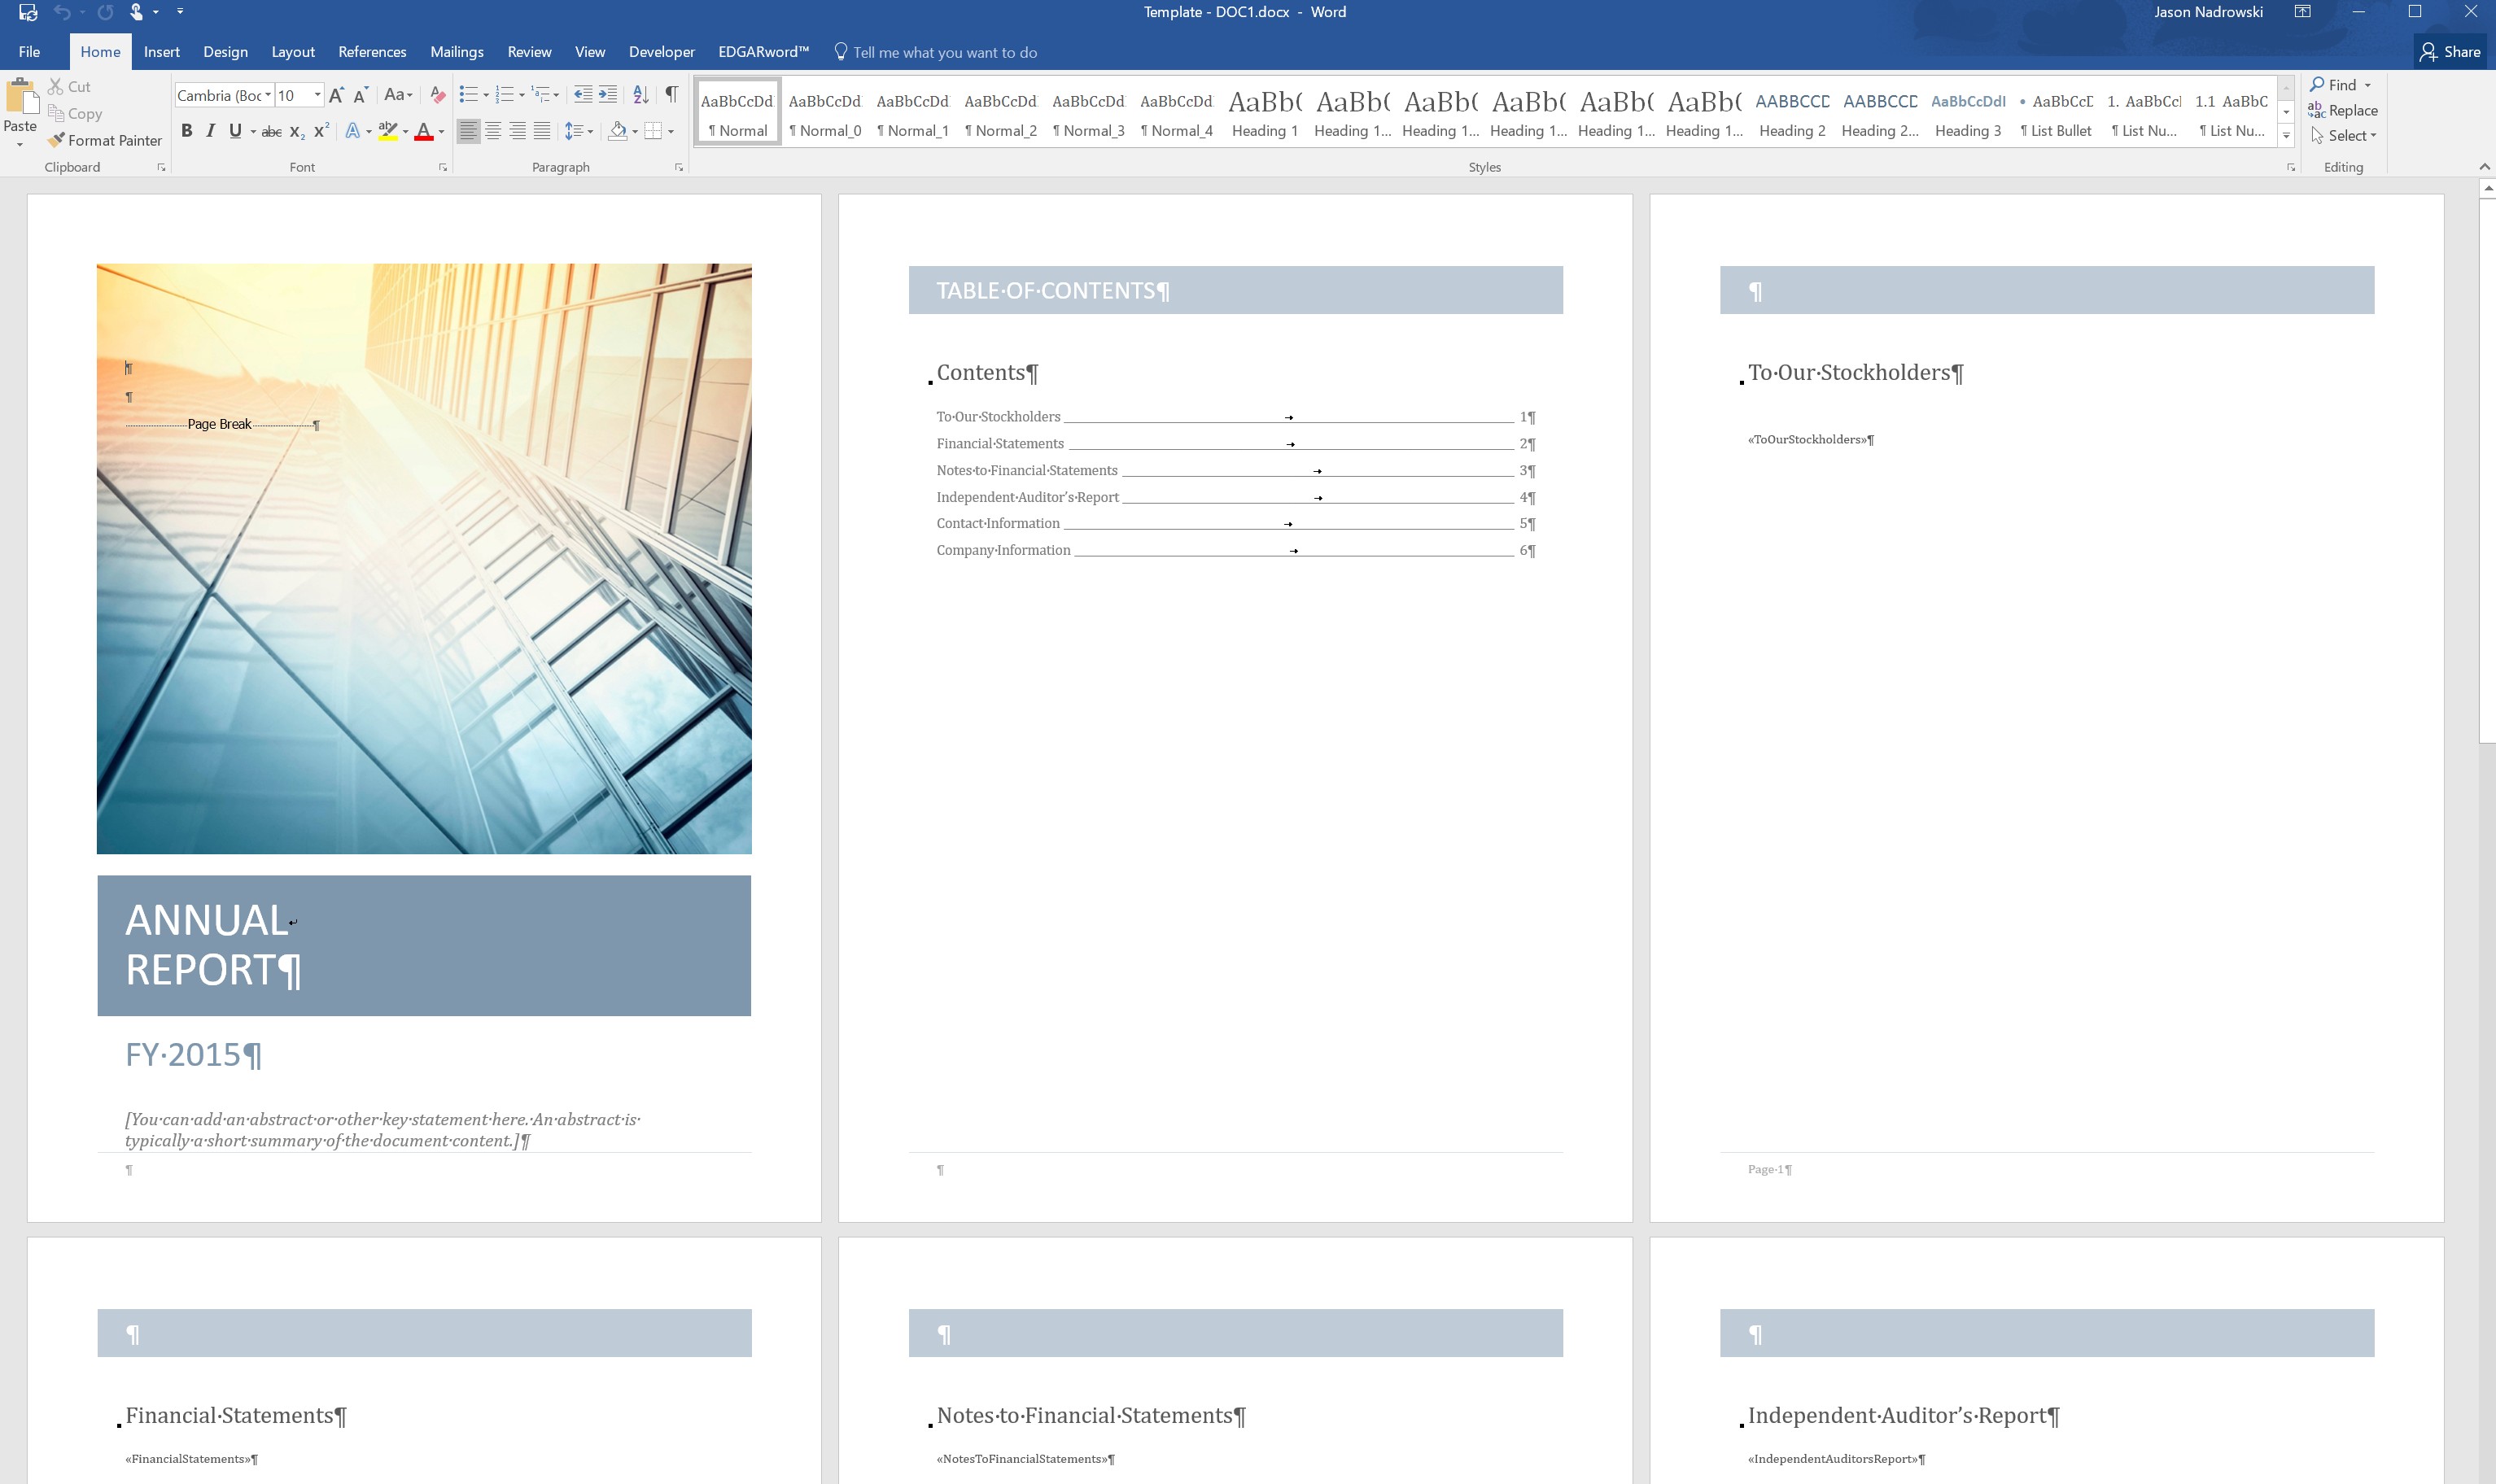
In our particular case we will modify the Annual Report template above as shown in Figure 4. Note we move the content headers into the template and then follow that header with an insertion point (Word Mail Merge Field).
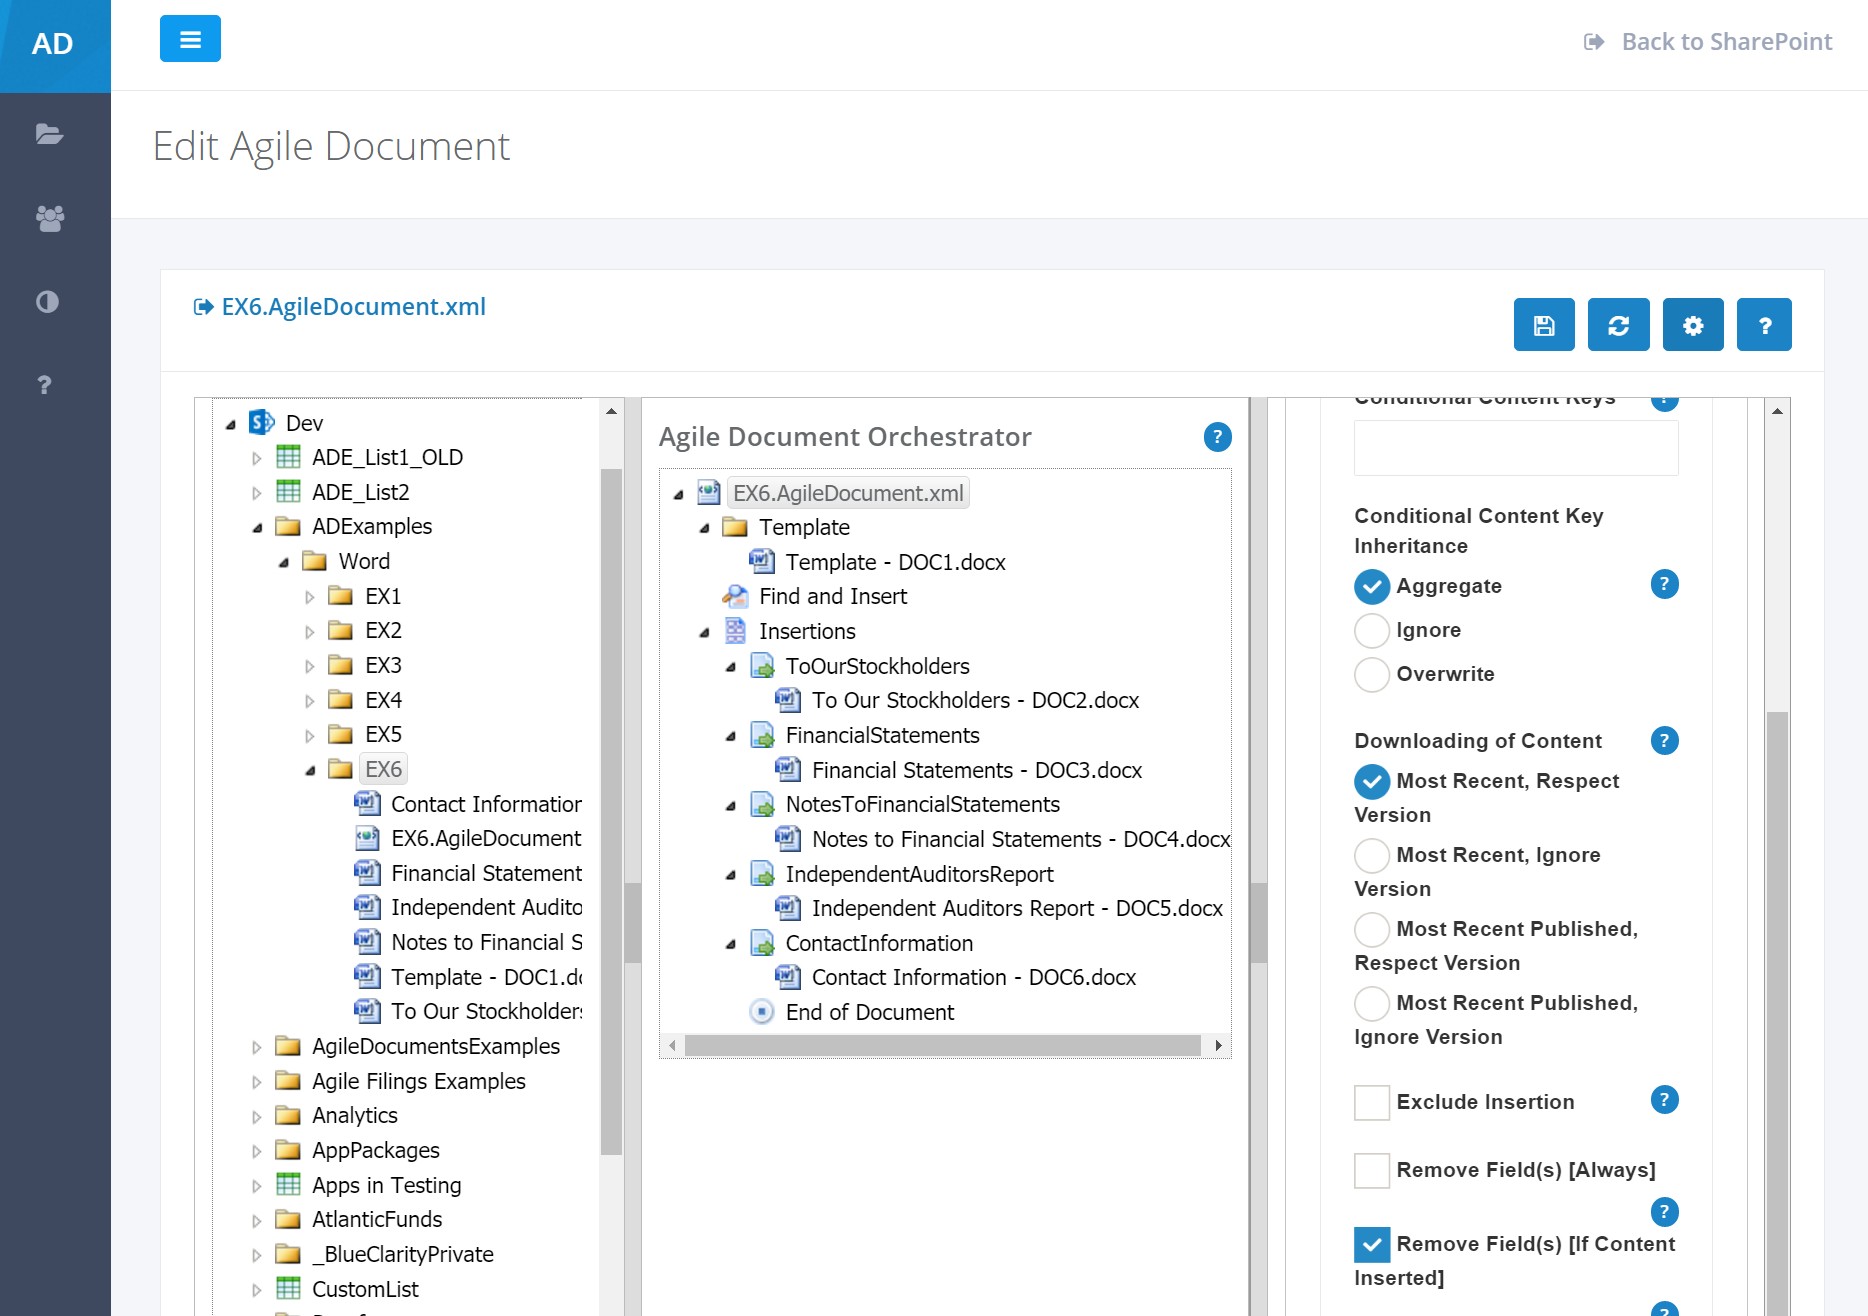
Similar to previous examples, ensure that the folder Word/EX6 exists within your document library. Then create a new Agile Document through SharePoint Explorer. Go back into SharePoint and rename it EX6.AgileDocument.xml. Also, deconstruct the template into six Word files as described above. Remember, the template should include 5 insertion points (Mail Merge Fields) as shown in Figure 4. Edit the EX6 Agile Document to look like Figure 5. In addition, make sure you set the Agile Document output type to DOCX. Note that we placed the template in the Agile Document, saved () and then reloaded () it to reflect the template's insertion points in the Agile Document. Also, note the Remove Field(s) [If Content Inserted] option selected for the Agile Document in Figure 5. Save, build and then review Figure 6.

The output is probably exactly what you were expecting. In fact, it looks just like the output of EX5. The goal of this example was to explain conceptual differences between Agile Document construction techniques. As you can see, there are multiple techniques that can produce the same results. The benefits of templates are more control over style and structure.