Help / Manual / Update Files
Update Files allows the user to upgrade Microsoft Office files and/or Agile Document files. Please note that this functionality is mainly provided for our legacy clients.
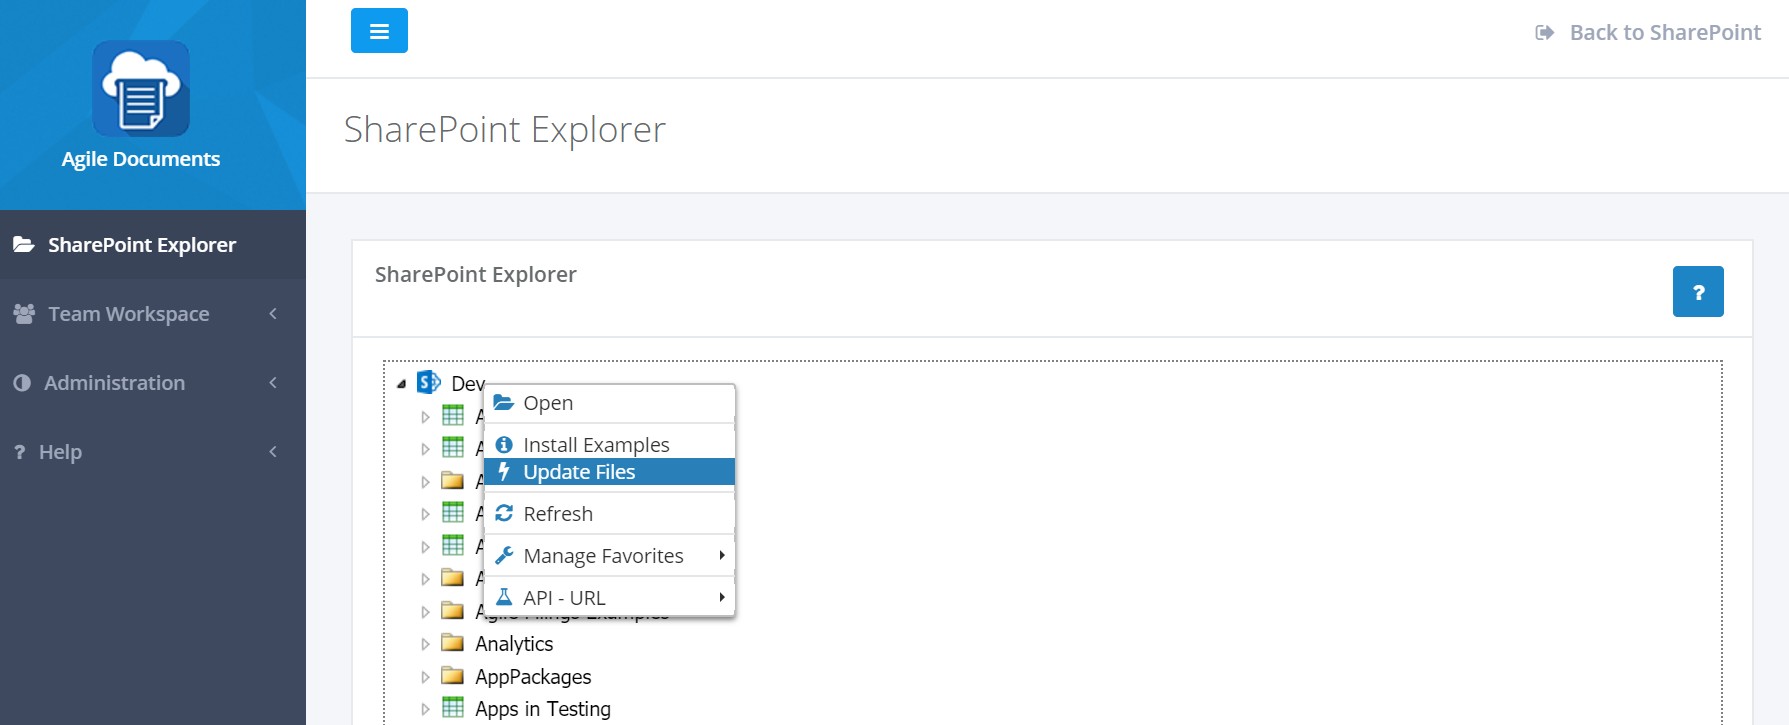
You navigate to Update Files through SharePoint Explorer. Update Files is available in the right-click menu of any SharePoint web in SharePoint Explorer (Figure 1). Update Files will upgrade the current web and/or its child webs [and NOT any parent or ancestor web]. Therefore, your selection of Update Files for a particular web filters the available documents that you wish to be upgraded.
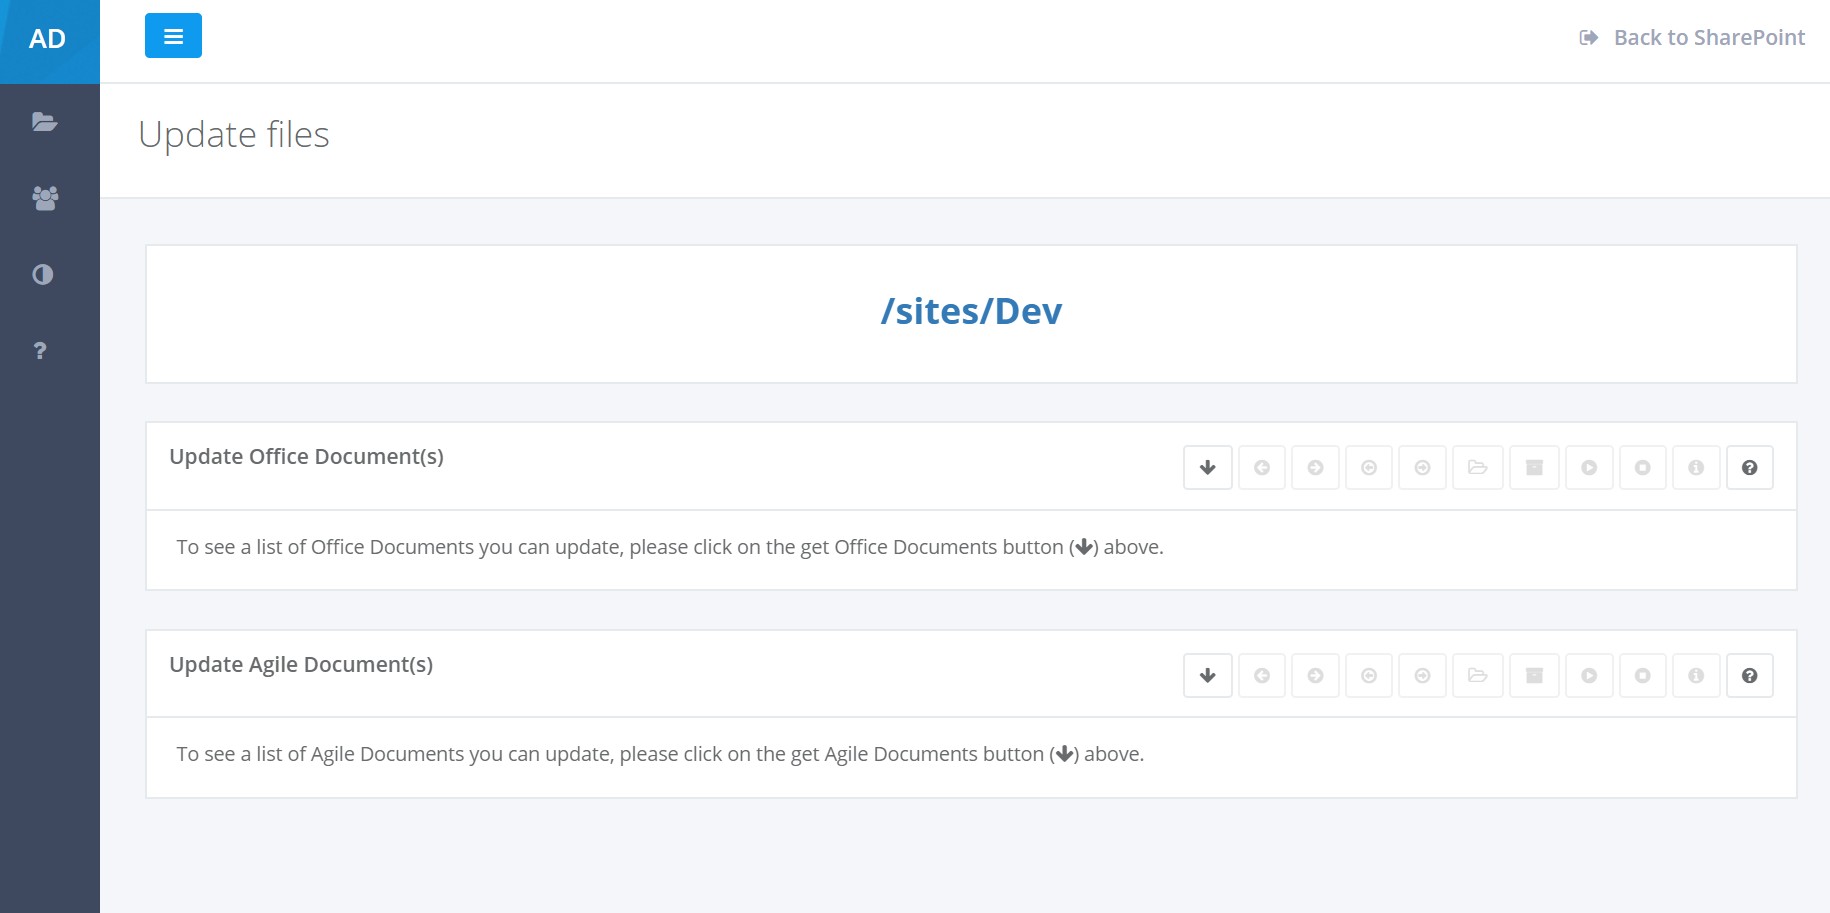
Your selection in SharePoint Explorer will take you to the Update Files page (Figure 2).
Update Microsoft Office Files
Agile Documents updates Microsoft Office file by opening an pre-Office 2007 files (.doc, .xls, .ppt), resaving it in its newer format (.docx, .xlsx, .pptx) and then renaming the file with its appropriate file extension. It can do this one file at a time or in bulk in the Update Office Document(s) section.
As you may know, when you edit a pre-Office 2007 document with Office Online (the web browser version of Office) it will make a copy of the file and resave it in the new format. You will then have two copies of the same file in two different formats (i.e. .doc and .docx). The old format will retain its version history, but the new copy will not have any version history. One issue with Microsoft's implementation is that users may be confused as to which of the two files they should edit. This is further complicated by not wanting to delete the old format because it retains the version history. Additionally, there is no way to bulk update your Microsoft files.
Agile Documents addresses these two issues by merging the new formated version with the historical versions and renaming the file with the appropriate file extension. It also provides a bulk update of Microsoft Office files. This functionality is surfaced through the Update Office Document(s) box on the Update Files page (Figure 2).
To begin, select the toolbar button. This will search the currently selected SharePoint web for Microsoft Office Documents in a pre-Office 2007 file format. If the web has sub-webs, you will be asked if you want to search them as well.
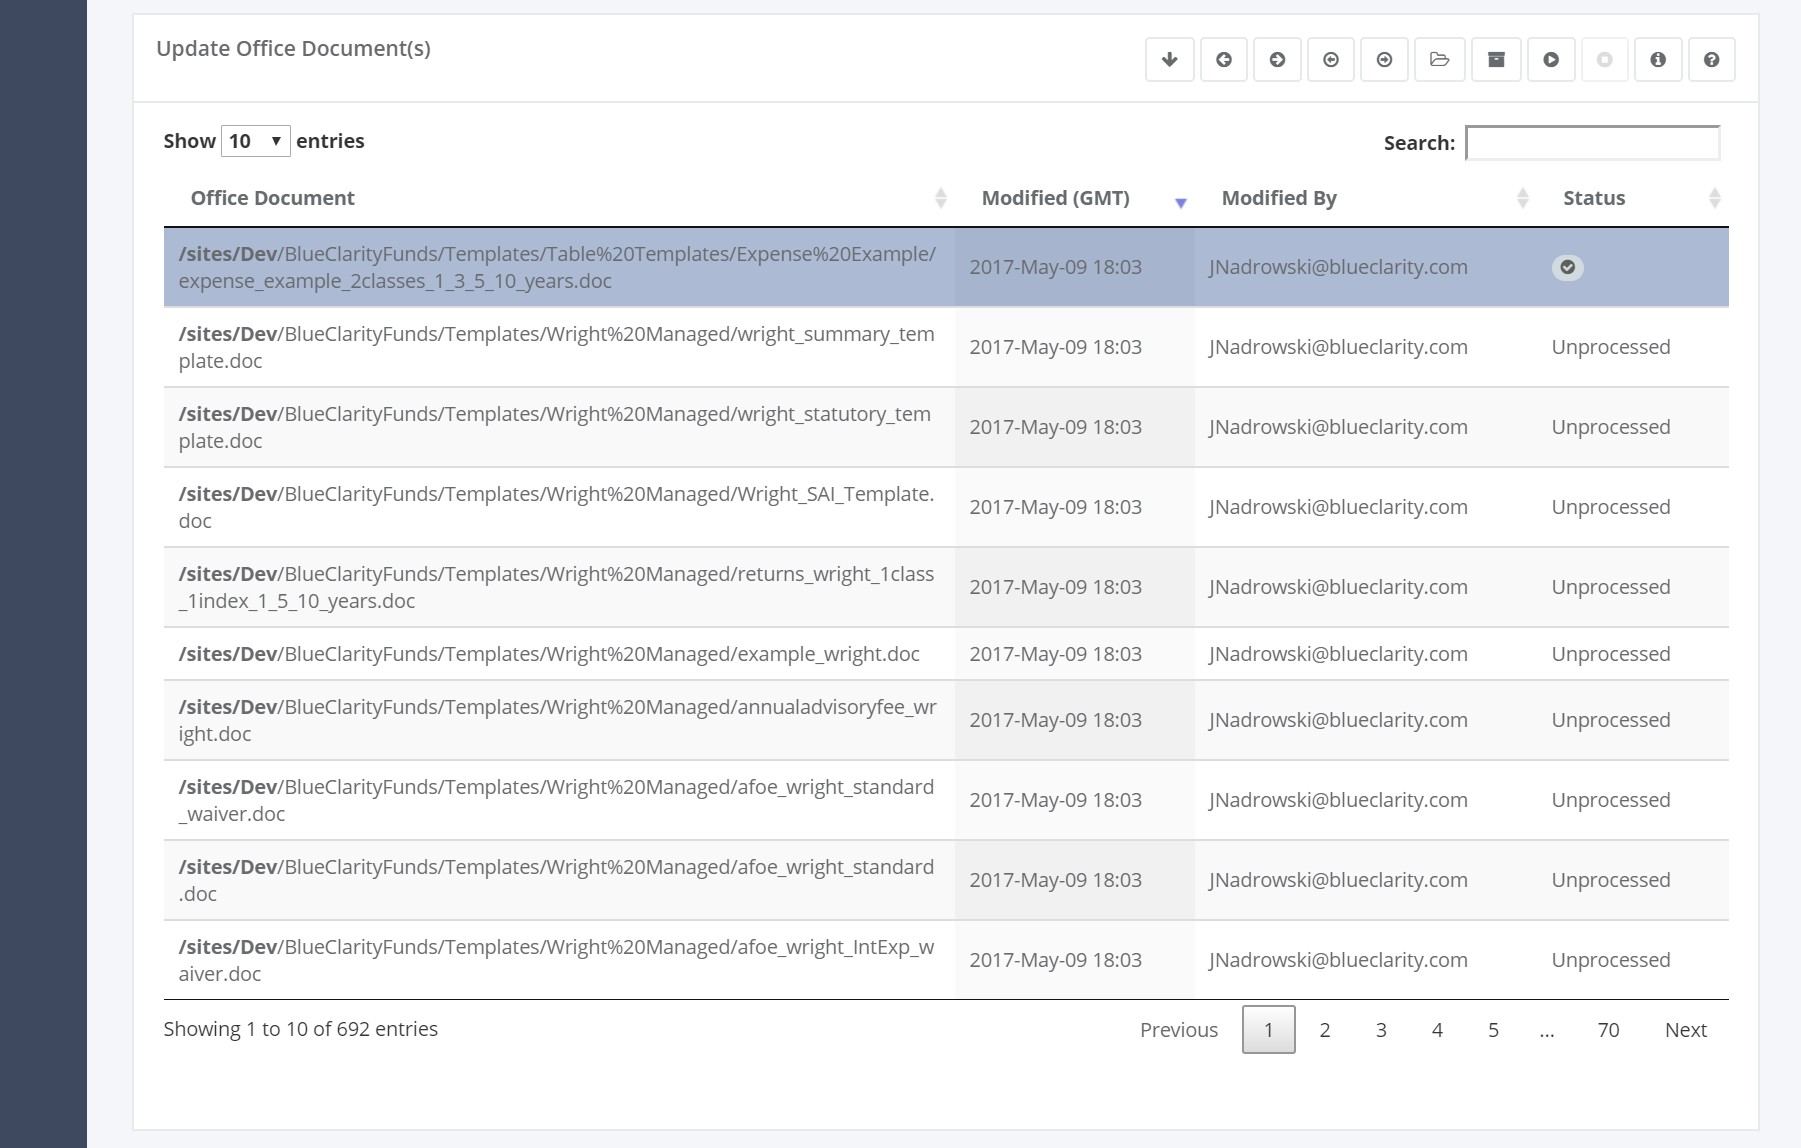
If pre-Office 2007 documents were found (Figure 3), you may select them for further research or convert them to the newer file format. You select them by clicking on any row in the table, clicking on the toolbar button to select all or clicking ion the tool bar button to select all the items on the current page.
If you have selected one, you may click on to open its parent folder. You may also review its version history by clicking on .
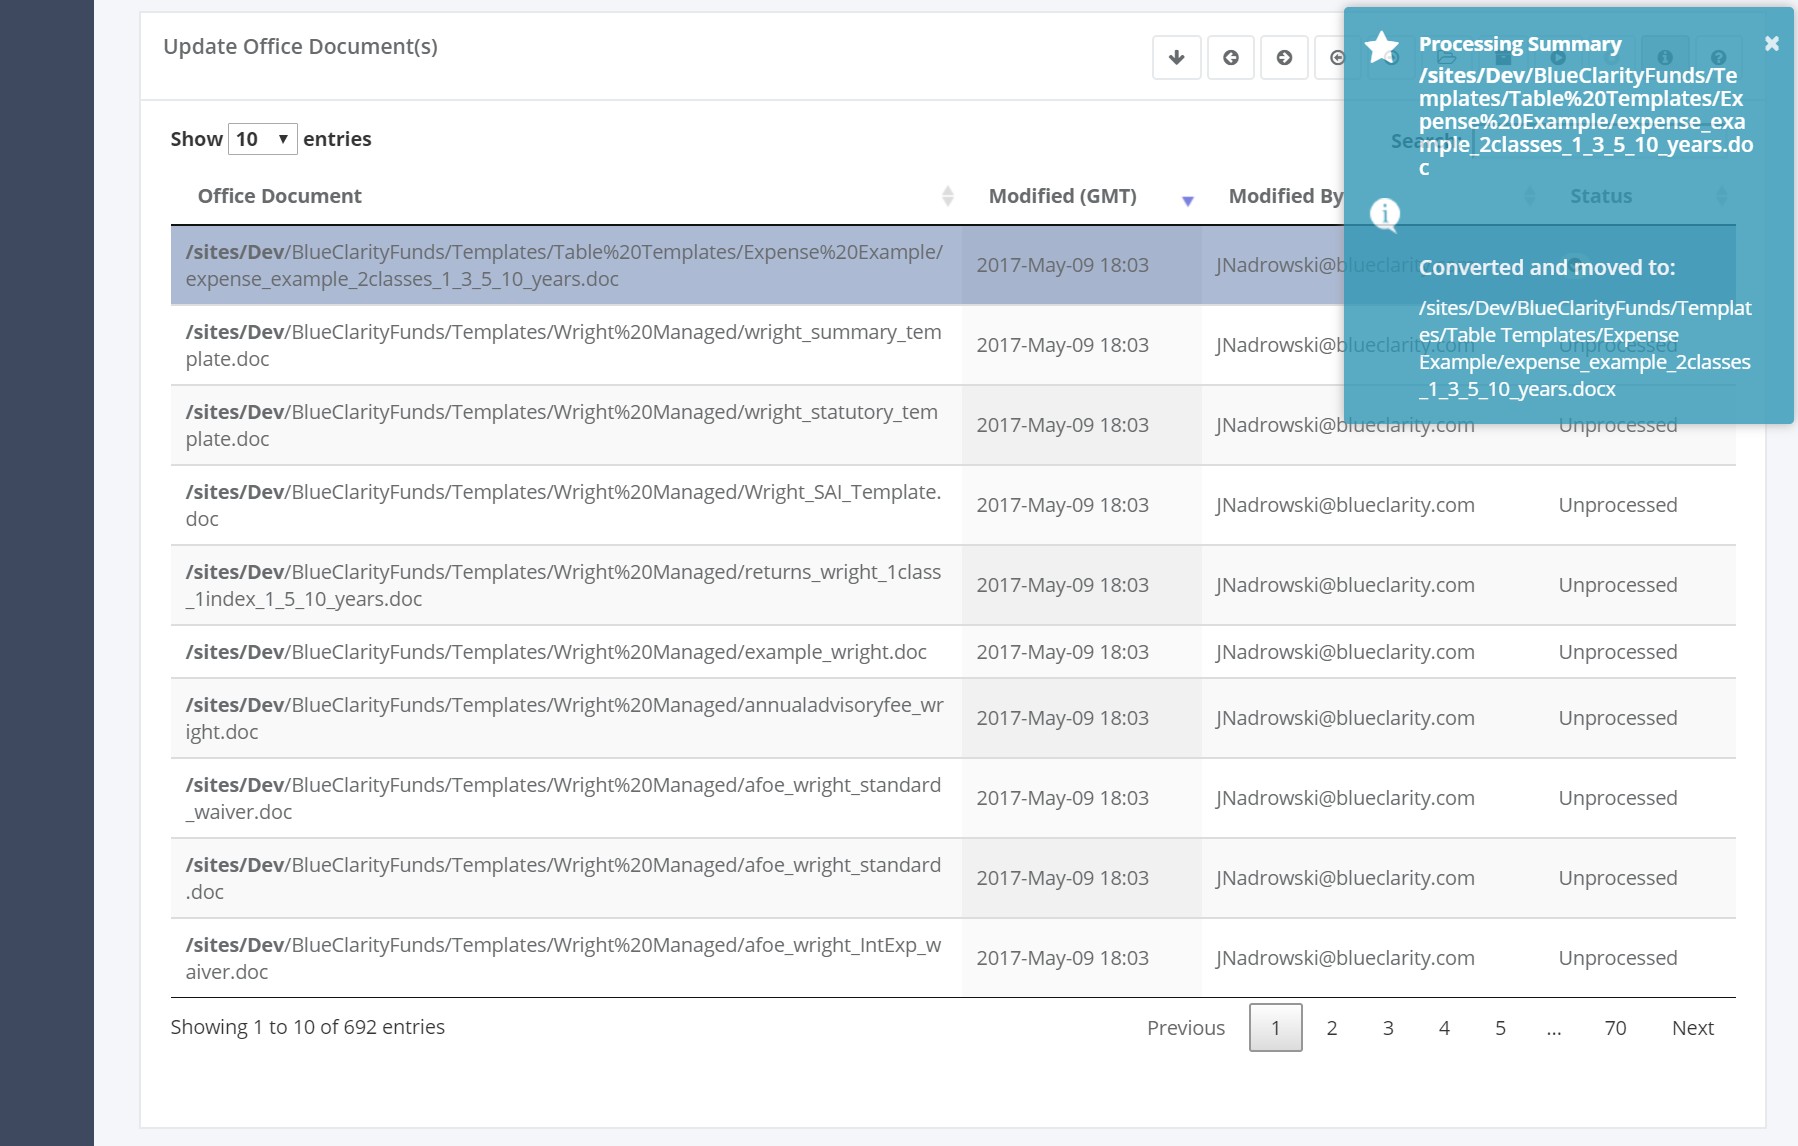
If you have selected one or more, you may click on to update the selected files. The status column will update in real time for the processed files. You will be able to tell what files are queued and the results of any processing/upgrading. Once a file is processed, you may find more information about it by selecting only that file and then clicking on the button (Figure 4).
Update Agile Document Files
Agile Documents files can also be updated too. Specifically, any content files that may have renamed [or moved] can also be automatically re-linked. For instance, the Office files that you just converted [described in the section above] from the old format to a new format will be re-linked. Additionally, this is helpful if you have renamed a content file shared between multiple Agile Documents. You can select the Agile Document(s) to update and update all the changes in bulk.
The process is very similar to the Upgrade Office Documents procedure described above. To begin, select the toolbar button. This will search the currently selected SharePoint web for any files with an XML or BCBFO (older Agile Document format) extensions. If the web has sub-webs, you will be asked if you want to search them as well.
If files were found (Figure 5), you may select them for further research or convert them to the newer file format. You select them by clicking on any row in the table, clicking on the toolbar button to select all or clicking ion the tool bar button to select all the items on the current page.
If you have selected one, you may click on to open its parent folder. You may also review its version history by clicking on .
If you have selected one or more, you may click on to update the selected files. The status column will update in real time for the processed files. You will be able to tell what files are queued and the results of any processing/upgrading. Once a file is processed, you may find more information about it by selecting only that file and then clicking on the button (Figure 6).
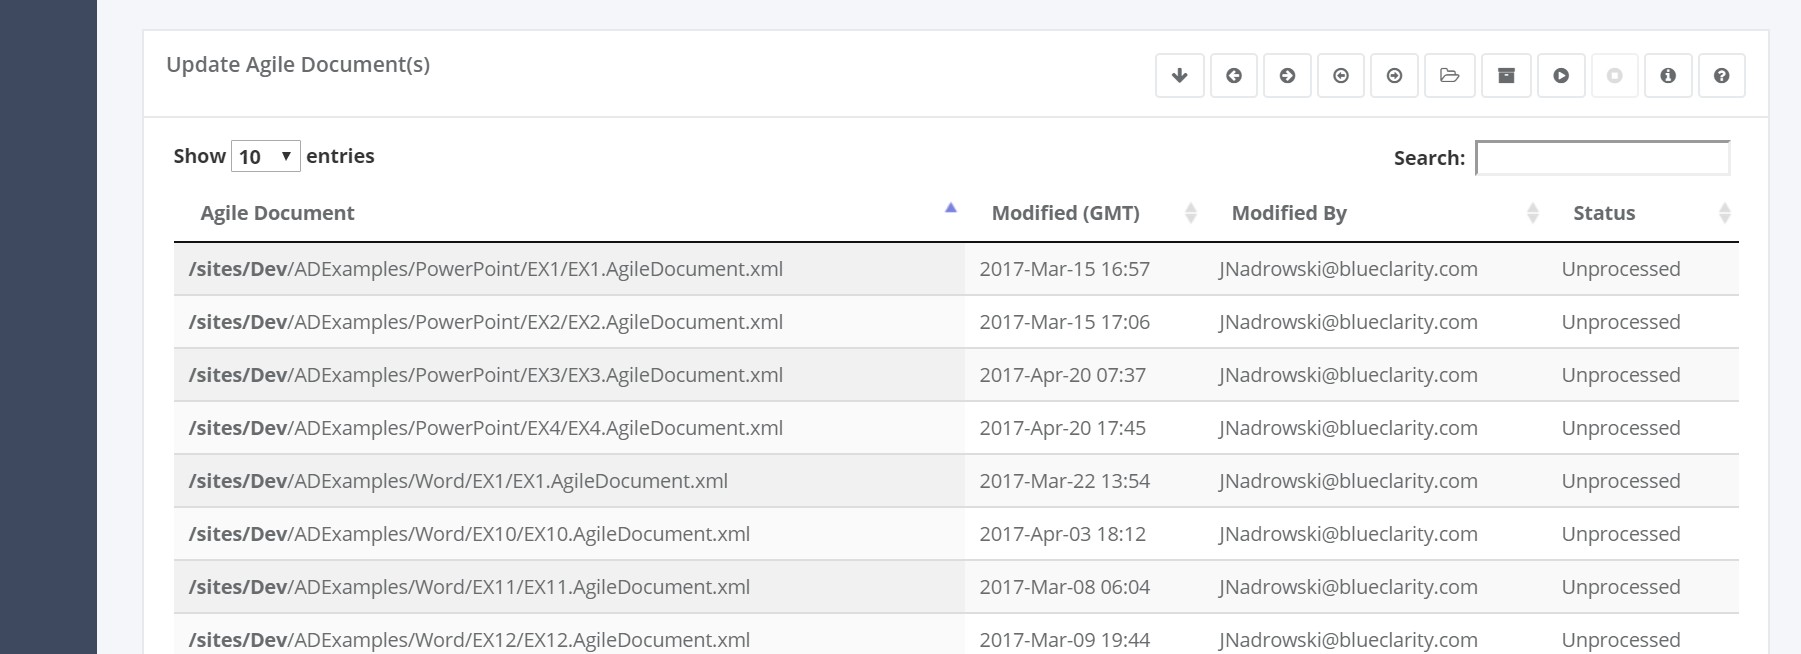
Figure 5: List of potentially upgradable Agile Document Files
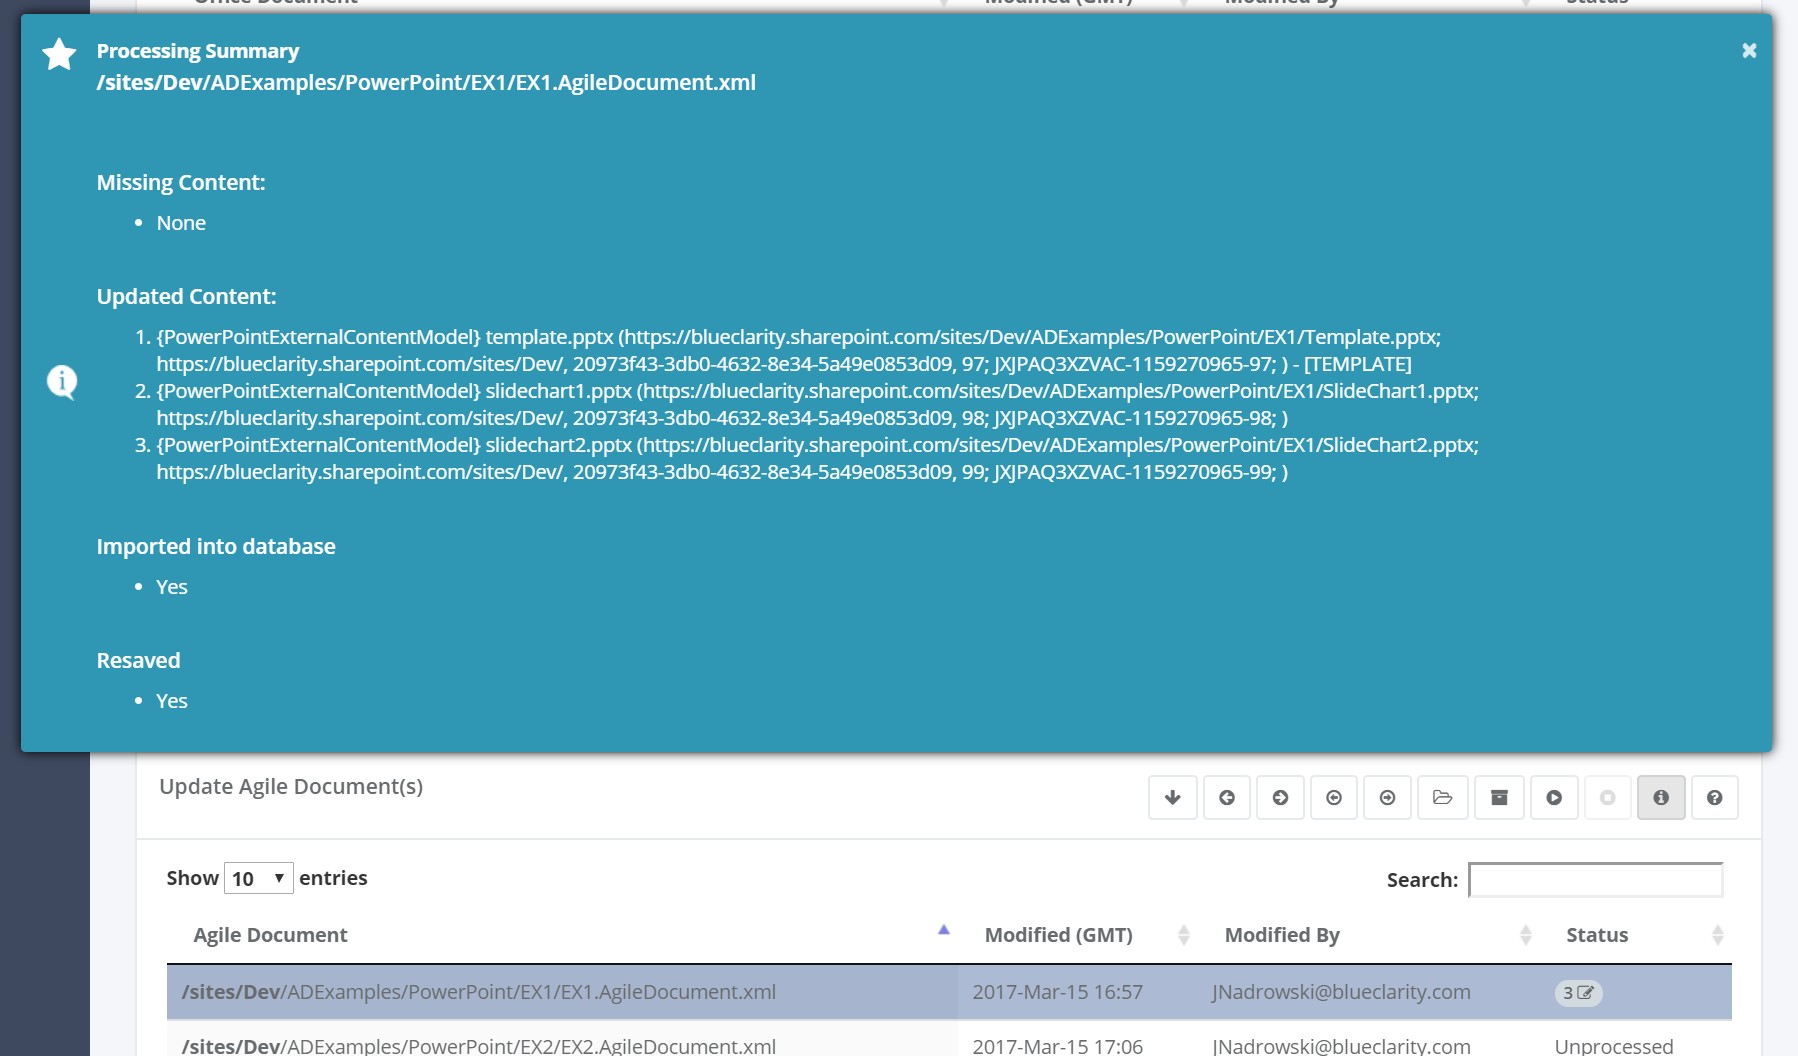
Figure 6: Results of Agile Document processing