Help / Manual / Agile Document Editor
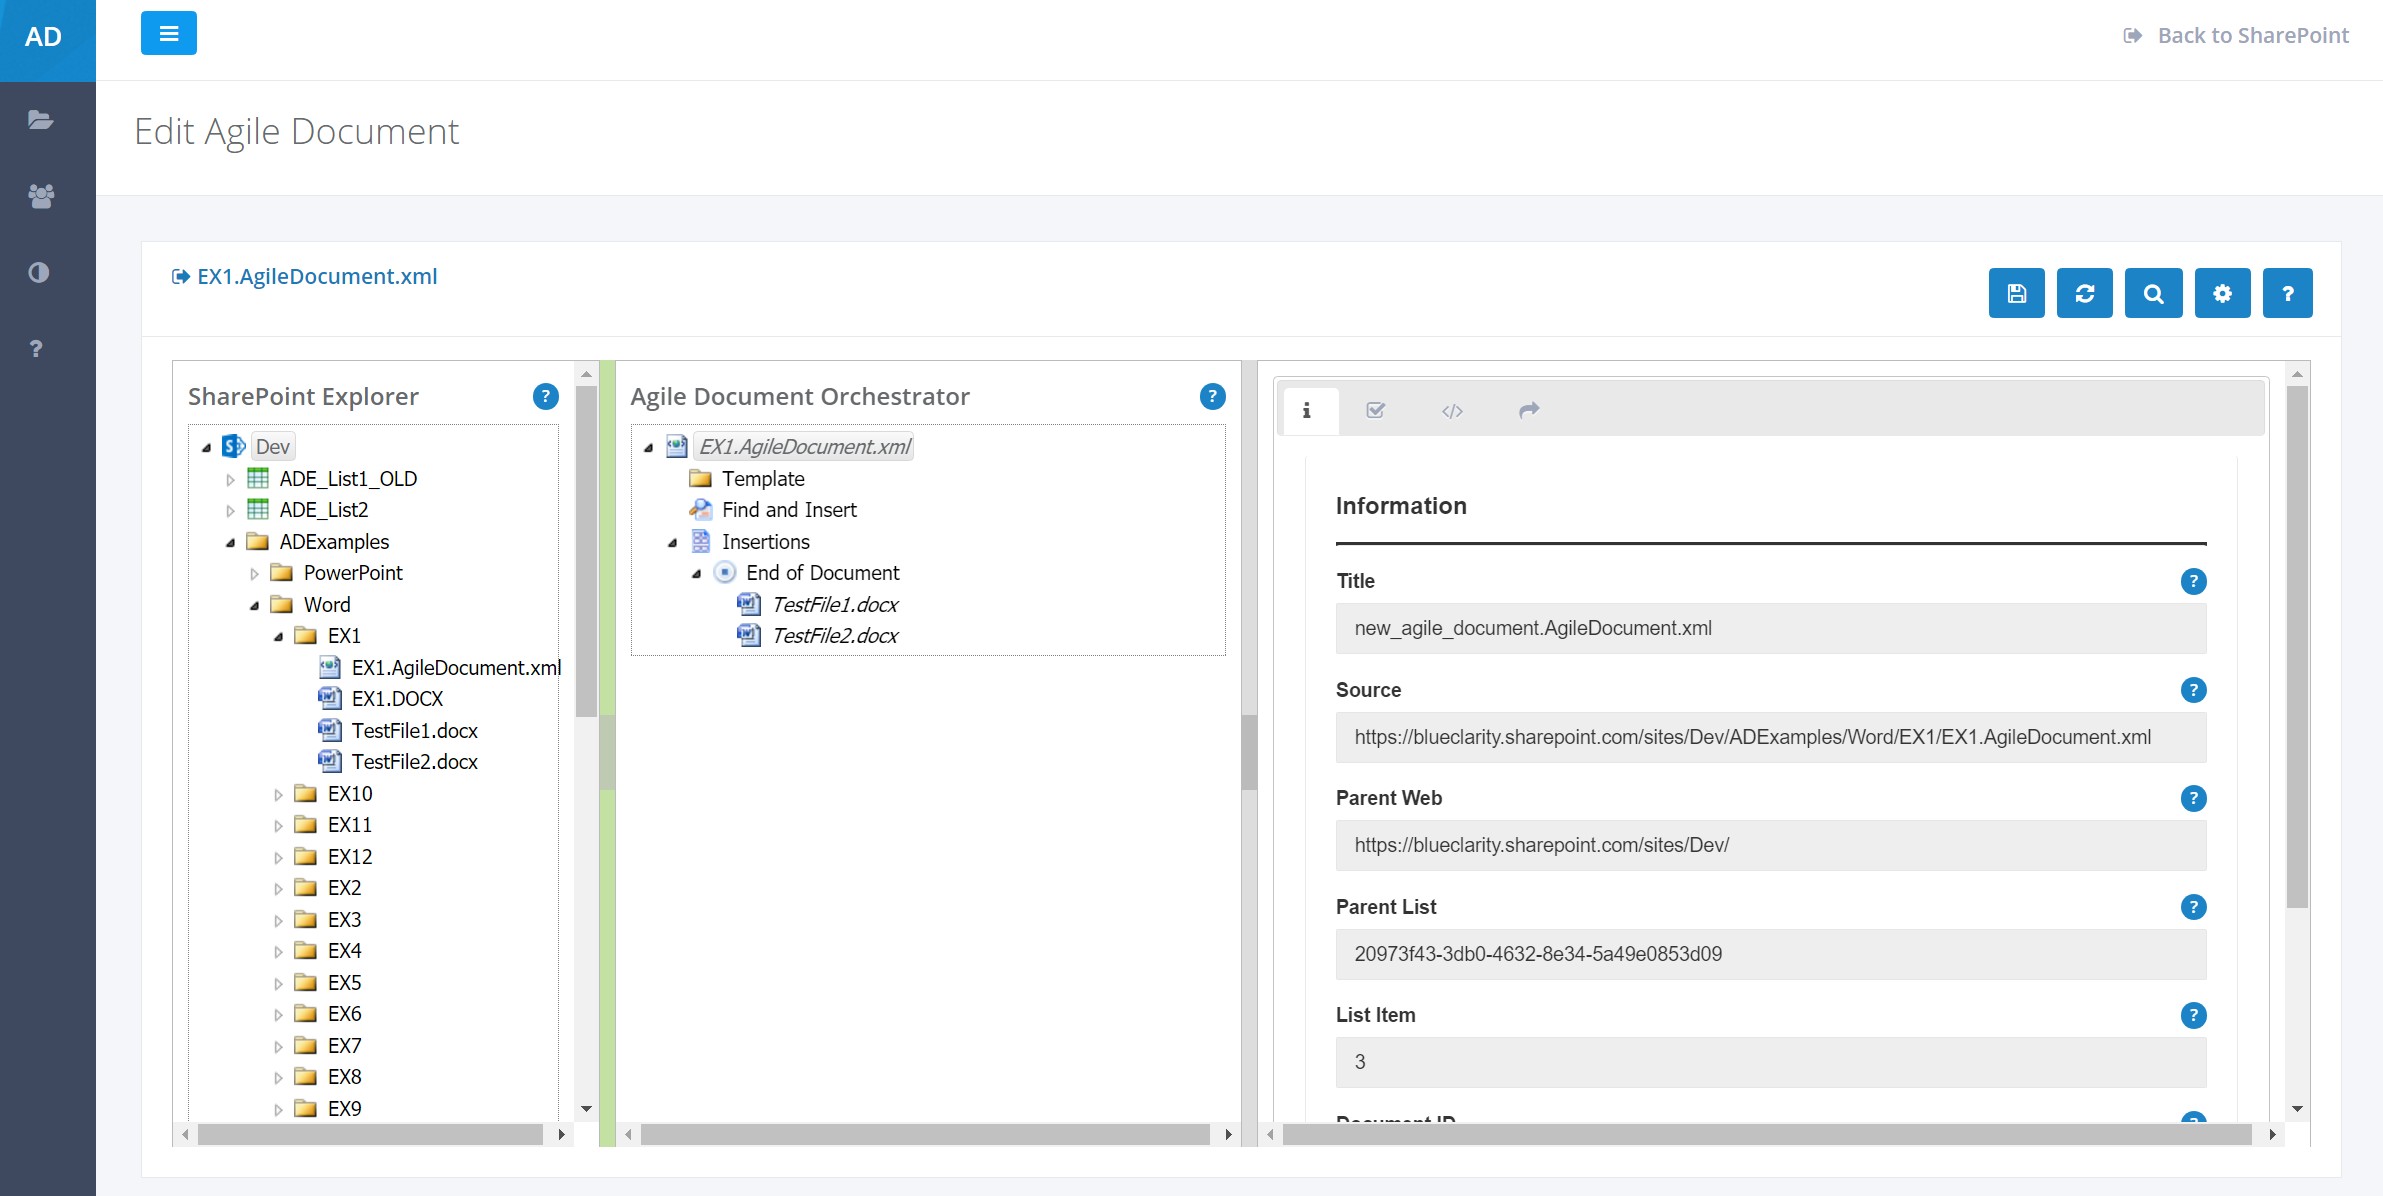
The Agile Document Editor (Figure 1 and Figure 2) provides a friendly way to edit the Agile Document XML file. Note that may need to click on the right and left side of the images below to rotate through figures. The editor allows you build documents from data on your SharePoint site. You can navigate to the Agile Document Editor through SharePoint Explorer or through a direct URL [typically generated through API - URL in SharePoint Explorer].
The editor is framed by a left navigation and a top right link to return to SharePoint. Please note the 3 bars icon in the upper left (Figure 1). Clicking on that will collapse and expand the left navigation bar. This is handy when you need more screen real estate for editing Agile Documents.
The editor itself has three 4 major sections: (1) the top title and toolbar row, (2) the left SharePoint Explorer pane, (3) the middle Agile Document Orchestrator pane and (4) the right Details pane. These sections are detailed below.
The left, center and right panes may be resized (Figure 1) and/or closed (Figure 2). When resizing, move the mouse cursor over the splitter separating two of the panes until the bar turns green, then hold down the left mouse button and drap the splitter left or right. When closing a pane, move the mouse cursor to the vertical mid-point of the splitter until the button within the splitter turns orange, then click.

Top Agile Document Title and Toolbar Row
On the left side, the row displays the title of the Agile Document you are editing. If you click on this title, it will take you back to the parent folder of this Agile Document.
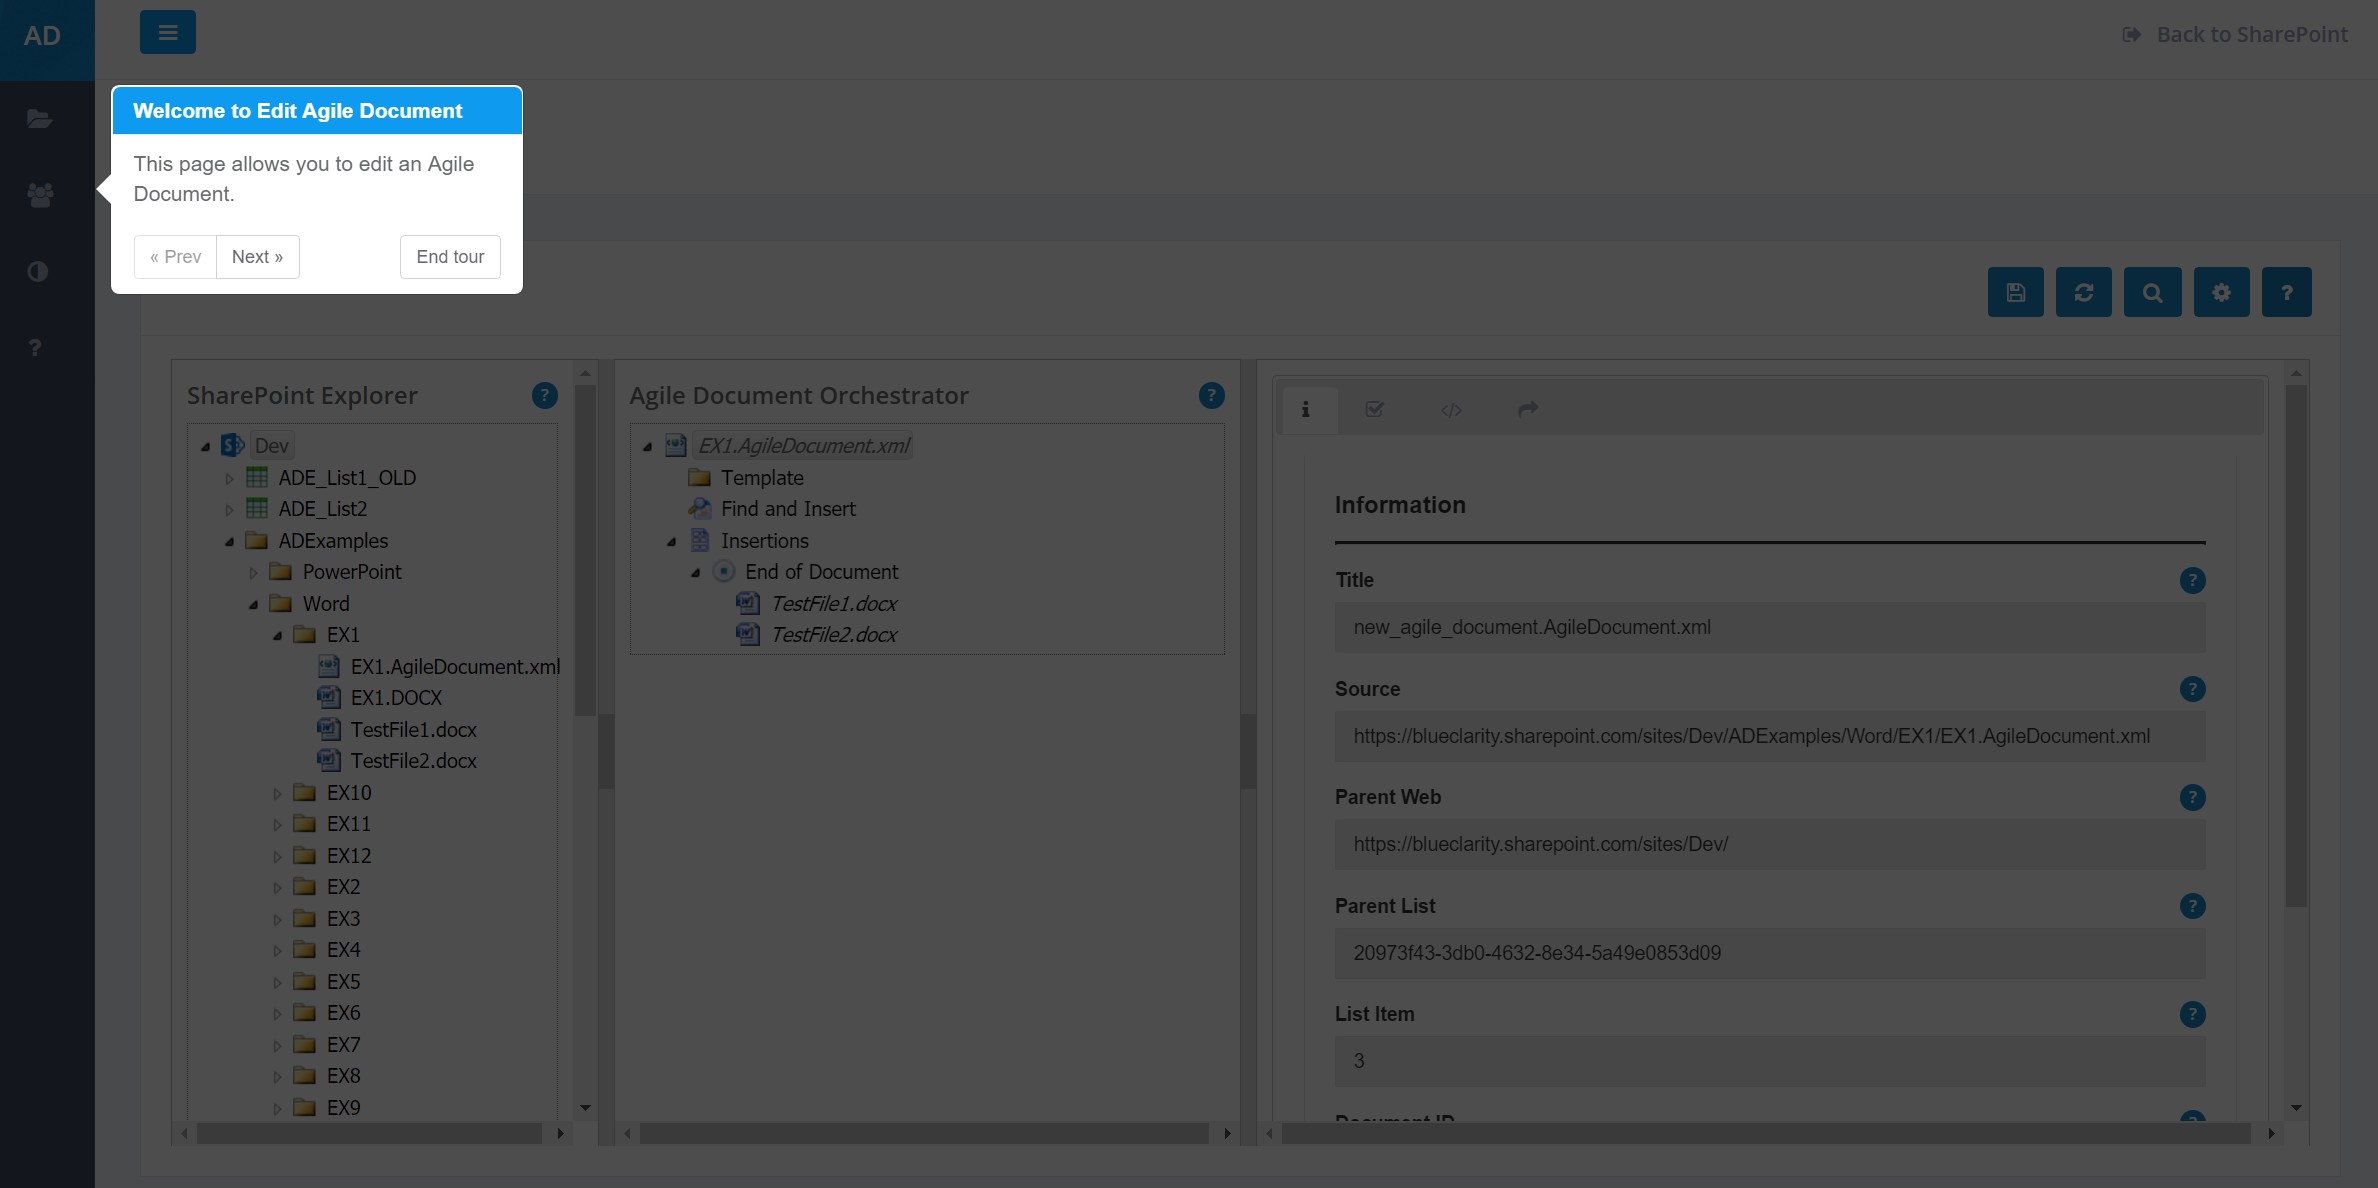
On the right side are several toolbar buttons: Save, Refresh Agile Document, Search for documents, Build Agile Document, and Help. Save will save any changes you made to the Agile Document back on SharePoint. Refresh Agile Document will discard the current [in memory] Agile Document and will reload it with the most recent version from SharePoint. Search for documents will step through all the content items in the current [in memory] Agile Document and search for them on the SharePoint server. In many cases, Agile Documents can find content items that have been renamed or moved. When found, their references will be update in the Agile Document. Build Agile Document will build the current [in memory] Agile Document. Thus, any unsaved Agile Document changes will be reflected in the build. In this way, you can modify the Agile Document in memory, change the output folder and generate a test build without affecting the official document. If you wish to build the Agile Document that is stored on the server, use the build process in SharePoint Explorer. Finally, click Help to go through the help tour for this page (Figure 3).
SharePoint Explorer Left Pane
The SharePoint Explorer Pane is very similar to the SharePoint Explorer Page. The main difference is that much of the functionality of the SharePoint Explorer Page has been removed for the pane version. Just like the SharePoint Explorer Page, the pane shows all your SharePoint Site Collection's content and is very similar in nature to Windows File Explorer. You can left-click to drill-down on sites, lists and folders. You can right-click menu is significantly reduced from the options on the SharePoint Explorer Page.
You may drag content (list items and files) from the SharePoint Explorer Pane to the Agile Document Orchestrator Pane. This allows you to construct your Agile Document via a drag and drop interface. For instance, in Figure 1, a user had previously dragged the files TestFile1.docx and TestFile2.docx from the SharePoint Explorer Pane to the End of Document in the Agile Document Orchestrator.
In addition to using the right-click menu to launch the appropriate viewers for the files and list items in the SharePoint Explorer Pane, selecting a file in that pane will also update the information in the right Details Pane. The right Details Pane will detail the content item's title, URL and other information that describes its location within SharePoint.
Agile Document Orchestrator Center Pane
This is the graphical representation of your Agile Document. The pane allows for specifying a template, Find and Insert and content insertions. Items in this view are further refined in the left Details Pane.
The template specifies the structure and style of your Agile Document. The use of a template is analogous with templates you have used in Microsoft Office. Styles in your template can override styles specified in any included content documents. In this way, you may use your template to define the styles for the entire Agile Document despite have conflicting definitions in your content documents. Additionally, templates can support insertion points that serve as placeholders for content insertions. For instance, if we were to use a Microsoft Word document as our Agile Document template, our template could define a partially completed document with placeholders (Mail Merge Fields for Microsoft Word). We could then use Agile Document's to fill in the specifics such as a name, date, number, table, images, paragraphs, or other sorts of data. For better context, you may wish to review Word Basics - Templates.
Find and Insert is just what it sounds like. In fact, it parallels the Find and Replace functionality in Microsoft Word. In Microsoft Word, Find and Replace allows the user to specify something to look for and then something to replace it with. Agile Document’s Find and Insert allows the user to specify a series of key-value pairs. The key is what to look for and the value is what to insert immediately above it. In Agile Documents, the key must match a field (Mail Merge Field in Microsoft Word). You may wish to review Word Basics - Find and Insert.
Insertions allows you to insert content into the template's insertion points. When you specify a template for Agile Documents, save and then reload the Agile Document, any template insertion points are displayed under the Insertions branch. It might be helpful to review Example 6 in Word Basics - Templates.
Details Right Pane
The Details Pane provides further details and customization of items selected in the SharePoint Explorer and Agile Document Orchestrator panes. In the case of the SharePoint Explorer Pane, it provides a readonly information on the item selected. However, it provides significantly more information and customization on items selected in the Agile Document Orchestrator Pane.
The Details Pane may be subdivided into a maximum of four tabs: Information (Figure 4), Settings (Figure 5), Select (Figure 6), and Code (Figure 7). However, items selected in either the SharePoint Explorer Pane or Agile Document Orchestrator Pane will typically have a subset of those tabs displayed. Further, the items within said tabs will be limited based on the context of the item selected.
The Information tab (Figure 4) displays information on the location of the content item within SharePoint. It provides the URL, Parent Web, Parent List, List Item and a myriad of other location information.
The Settings tab (Figure 5) allows for the general customization of a content item within an Agile Document.
The Select tab (Figure 6) allows for the subselection of data within a content item. This is helpful to pull out a single cell or a range with an Excel worksheet. For more information, review Example 2 in Word Basics - Start Here.
The Code tab (Figure 7) allows for the application of XSLT to the content item. You may wish to review the XSLT Examples and XSLT in the manual.
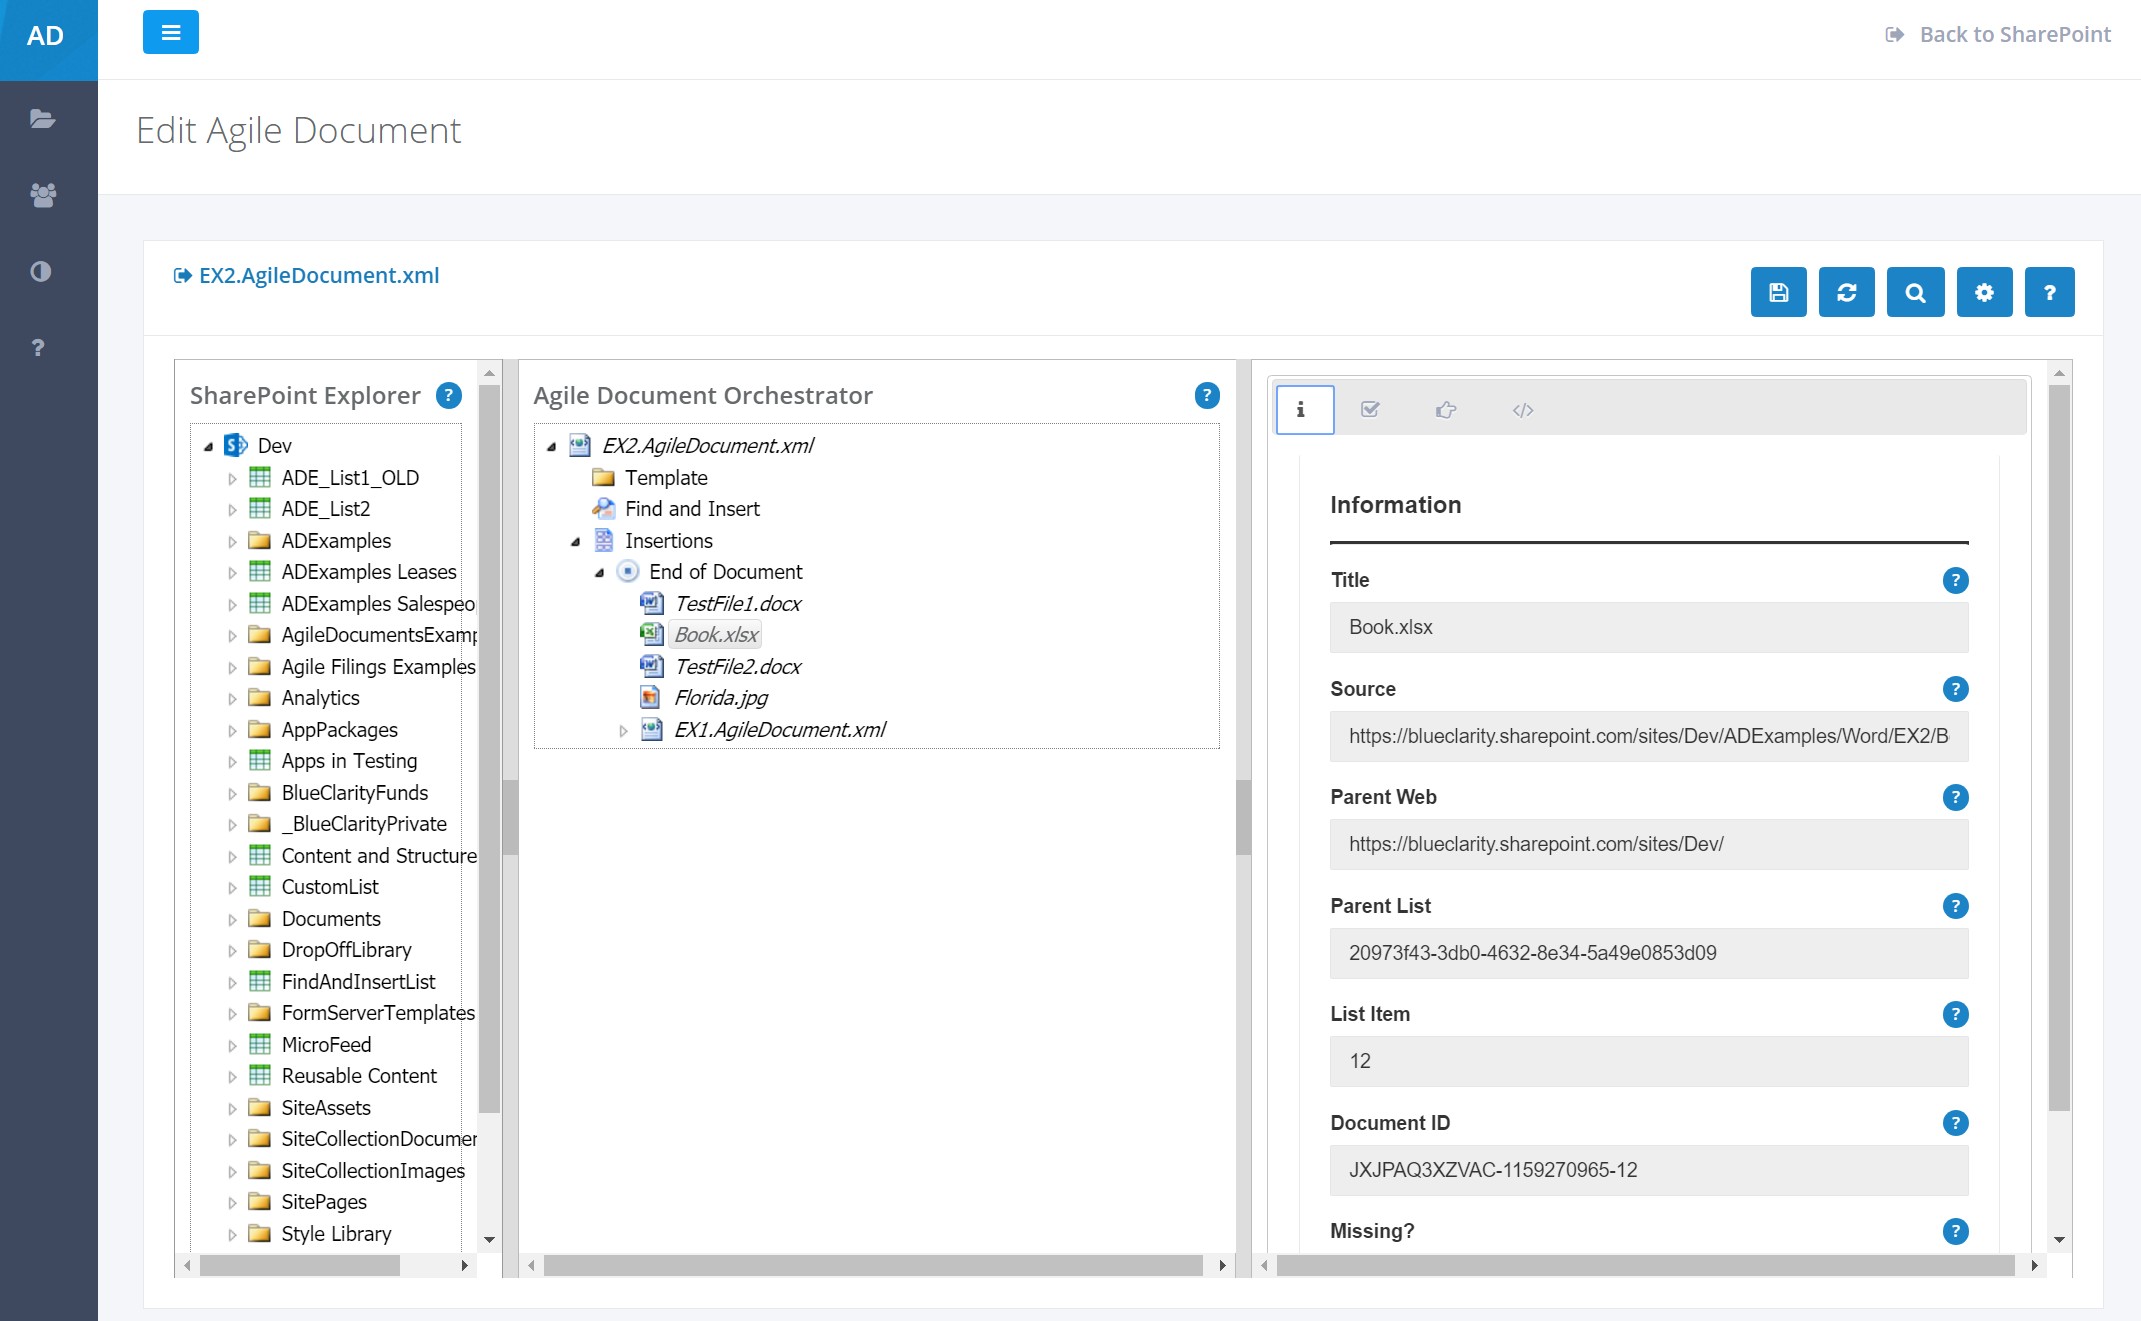
Figure 4: Information Details Pane
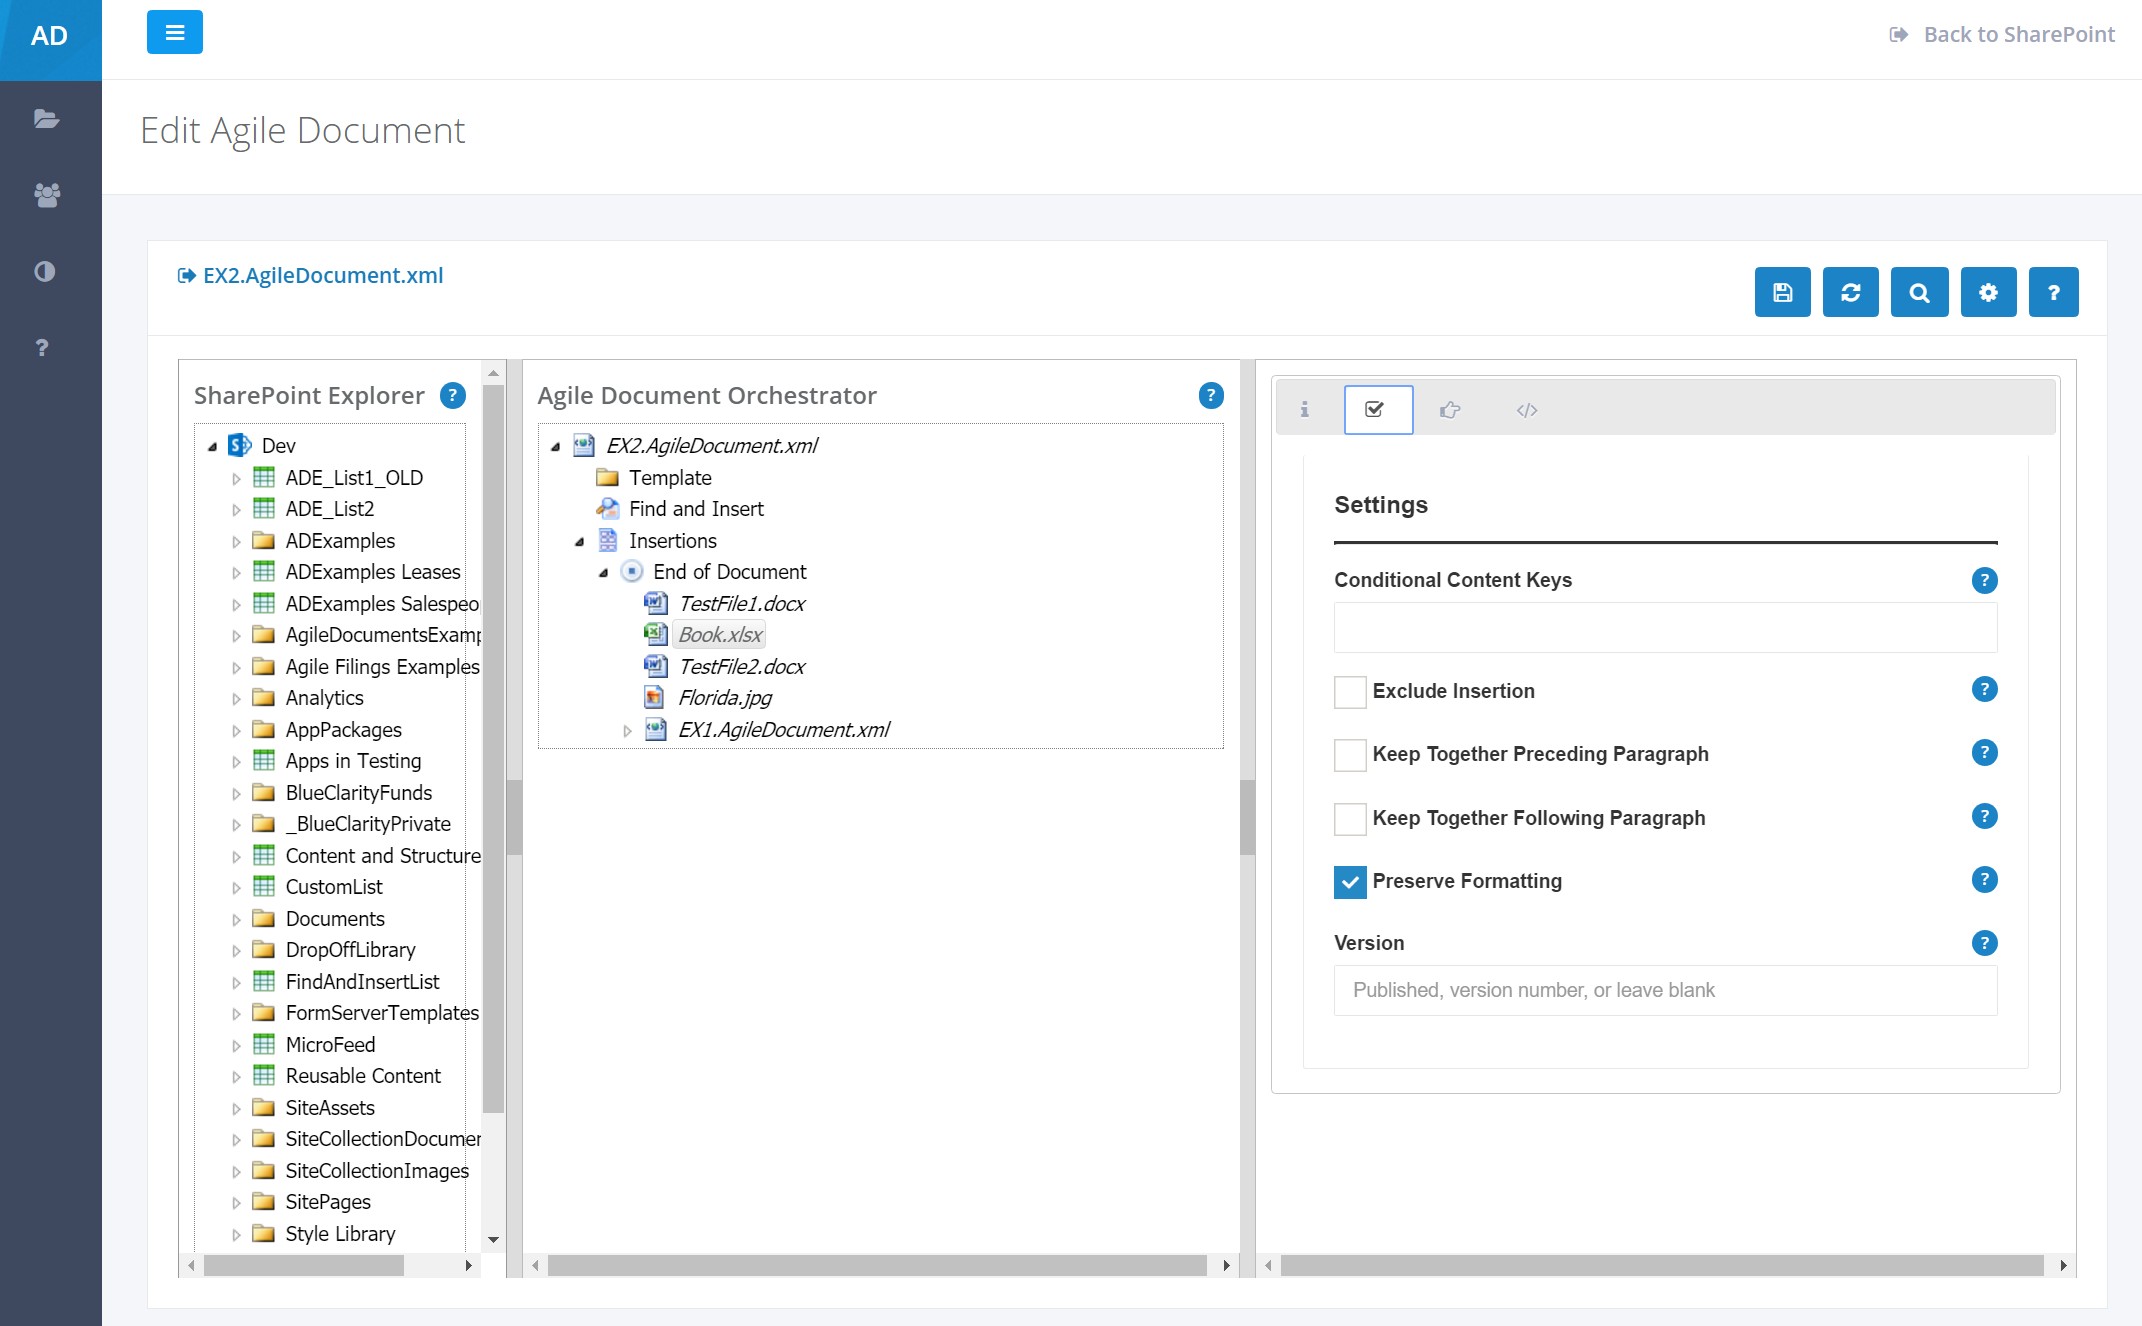
Figure 5: Settings Details Pane
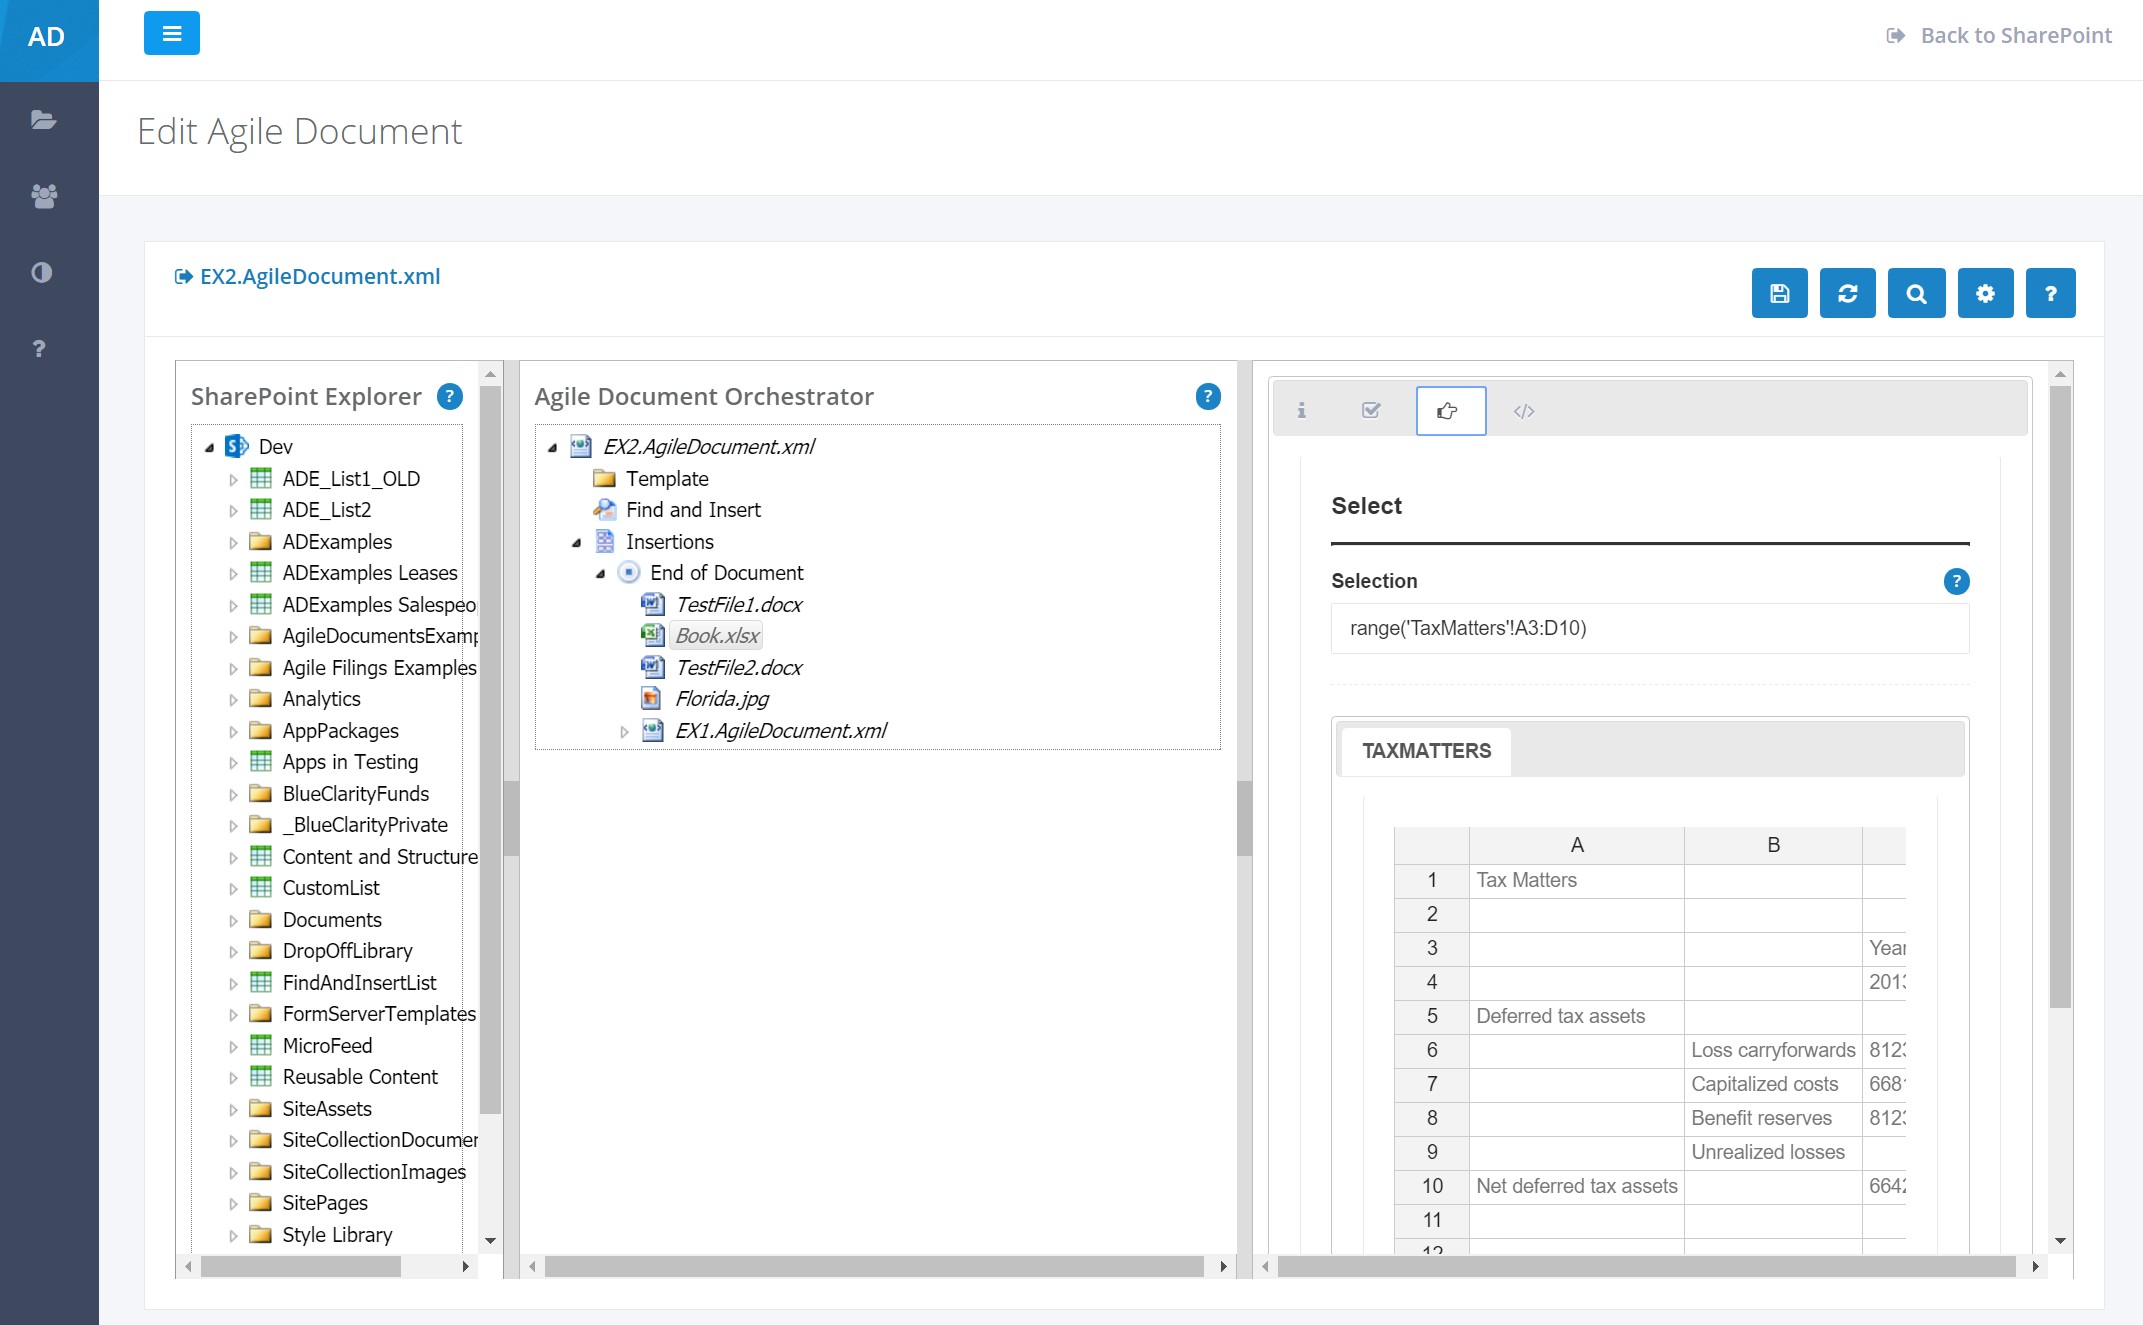
Figure 6: Select Details Pane
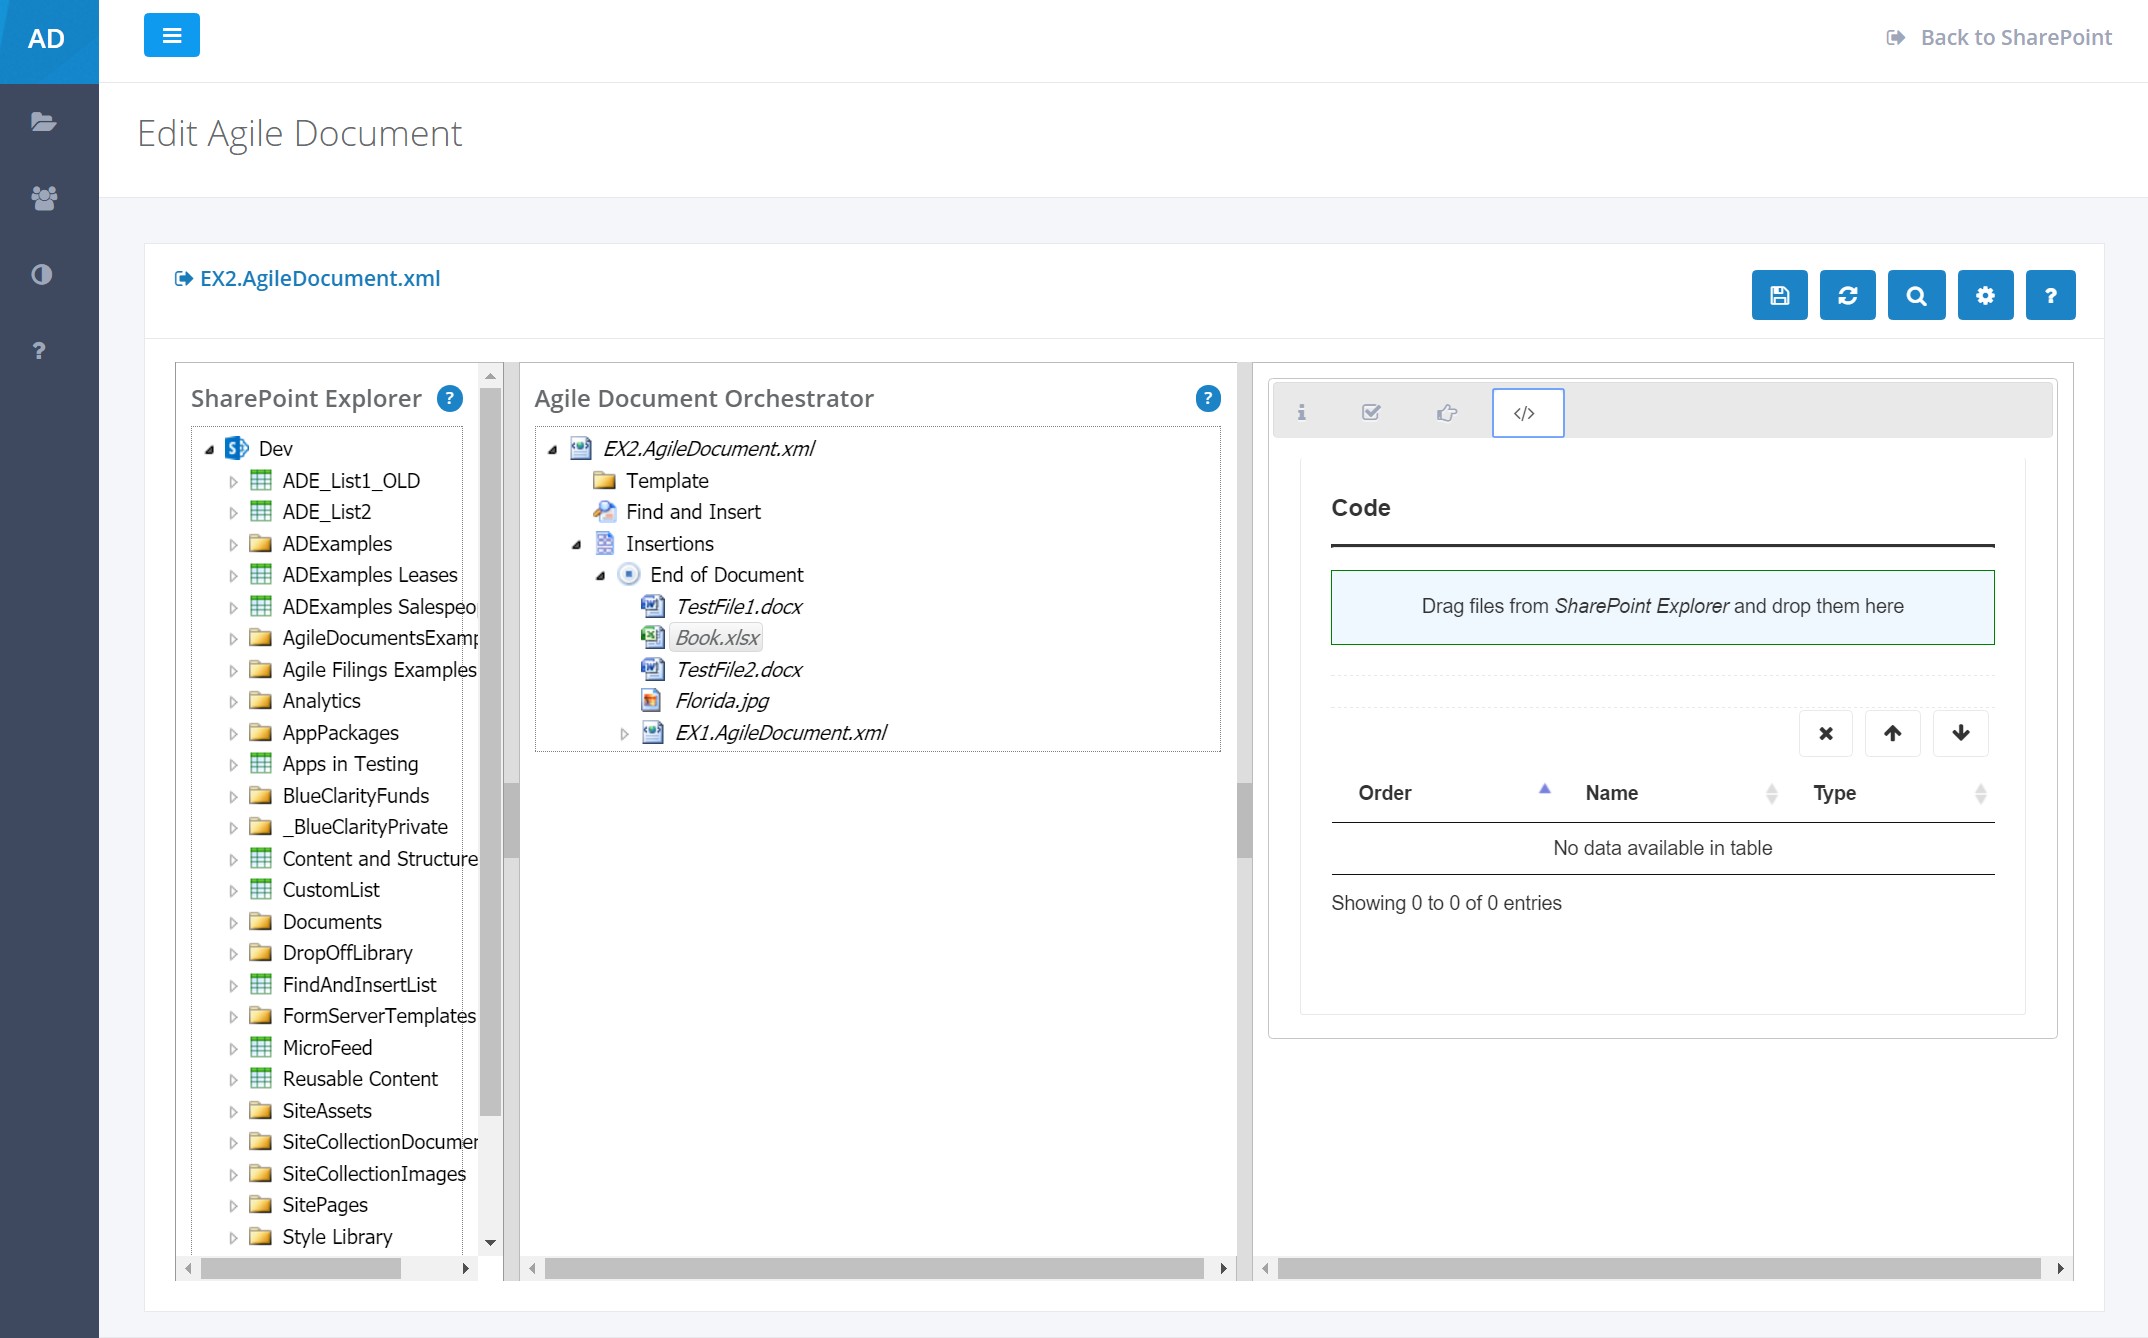
Figure 7: Code Details Pane