Help / Manual / Find and Insert
In this section we detail Agile Document's Find and Insert functionality. Find and Insert is just what it sounds like. In fact, it parallels the Find and Replace functionality in Microsoft Word. In Microsoft Word, Find and Replace allows the user to specify something to look for and then something to replace it with. Agile Document’s Find and Insert allows the user to specify a series of key-value pairs. The key is what to look for and the value is what to insert immediately above it.
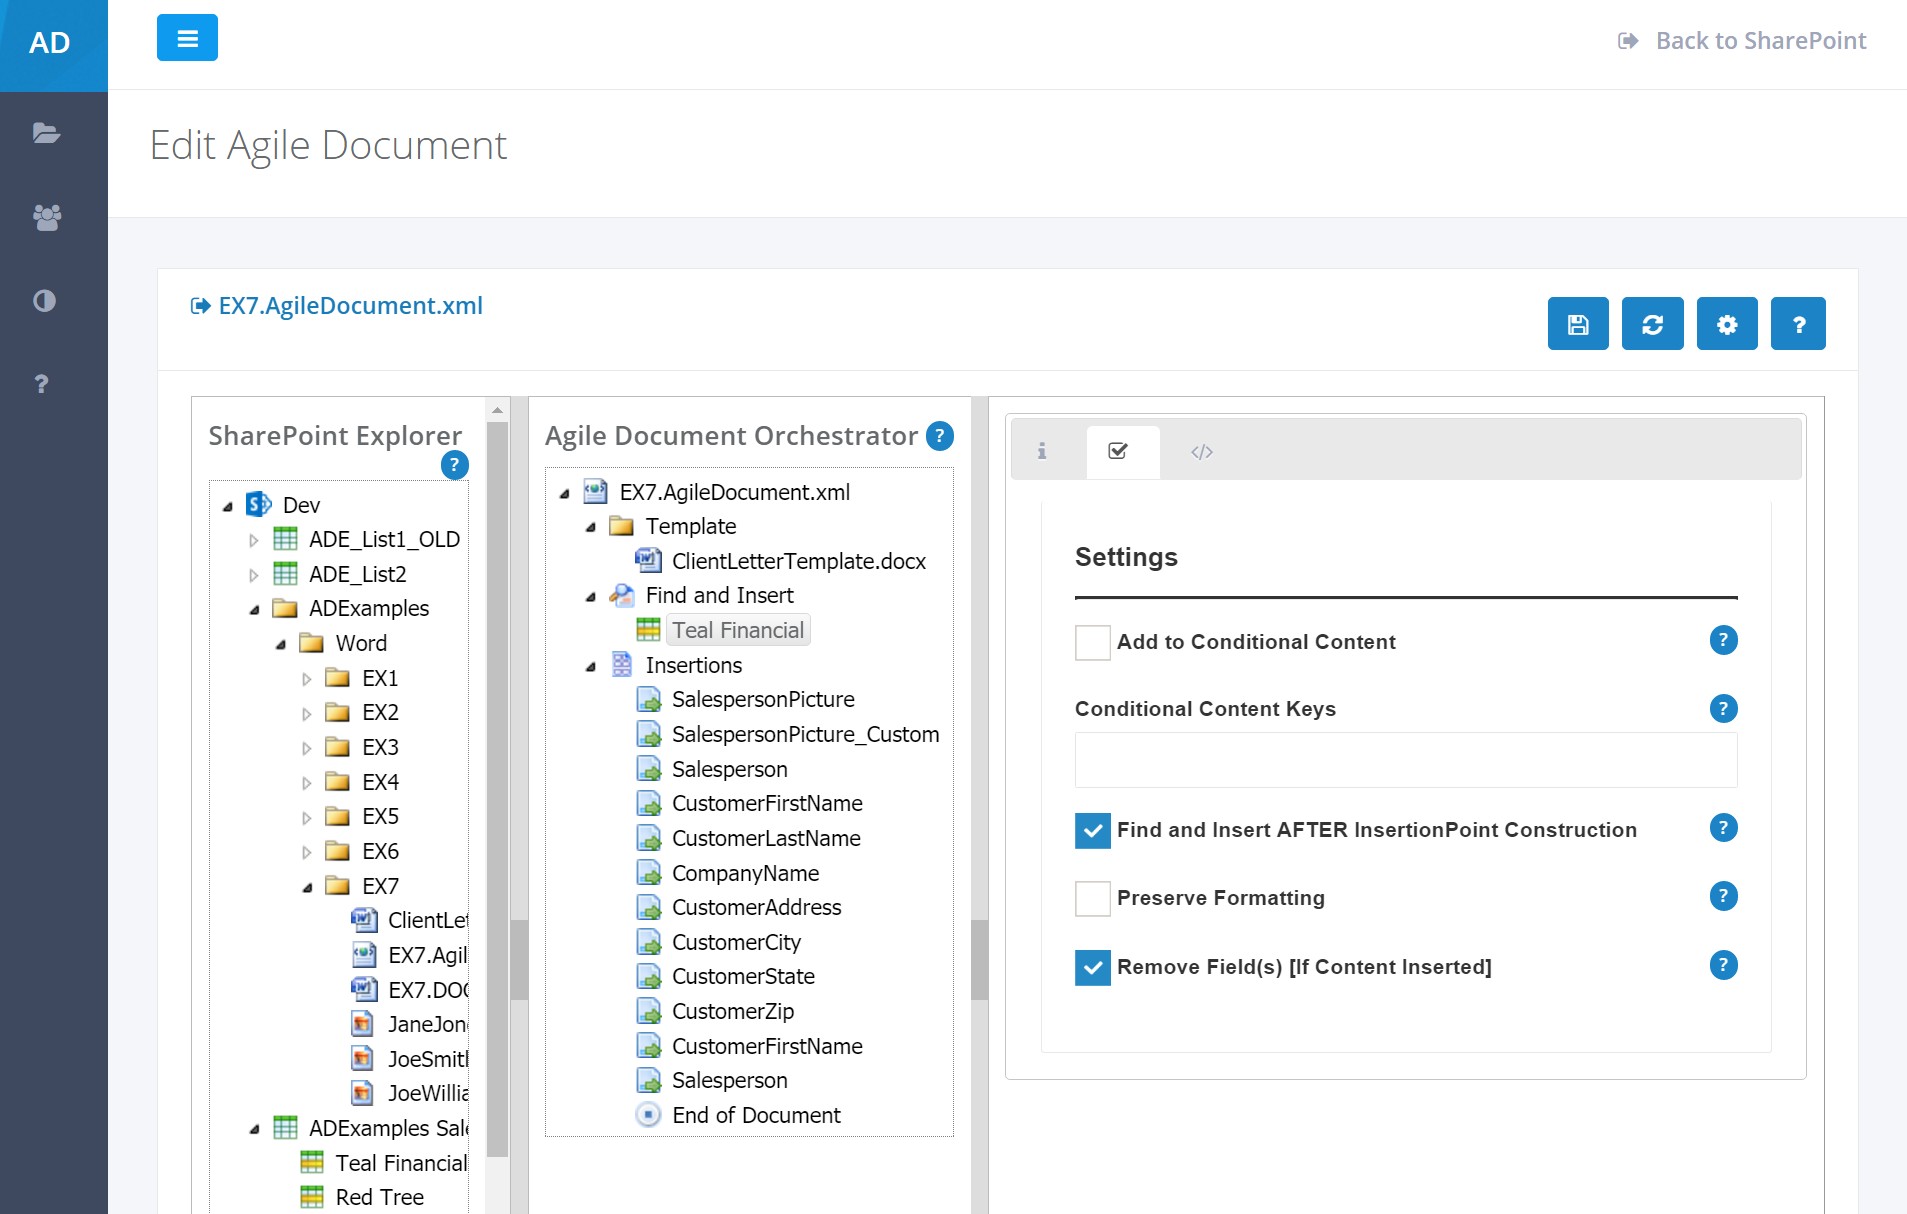
A SharePoint List Item (Figure 1), Adobe Acrobat Form (Figure 2), and Excel SpreadSheet (Figure 3) can all be used in Find and Insert. These then can be inserted into the Agile Document template or any content specified via Insertion Point construction ("Insertions"). This is done by have a field in the content match a field in the Find and Insert data set. For instance, having the Salesperson Mail Merge field in Figure 4 match the Salesperson field in Figure 1. Its also noteworthy that Power Point (Figure 5) and Adobe Acrobat generated documents can leverage Find and Insert.
However, there is more to Find and Insert than inserting content. It can also affect the generation of the Agile Document itself. For instance, the values specified via Find and Insert can affect the name of the output document or a web hook to call after Agile Document generation.
Please note, there are a number of examples that showcase the use of Find and Insert.
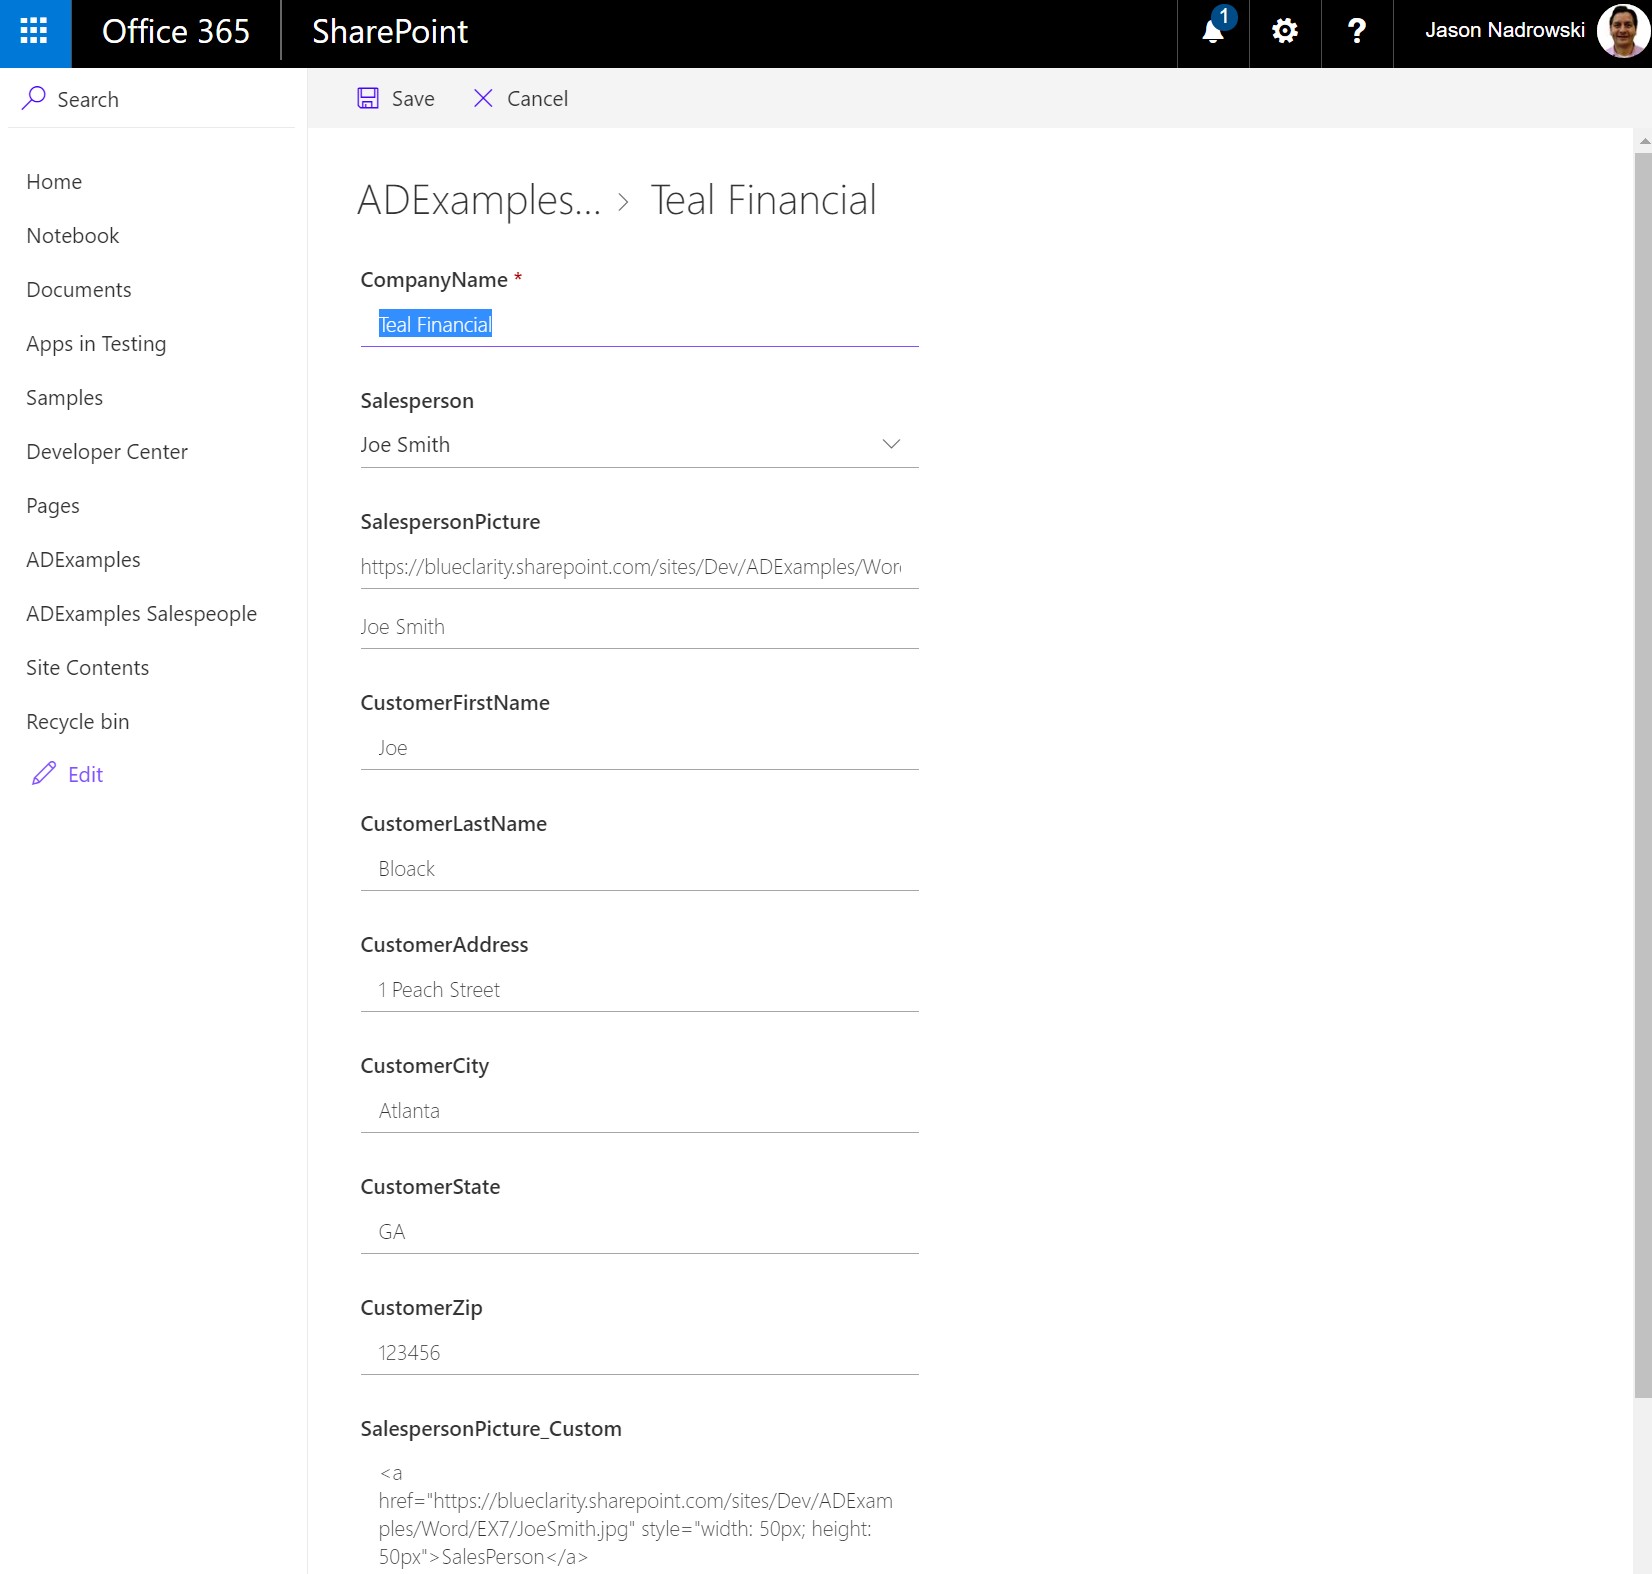
Figure 1: Editing the Agile Document
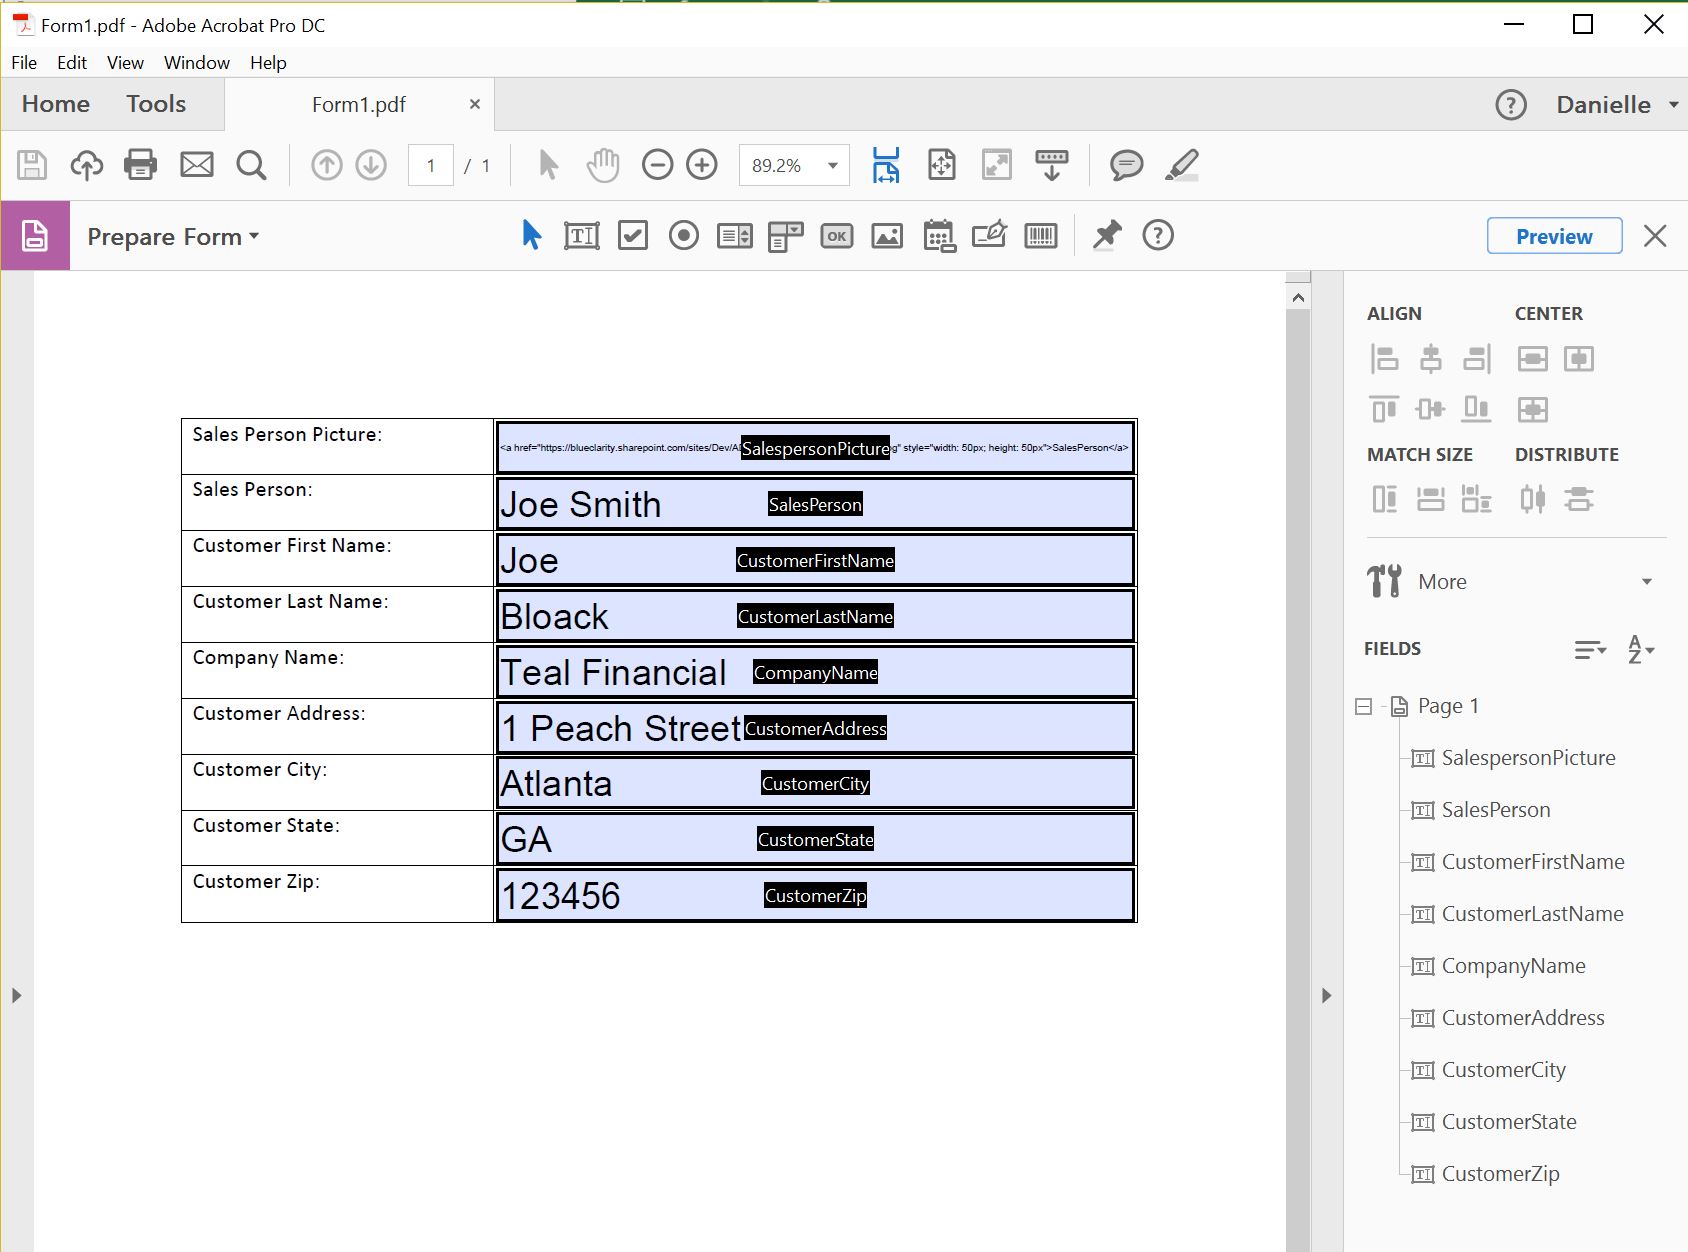
Figure 2: Adobe Acrobat Form
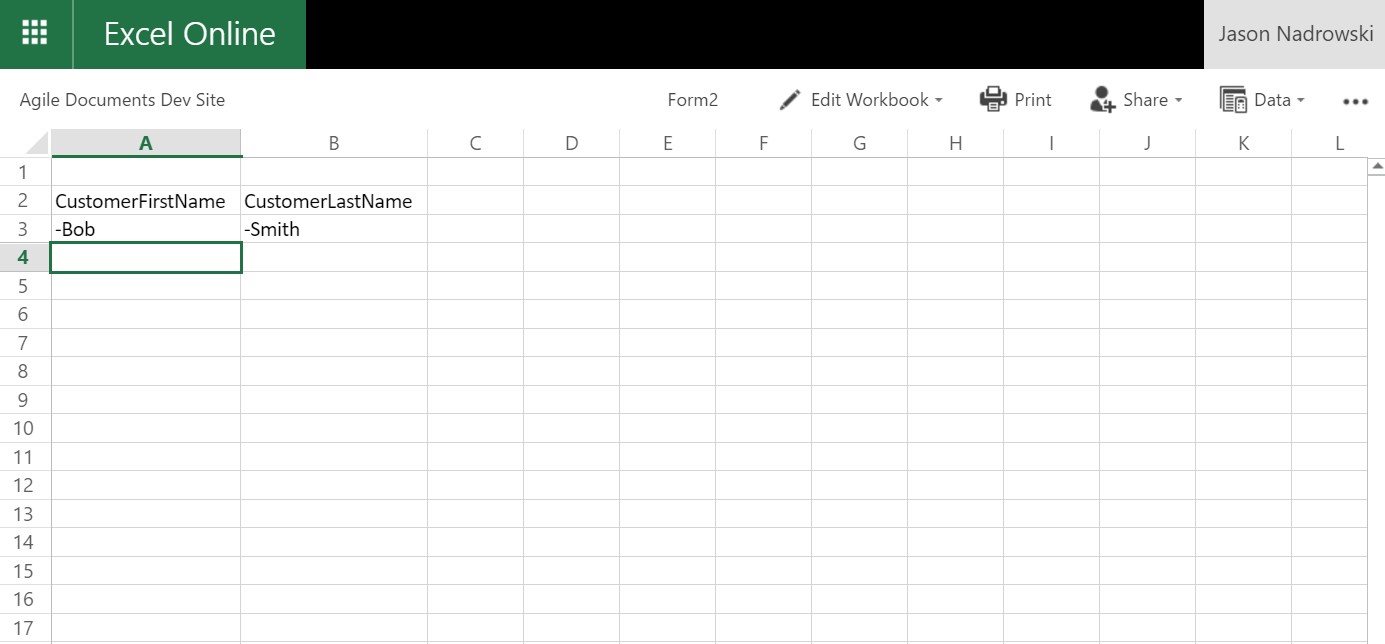
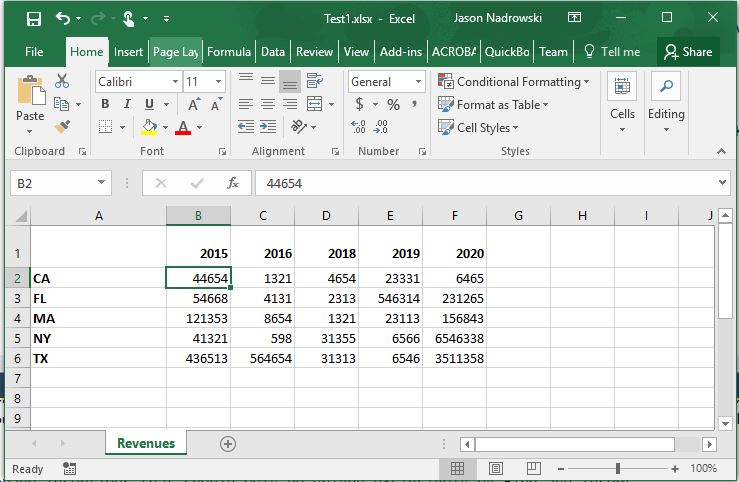
Figure 3: Excel "Fields"
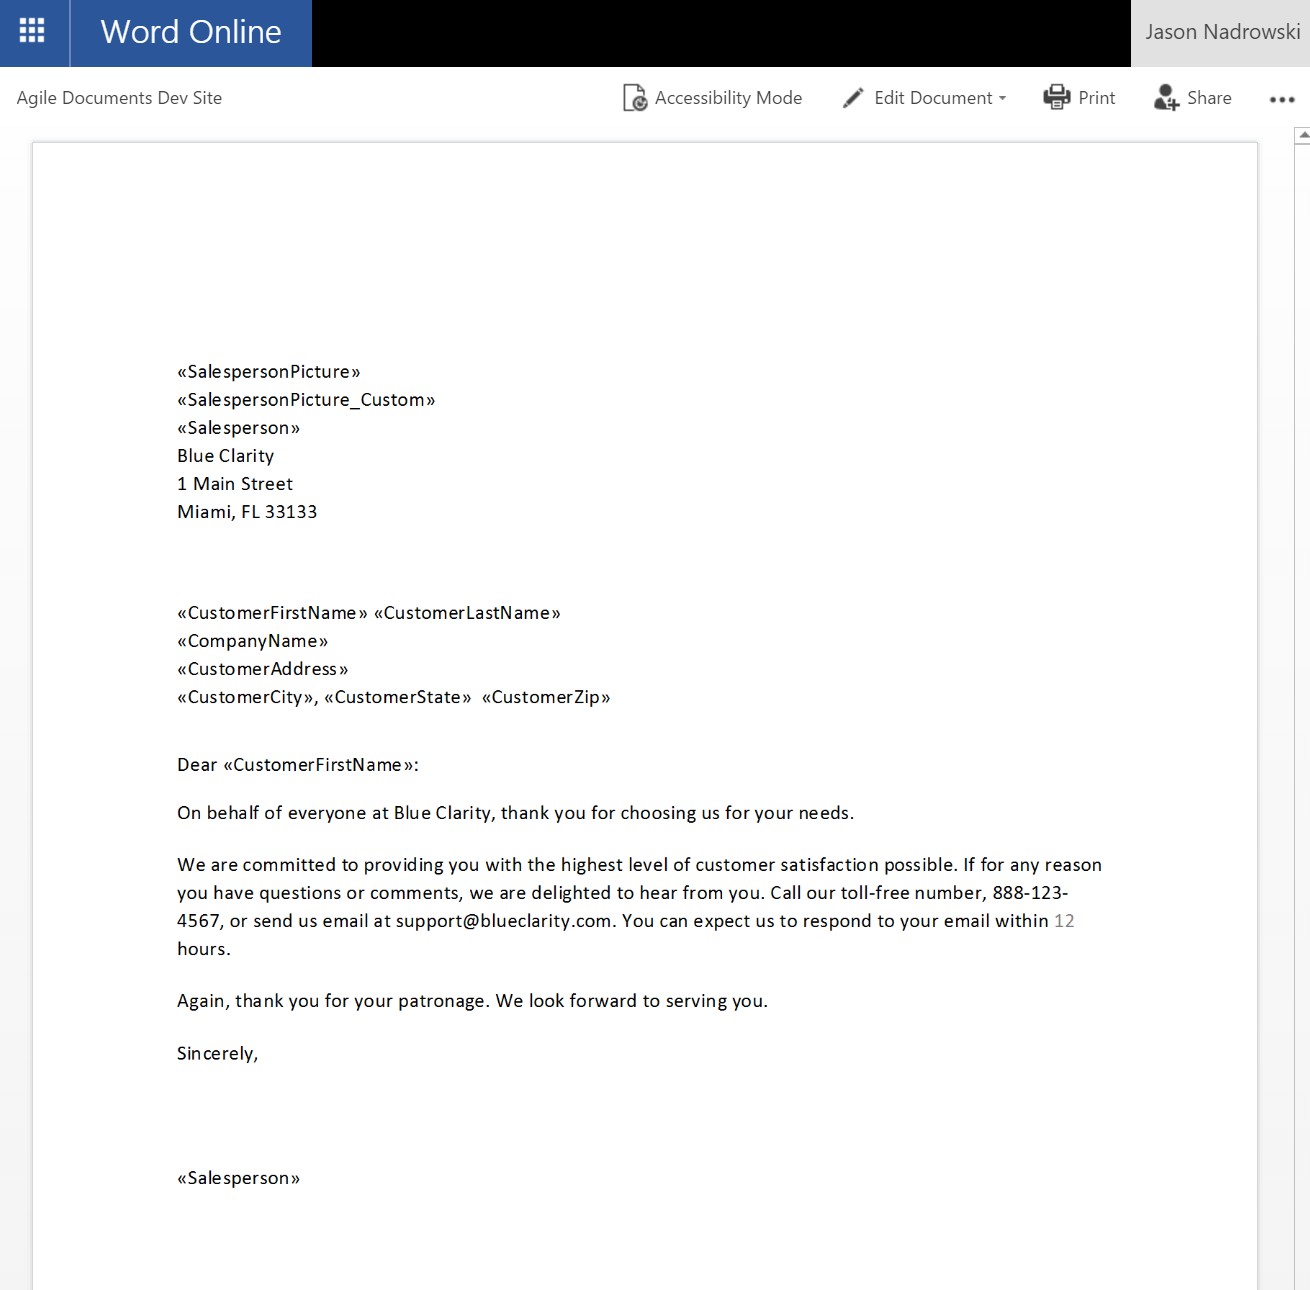
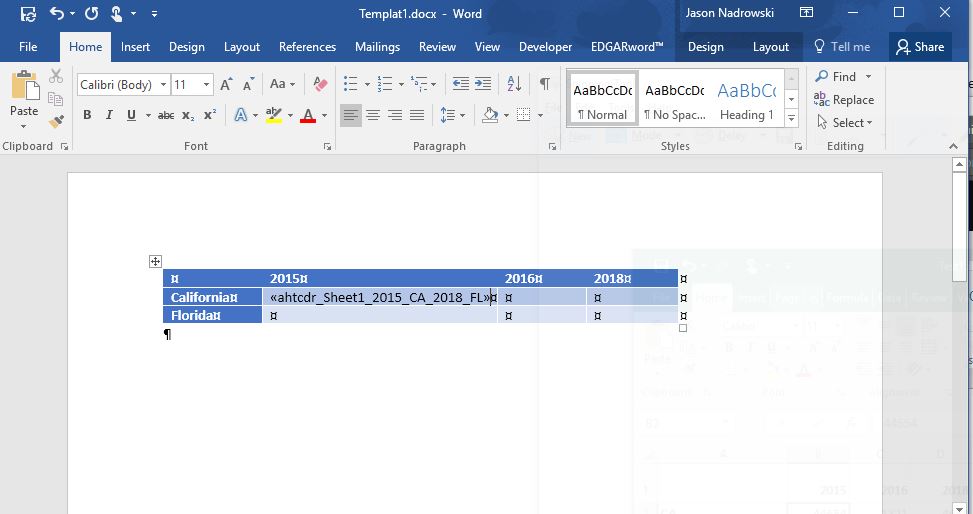
Figure 4: Microsoft Word - Mail Merge Fields
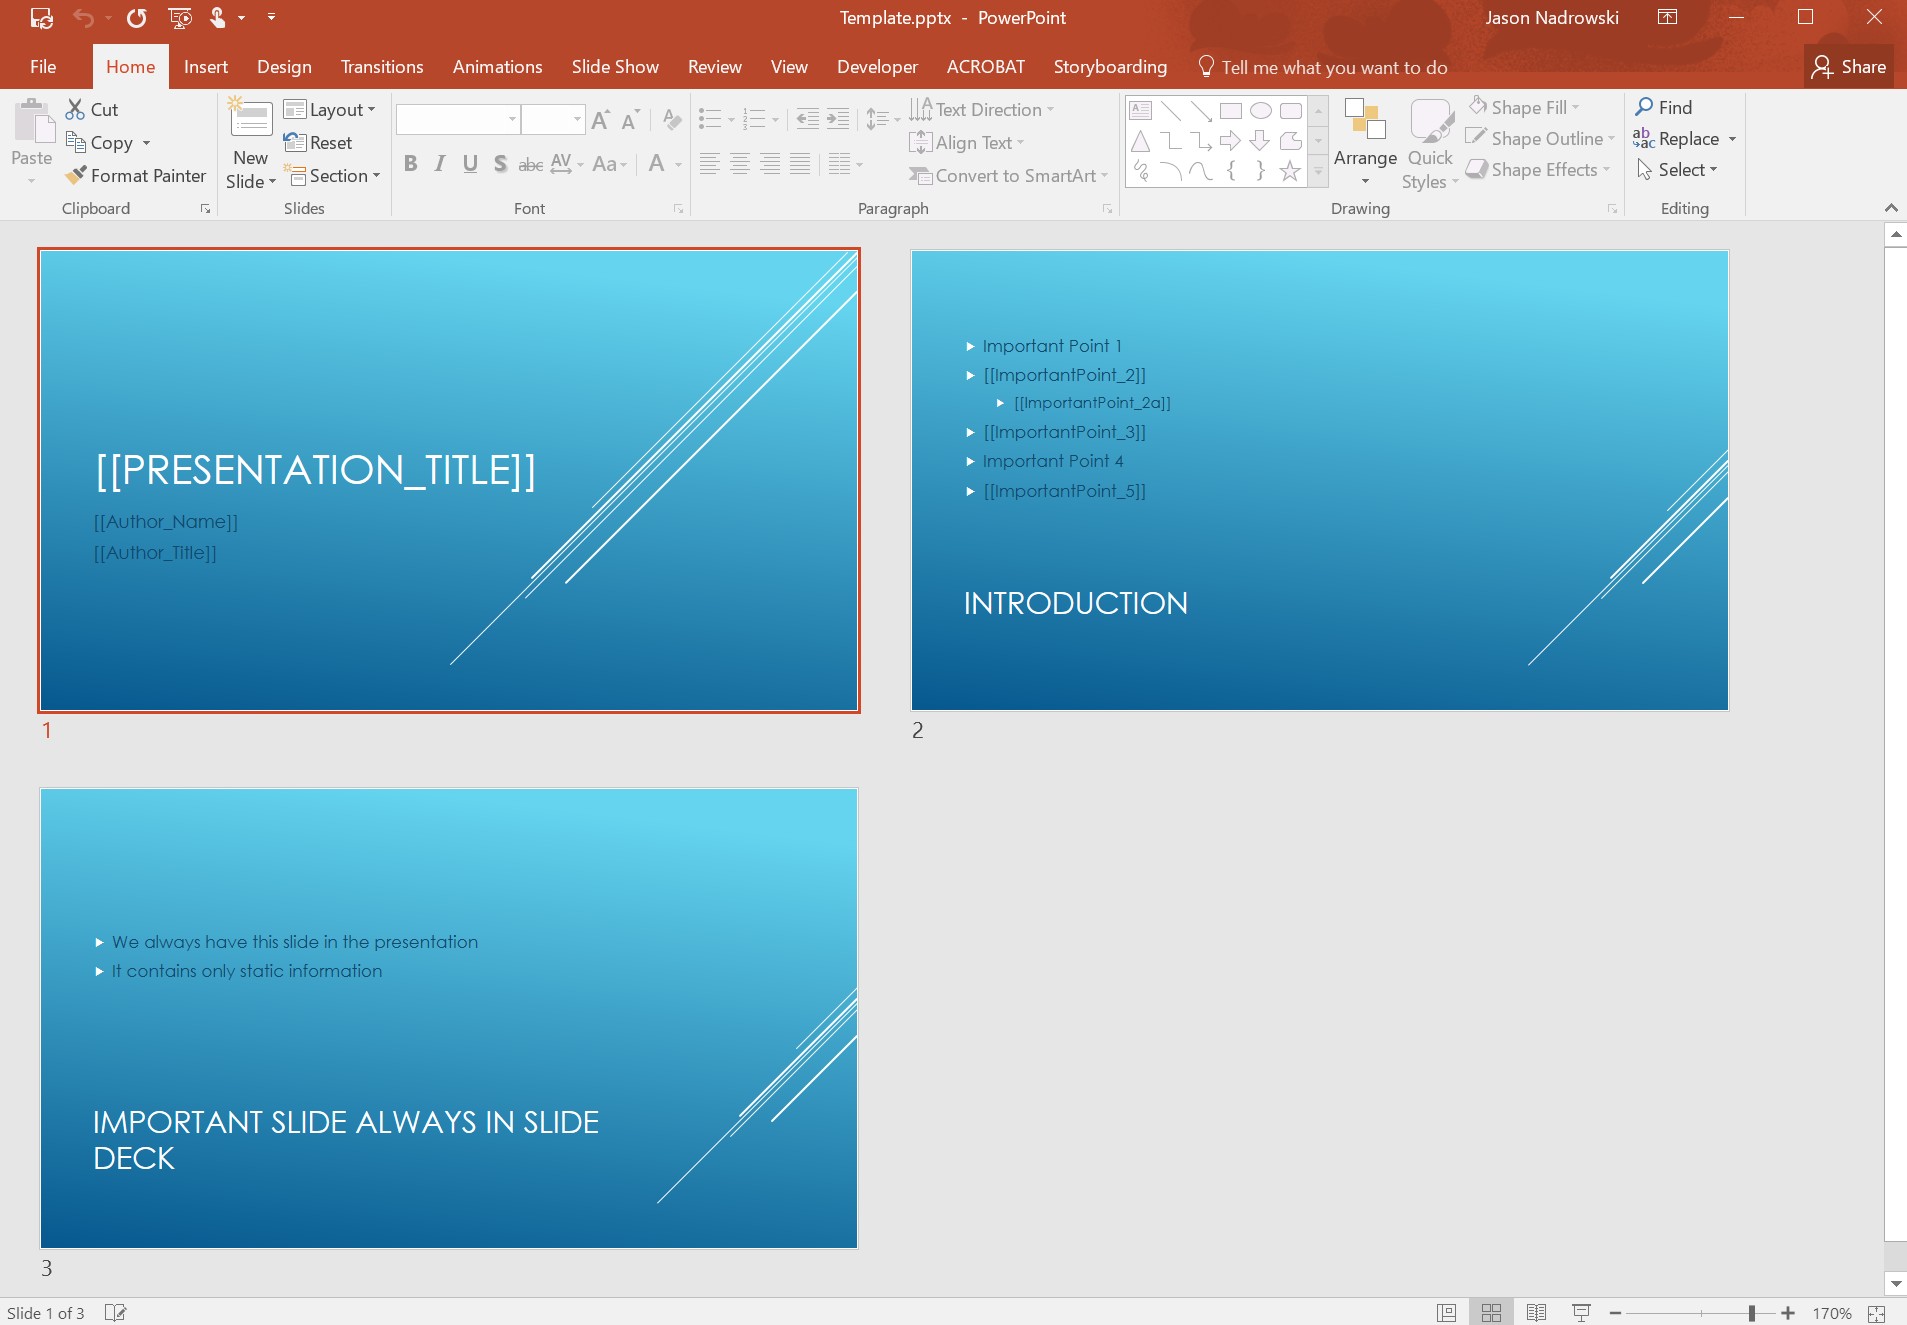
Figure 5: PowerPoint "Fields"
Inserting Content
You configure Find and Insert through the Agile Document Editor--as shown in Figure 6. As discussed above, Find and Insert content can be from a SharePoint List Item (Figure 1), an Adobe Acrobat Form (Figure 2), or an Excel spreadsheet (Figure 3). Further, as shown in Figure 6, you can control whether the find insertion is done before or after the insertion point construction, preserve the Find and Insert items's formatting, remove the field [in the template or insertion construction] after the succes of a find and insert or adding the field name to conditional content keys.
Impacting Agile Document Generation
The following table details the various keys (ie Column name for a SharePoint list item) and how it is used. Simply add any of the following columns to a SharePoint list item and the Agile Document's properties will be augmented per the table descriptions below.
| Key | Use |
|---|---|
| AD_AddToConditionalContent |
Comma seperated list of additional content keys to add to the Agile Document during the build. |
| AD_FindInsertAfter |
If true, Find and Insert AFTER Insertion Point Construction. |
| AD_OutputFileUri |
The Agile Documents output file(s) will be stored at this new location. Agile Documents will add the appropriate extension depending on what output type was specified. Without this setting, the output will be stored as the combination of the Agile Document's output folder plus the Agile Document file name plus the appropriate file extension. If AD_OutputFileUri is specified as a relative path, the output will be stored as the combination of the Agile Document's output folder plus the AD_OutputFileRelativeUri relative path plus the appropriate file extension. If AD_OutputFileUri is specified as an absolute path, the output will be stored as the combination of AD_OutputFileRelativeUri plus the appropriate file extension. Please note that this can NOT be combined with AD_OutputFileUri. |
| AD_OutputFileSuffix |
The Agile Documents output file(s) will be appended with this suffix. Agile Documents will add the appropriate extension depending on what output type was specified. Please note that this can NOT be combined with AD_OutputFileUri. |
| AD_PreserveFormatting | If true, preserves any HTML or special formatting (ex Bold, Italics) of the find and insert item when it is inserted into the document. |
| AD_RemoveExistingConditionalContent |
If true, removes all the EXISTING Conditional Content Keys. This can be paired with AD_AddToConditionalContent so that only the keys specified in AD_AddToConditionalContent will be used. |
| AD_RemoveFieldsIfContentInserted | If true, the field in the document being generated is removed from the output stream. |
| AD_WebHook | Adds to the web hooks listed for the root Agile Document. |
Naming of Word Mail Merge Fields
The following table details how naming insertion points in your document affects the generation of your Agile Document as well as how that Agile Document is displayed in the Agile Document Editor.
| Title | Description |
|---|---|
| AH_* (Agile Hidden) |
If you prefix your insertion point name (i.e. Mail Merge Field in Word) with "AH_", it will not display in ther Agile Document Editor's Insertions section. For example, if you name your insertion point "AH_Title" it will (a) not be displayed as an insertion point in the Agile Document Editor and (b) will attempt to retrieve "Title" data (and NOT something named AH_Title) from your existing Find and Insert elements. This is a great way to leverage insertions that should only be driven exclusively by Find and Insert. |
| AHF_* (Agile Hidden Formula) |
AHF_ is a special prefix for pulling a CELL value in an Excel file specified through Find and Insert. In addition to the above, the AHF_ prefixed insertion point will not display in ther Agile Document Editor's Insertions section. The formula for using this is AHF_SheetName_ColumnHeader_RowHeader. SheetName is the name of the sheet -- such as Sheet1. RowHeader and ColumnHeader are used to triangulate the desired Excel cell on the specified sheet. Instead of using the "A1" Excel syntax, we leverage custom identifiers in Row 1 and Column A of your spreadsheet. This allows you to readily insert and remove columns/rows from the spreadsheet without having to redefine the insertion point name. If you wanted to retrieve "44654" (B2) from the Excel spreadsheet in Figure 7, you would name your insertion point AHF_Revenues_2015_CA. Revenues is the Excel sheet name. 2015 is the Column Header which happens to be located in position B1. CA is the Row Header which happens to be located in position A2. It should be noted that your row/col header names cannot use the "_" character. |
| AHTCDR_* (Agile Hidden Table Copy Down Right) |
AHTCDR_ is a special prefix for pulling TABLE data out of an Excel file specified through Find and Insert. In addition to the above, the AHTCDR_ prefixed insertion point will not display in ther Agile Document Editor's Insertions section. The formula for using this is AHF_SheetName_StartRangeColumnHeader_StartRangeRowHeader_EndRangeColumnHeader_EndRangeRowHeader. SheetName is the name of the sheet -- such as Sheet1. StartRangeRowHeader, StartRangeRowHeader, EndRangeColumnHeader and EndRangeRowHeader are used to triangulate the desired Excel range data on the specified sheet. Instead of using the "A1" Excel syntax, we leverage custom identifiers in Row 1 and Column A of your spreadsheet. This allows you to readily insert and remove columns/rows from the spreadsheet without having to redefine the insertion point name. If you wanted to retrieve the data range from B2 to D3 from the Excel spreadsheet in Figure 7, you would name your insertion point AHF_Revenues_2015_CA_2018_FL. Revenues is the Excel sheet name. 2015 is the Column Header which happens to be located in position B1. CA is the Row Header which happens to be located in position A2. 2018 is the Column Header which happens to be located in position D1. FL is the Row Header which happens to be located in position A3. It should be noted that your row/col header names cannot use the "_" character. An example use in Word is shown in Figure 8 below. Notice that the Excel table data will be copied into the existing Word table. Thus, in this case, one insertion point allows us to copy in multiple values from Excel. If the Word table was shorter than the Excel data range, the Excel inserted range would be trimmed to match the Word table. If the Word table was larger than the Excel data range, the Excel inserted range will leave columns to its right and rows below it blank. When using AHTCDR_*, you may find it useful to shape your data on a different Excel sheet and link that into your Agile Document. For instance, you can selectively considate Excel cells from other sheets by using the Excel Copy and Paste Link pair. This allows you to shape your table data in Excel and copy that shaped Excel data into Word...through ONE insertion point in Agile Documents. This is especially more efficient with larger tables. |